My route descriptions are getting as long as my ‘local history’ stories, and the more I learn about local life and the history of the fells and valleys, the more I’m finding it difficult to leave out any information that comes my way. With that said, you are welcome to just scroll down at your own pace, and hopefully you will gain something from what I’ve provided.
This Lakeland route is my favourite walk in my favourite valley of Borrowdale, and is a tribute to the men who mined and quarried the land, and the brave souls who had fallen during the Great War.
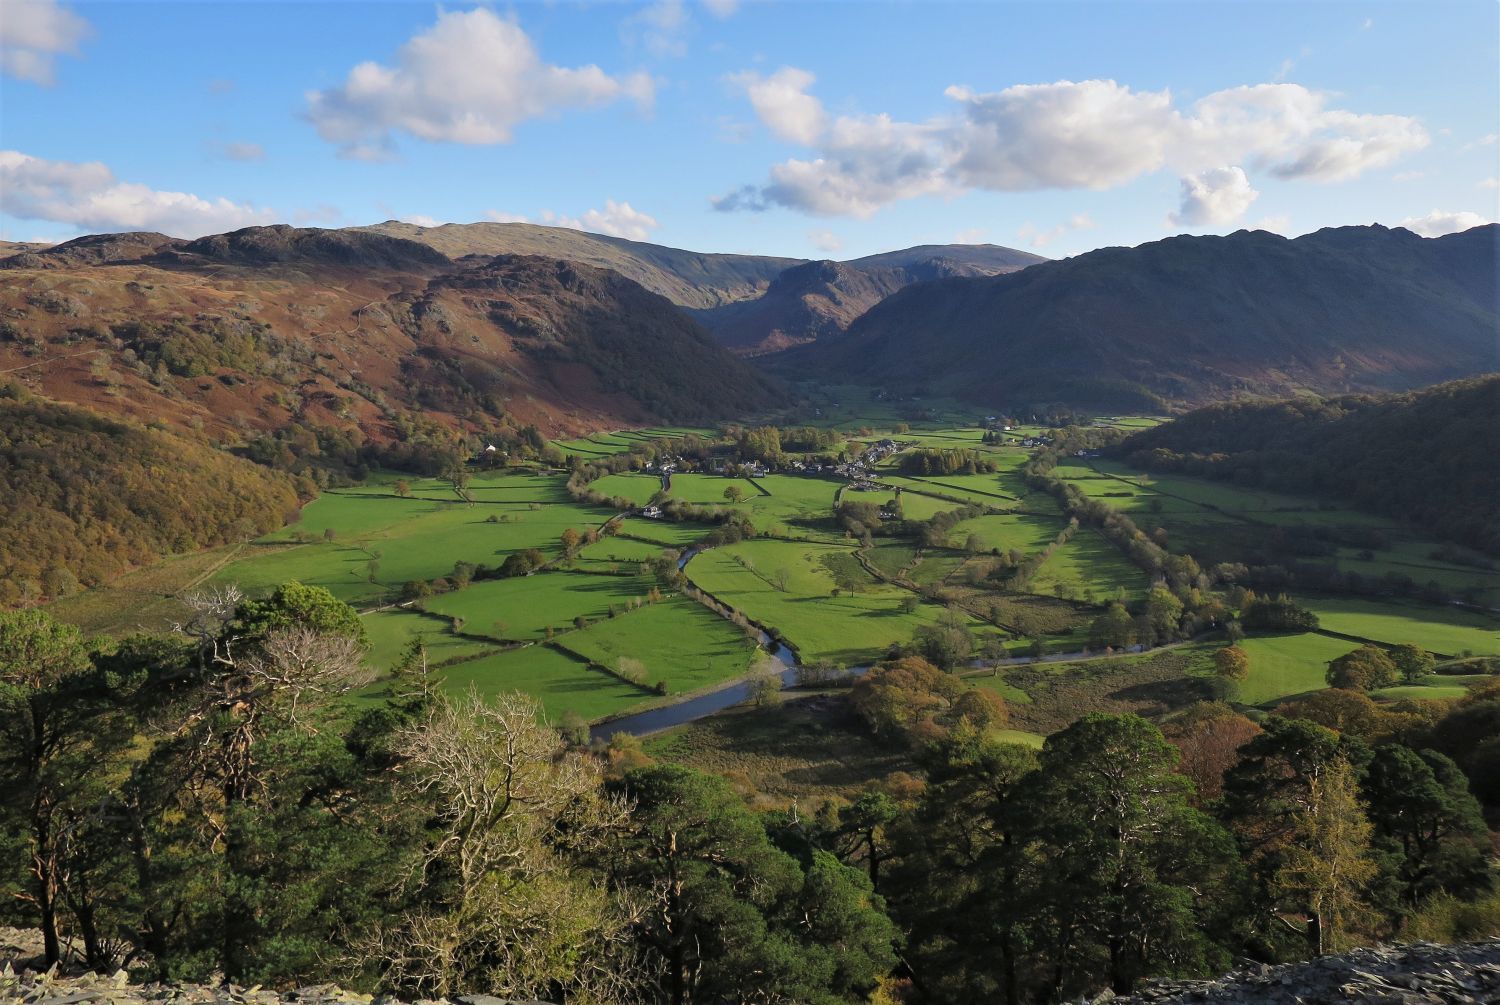
Lakeland in autumn is beautiful, but Borrowdale in autumn is simply unmissable.
GPX Route: Download
PDF Map: Download
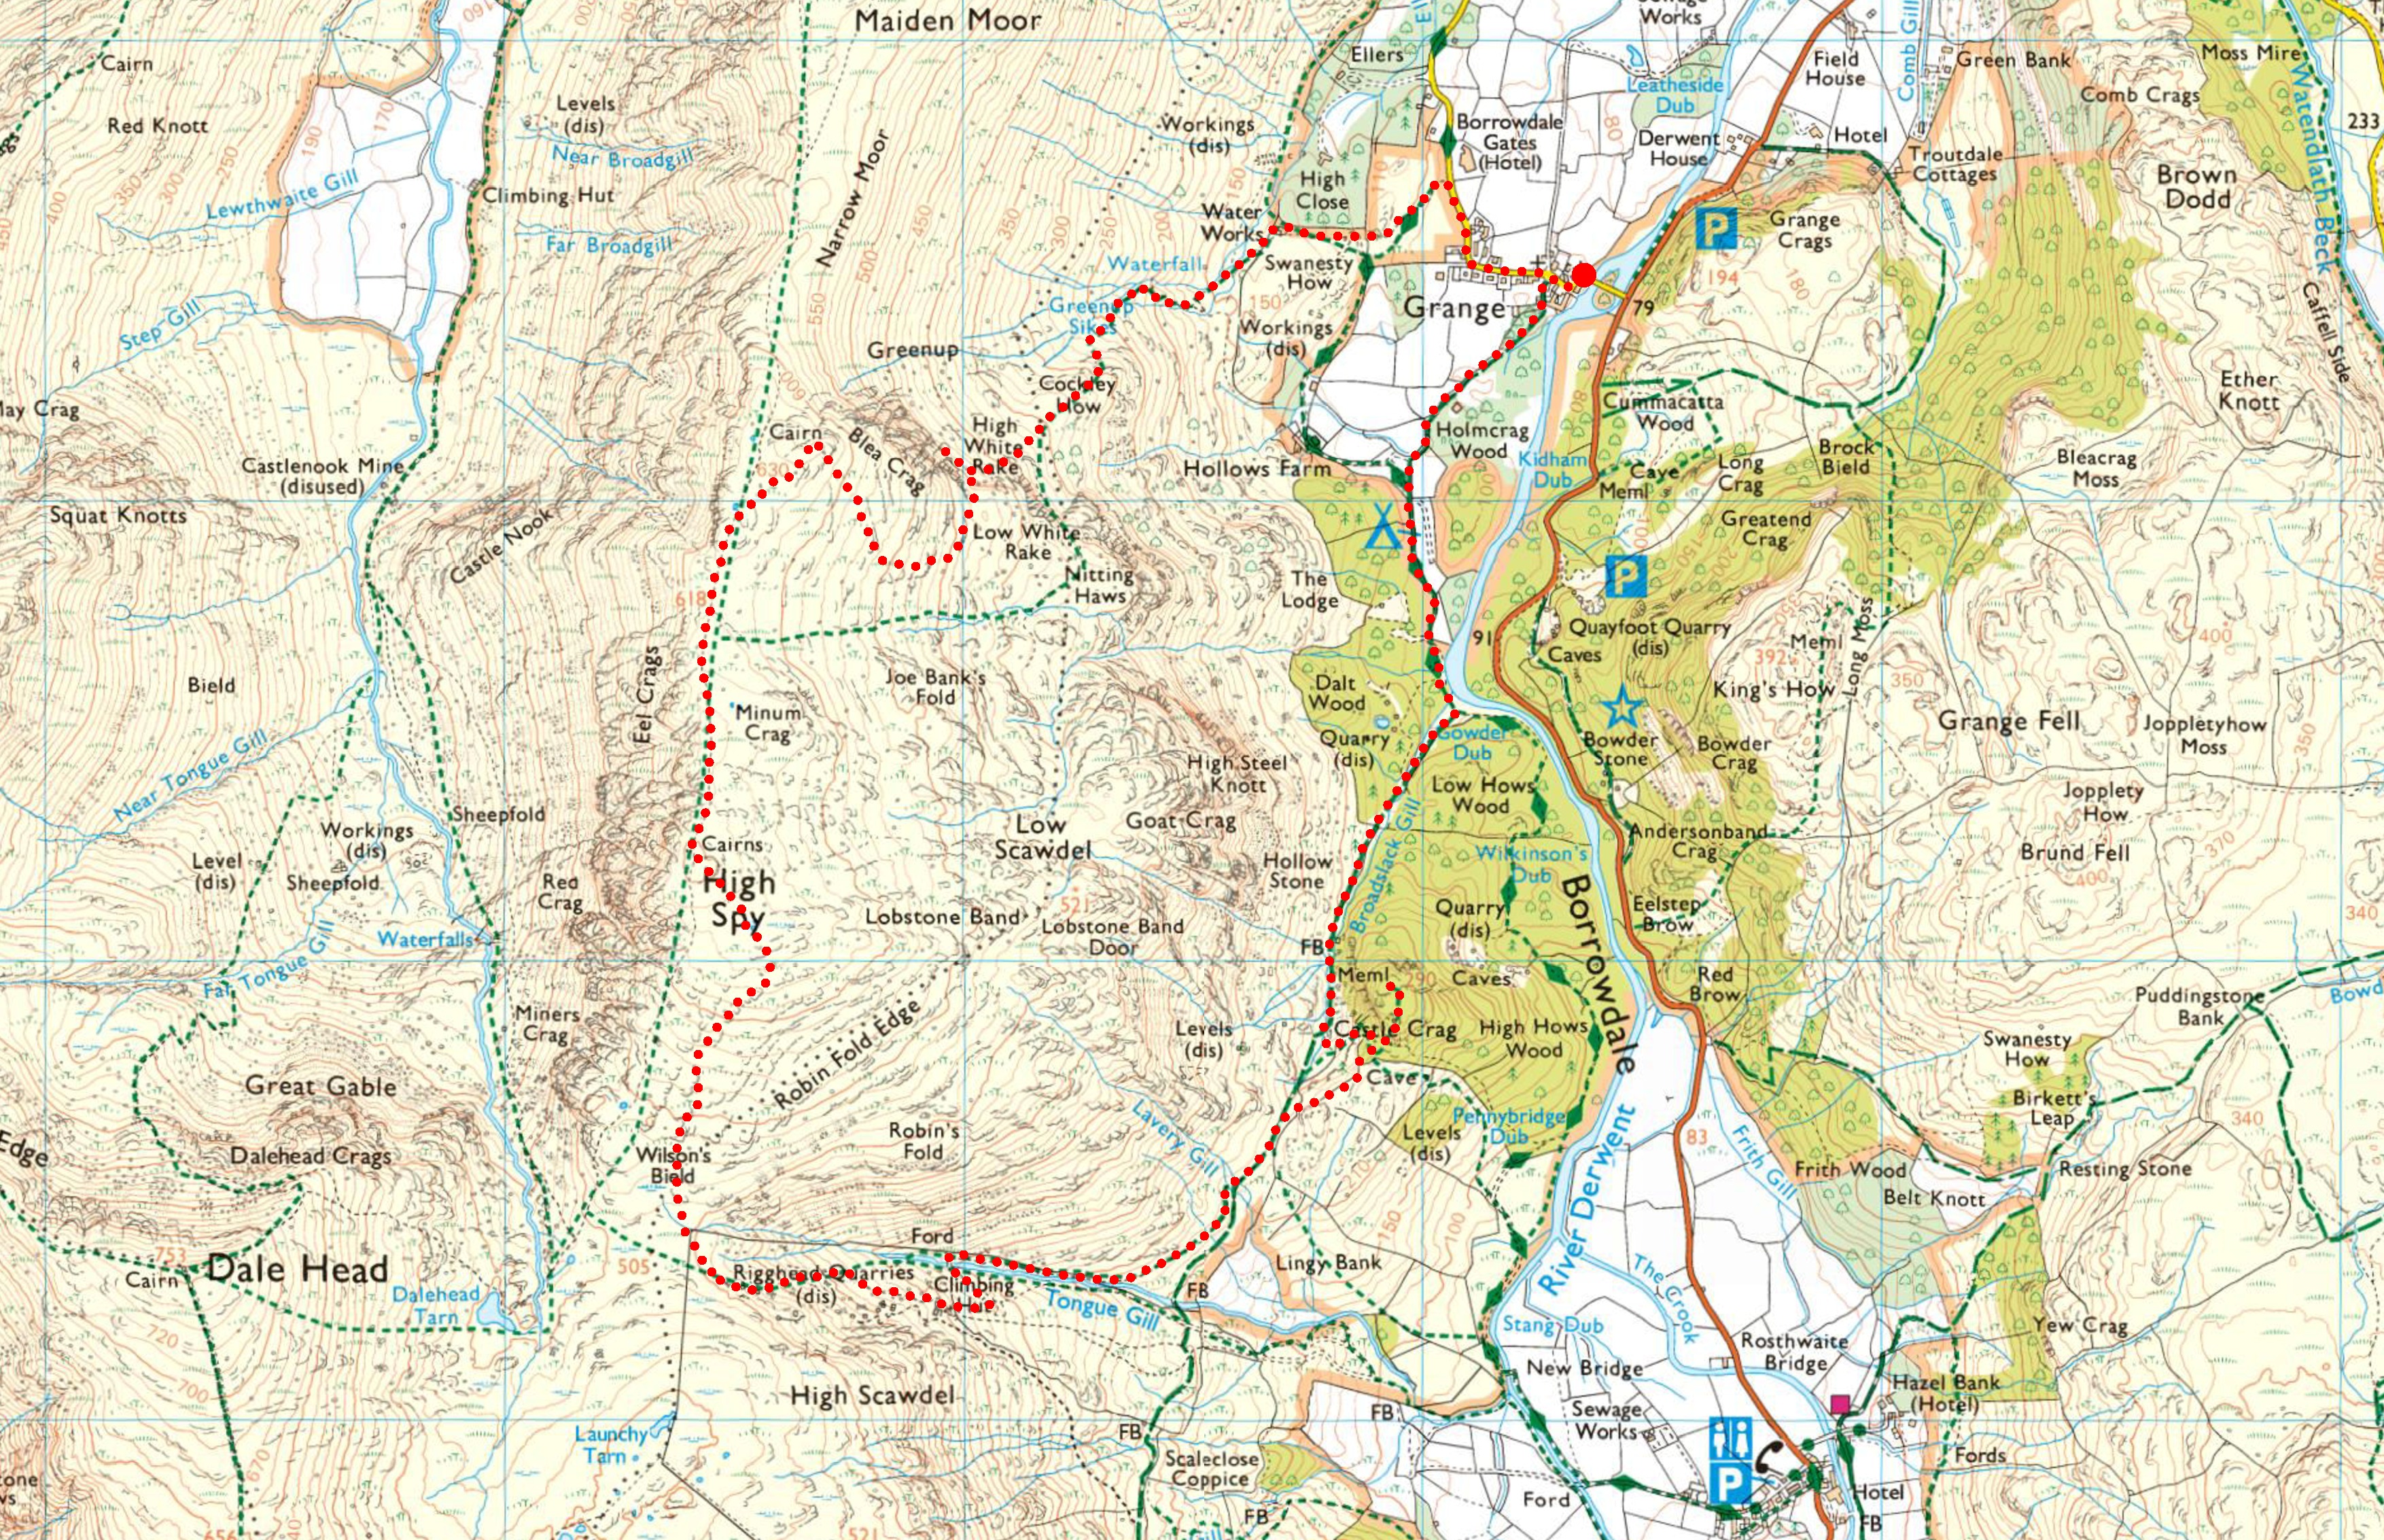
Grange > Swanesty How > Cockley How > High White Rake > Blea Crag > High Spy > Robin Hood Edge > Rigg Head > Rigghead Quarries > Tongue Gill > Broadslack Gill > Castle Crag > Broadslack Gill > Gowder Dub > Grange
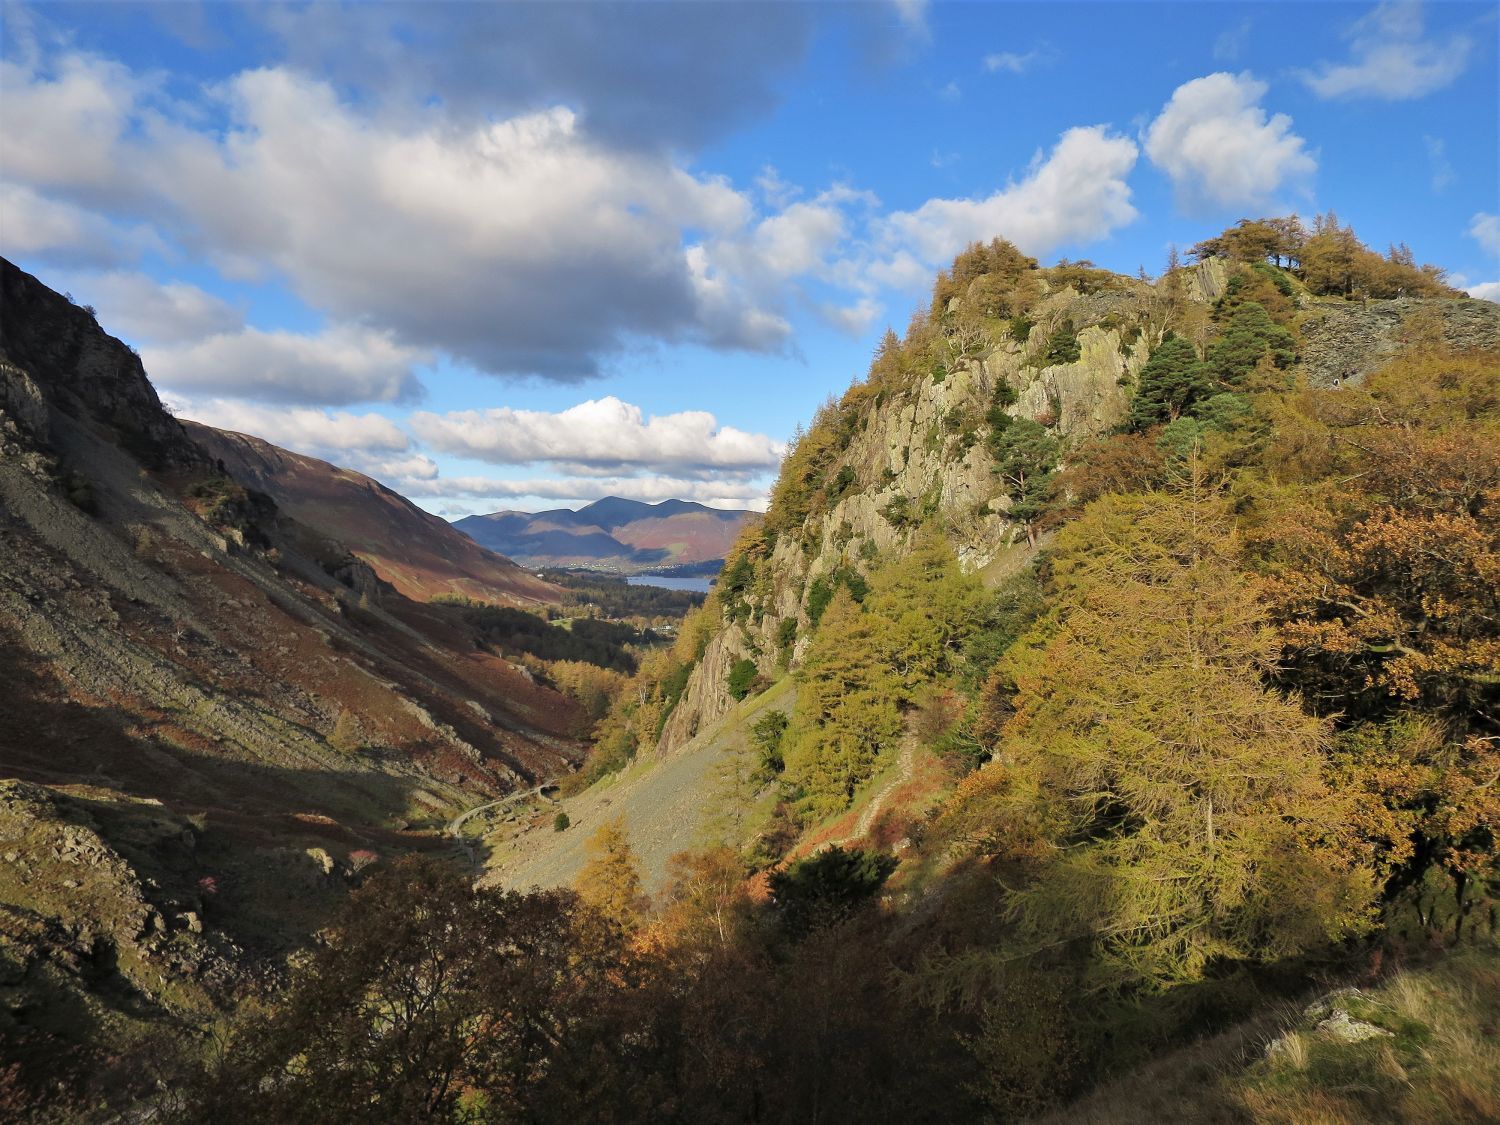
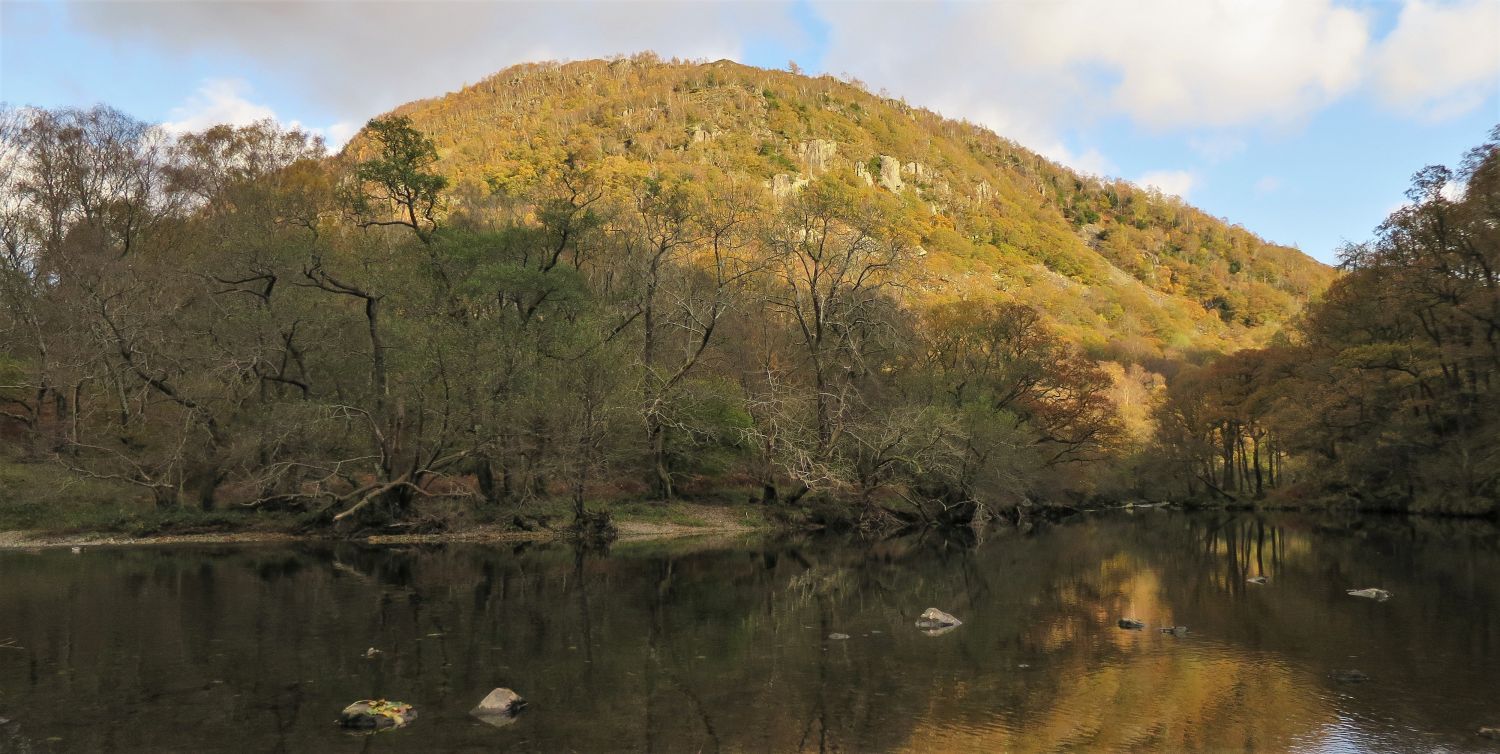
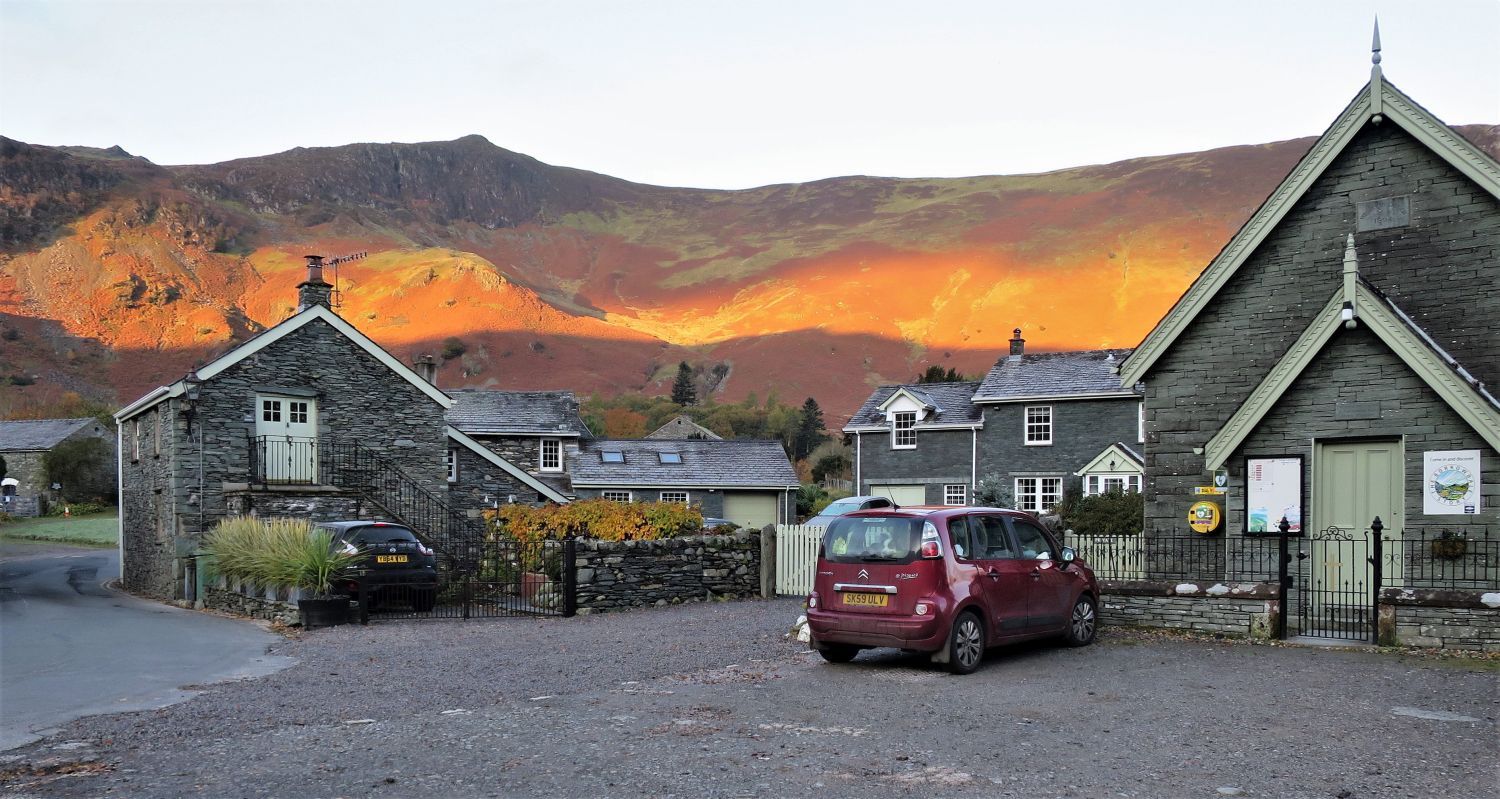 Blea Crag from the car park at Grange Methodist Church
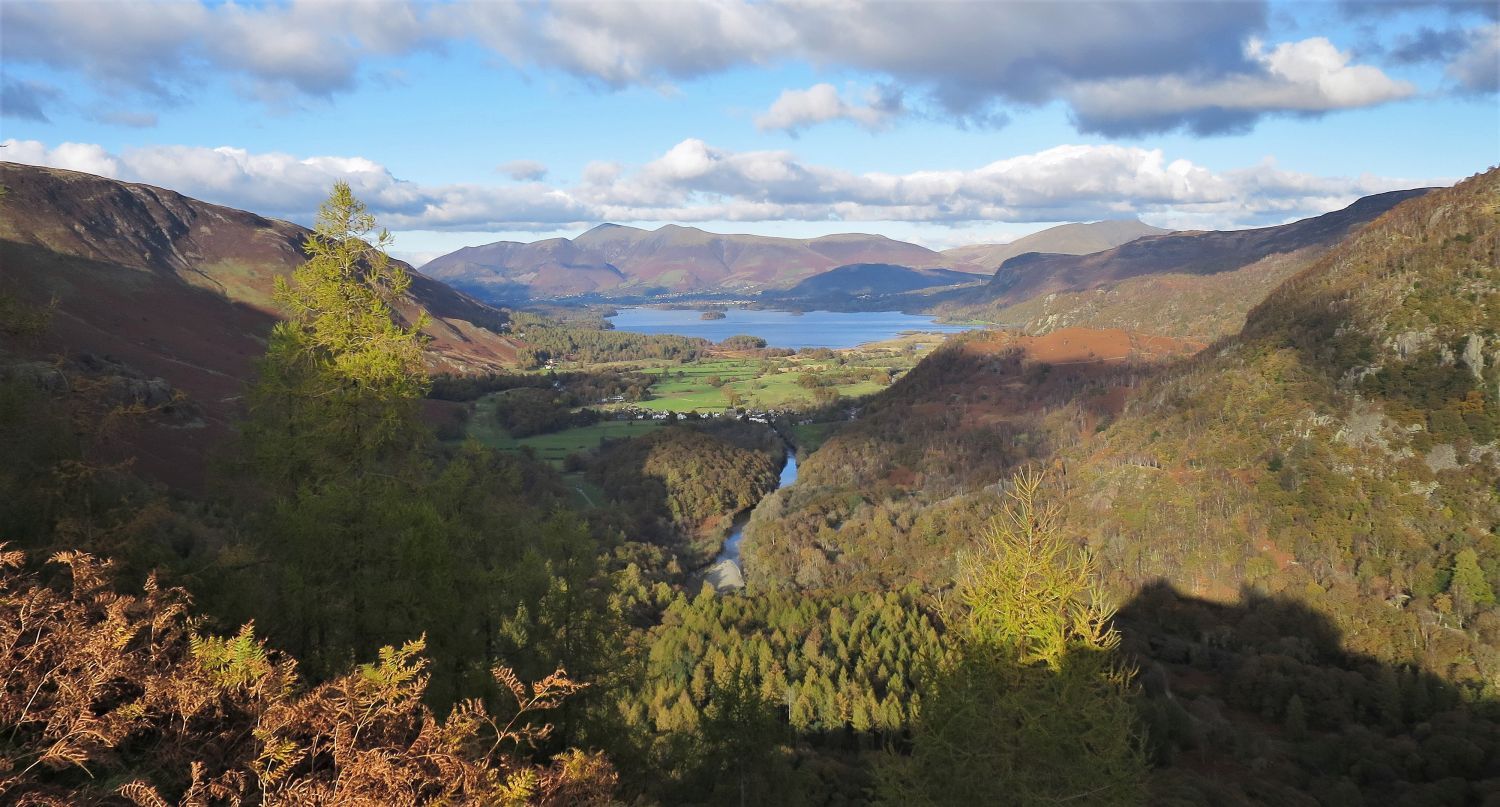
Our walk starts in the village of Grange, which lies where the valley of Borrowdale begins to narrow between Grange Fell and Castle Crag. This narrowing of the valley is known as the ‘Jaws of Borrowdale’, and is a lovely place to explore especially in autumn; the best of which, in the area of Castle Crag, will feature at the end of the walk.
A small free car park is provided at Grange Methodist Church, however, an early start is recommended due to the fact that the car park soon fills up. As you can probably tell by the picture, the sun is just starting its day.
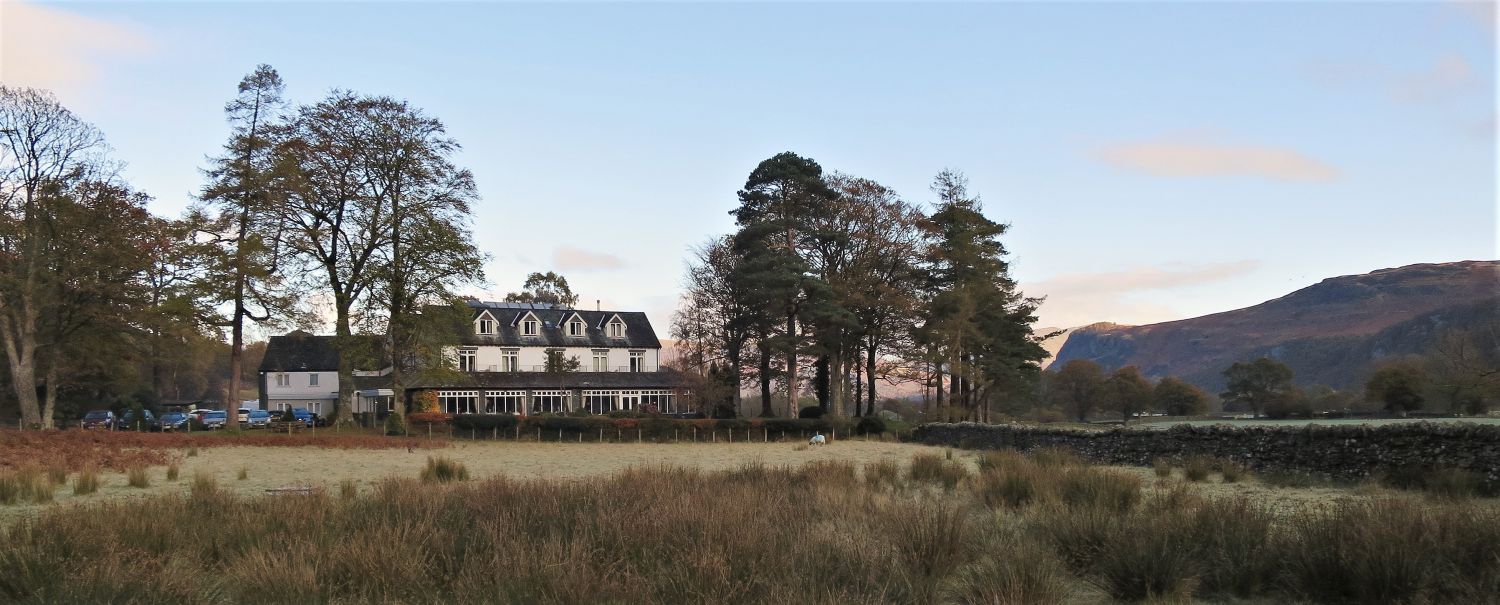 Borrowdale Gates Hotel from the Manesty road
Follow the Manesty road through the village until the Borrowdale Gates Hotel is reached. Opposite the hotel a gate leads to the open pastures of Peace How and Swanesty How; this path forms part of the Cumbria Way.
“Peace How was given to the National Trust in 1917 by its co-founder Canon H.D. Rawnsley.” High Spy 6
CH
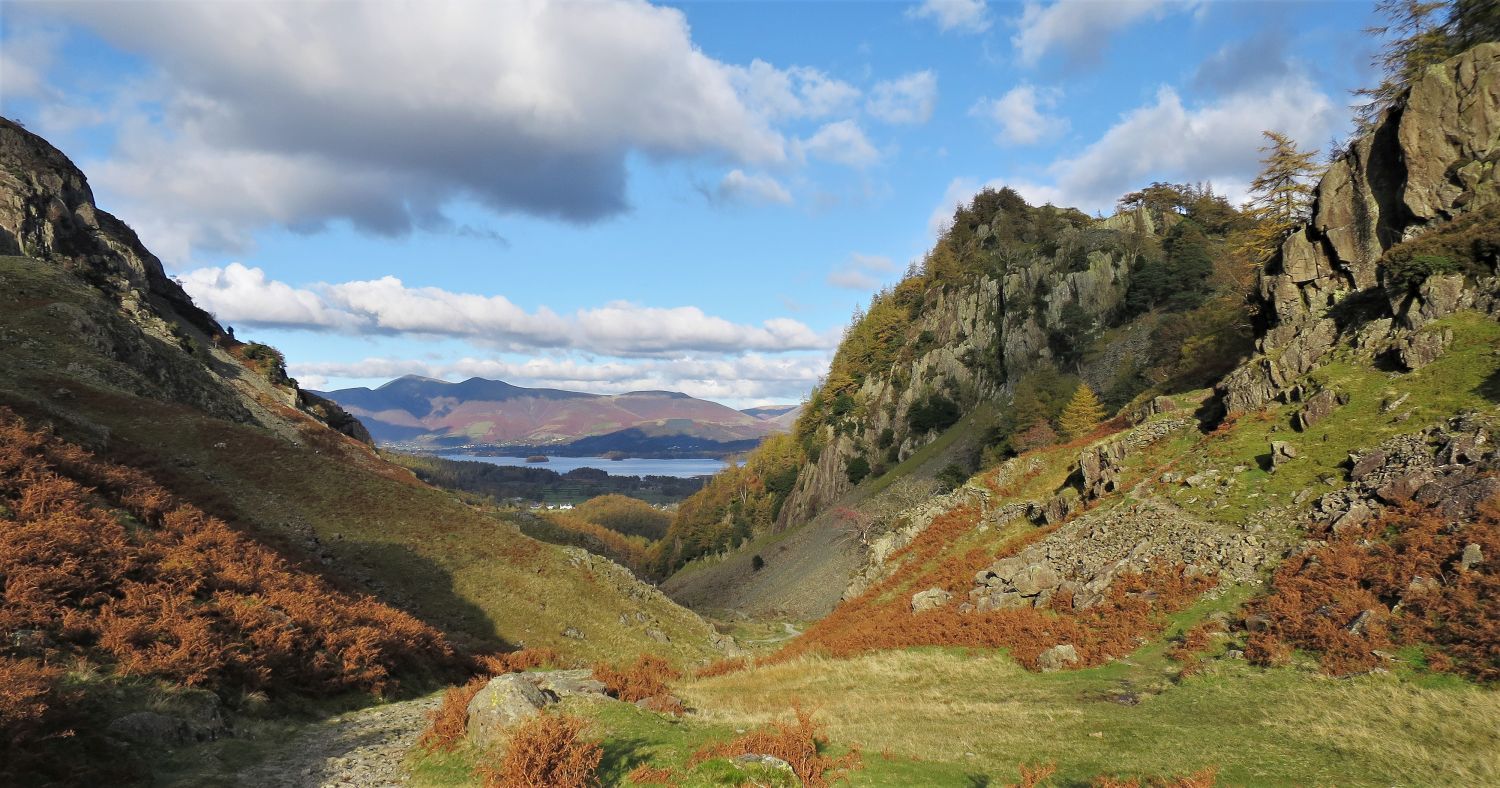
 Cockley How and Blea Crag from Swanesty How
Follow the Cumbria Way for only a short distance before joining a path that leads to the ridge of Cockley How and Blea Crag. Cockley How is the bracken-clad hill in front of the escarpment of crags, the larger of which is Blea Crag. Just above Cockley How, the early morning sun forms a near horizontal line in the area of High White Rake; this rake is our route onto Blea Crag and High Spy beyond.
 Looking back to Derwent Water from above Greenup Sikes Waterfall
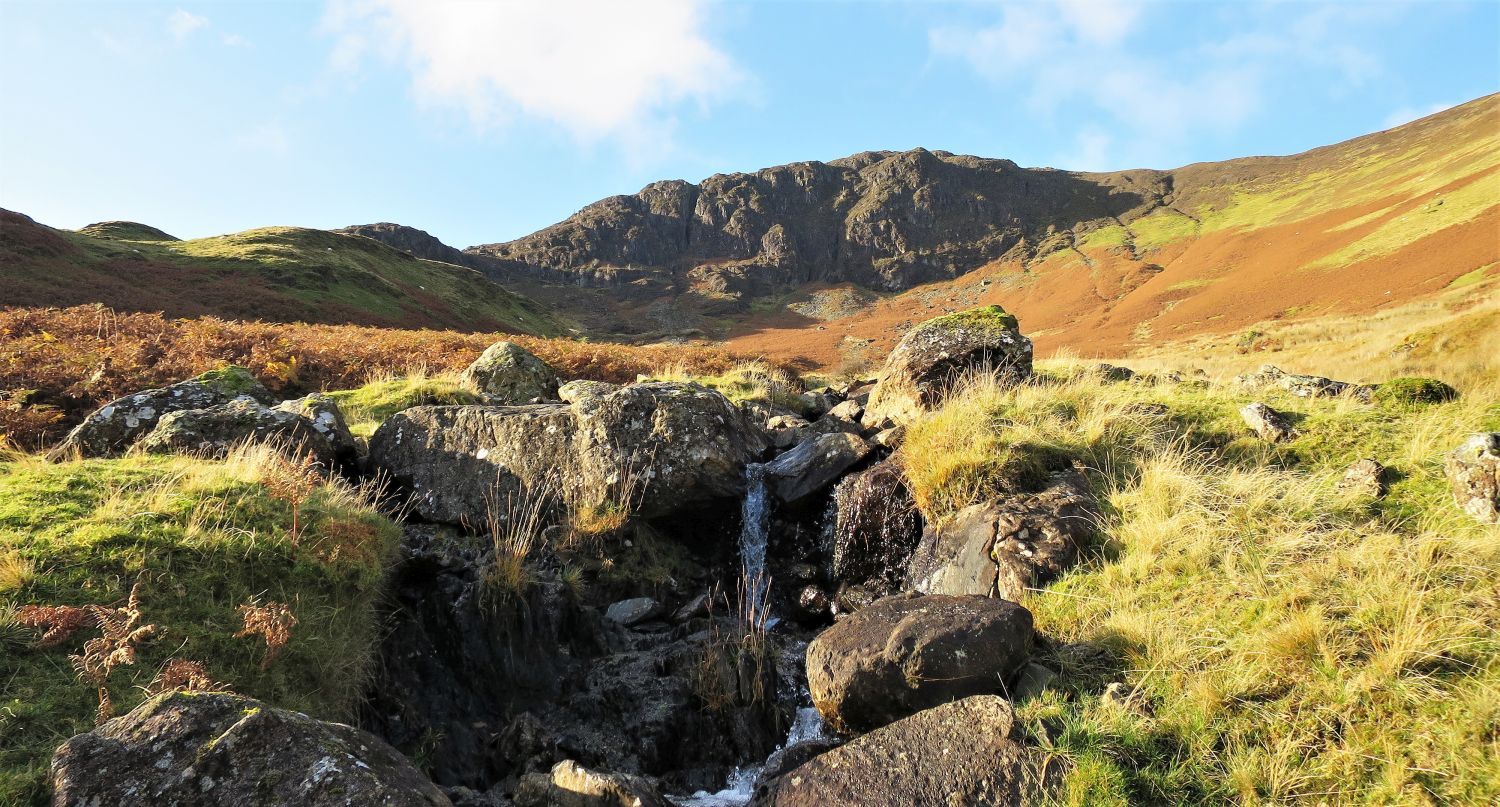 Blea Crag from Greenup Sikes
The cove ahead is Greenup, and the name “Sikes” refers to the becks/streams that pass through this marshy hollow basin. Note the dark cleft that splits the north-east cliff of Blea Crag; we must explore!
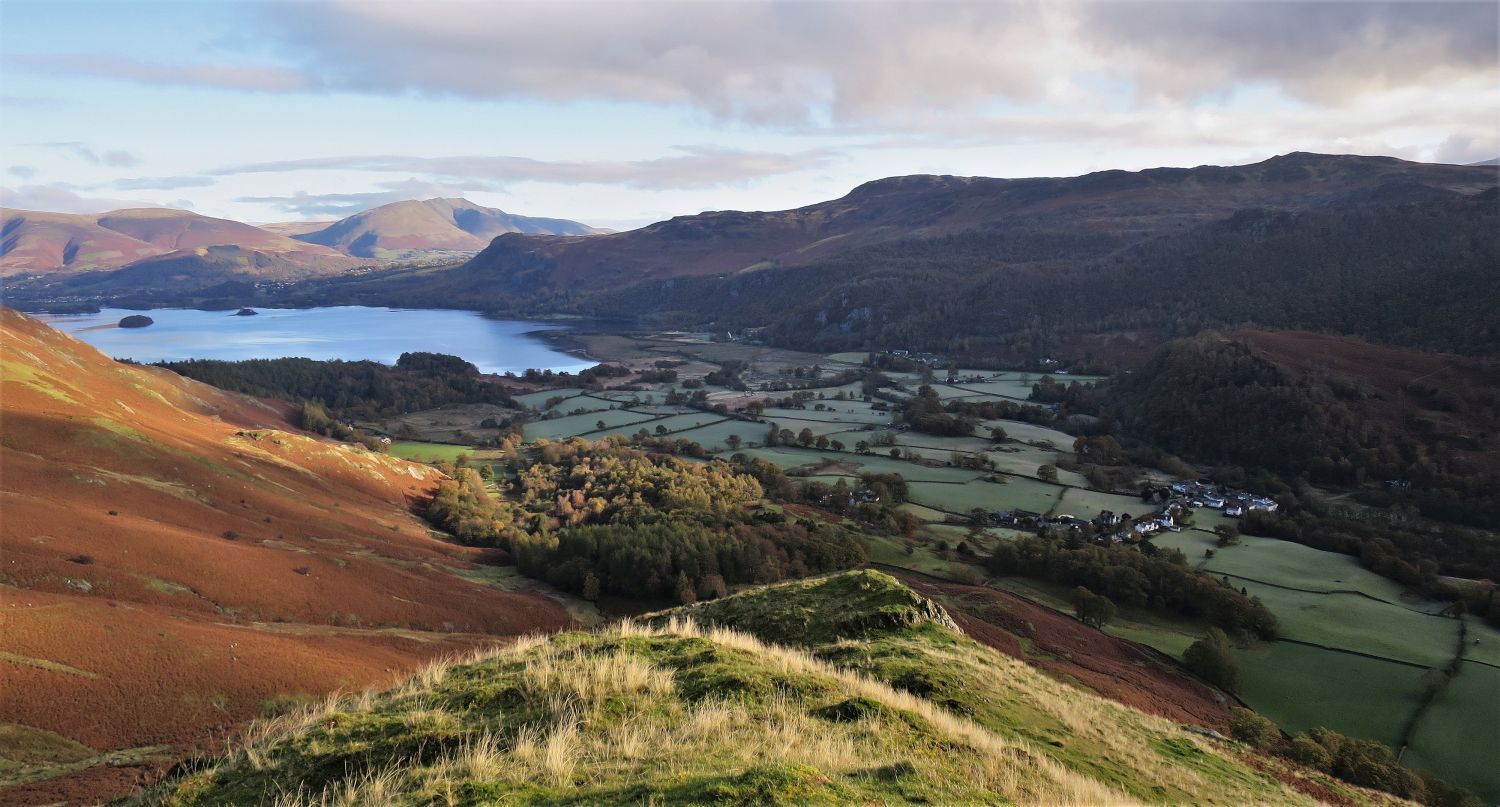 Looking back to Derwent Water and the village of Grange from Cockley How
A series of false summits up the ridge of Cockley How, leads to a grand spot to sit and admire the view of Derwent Water and beyond; this lower top has a slightly better view than the main summit.
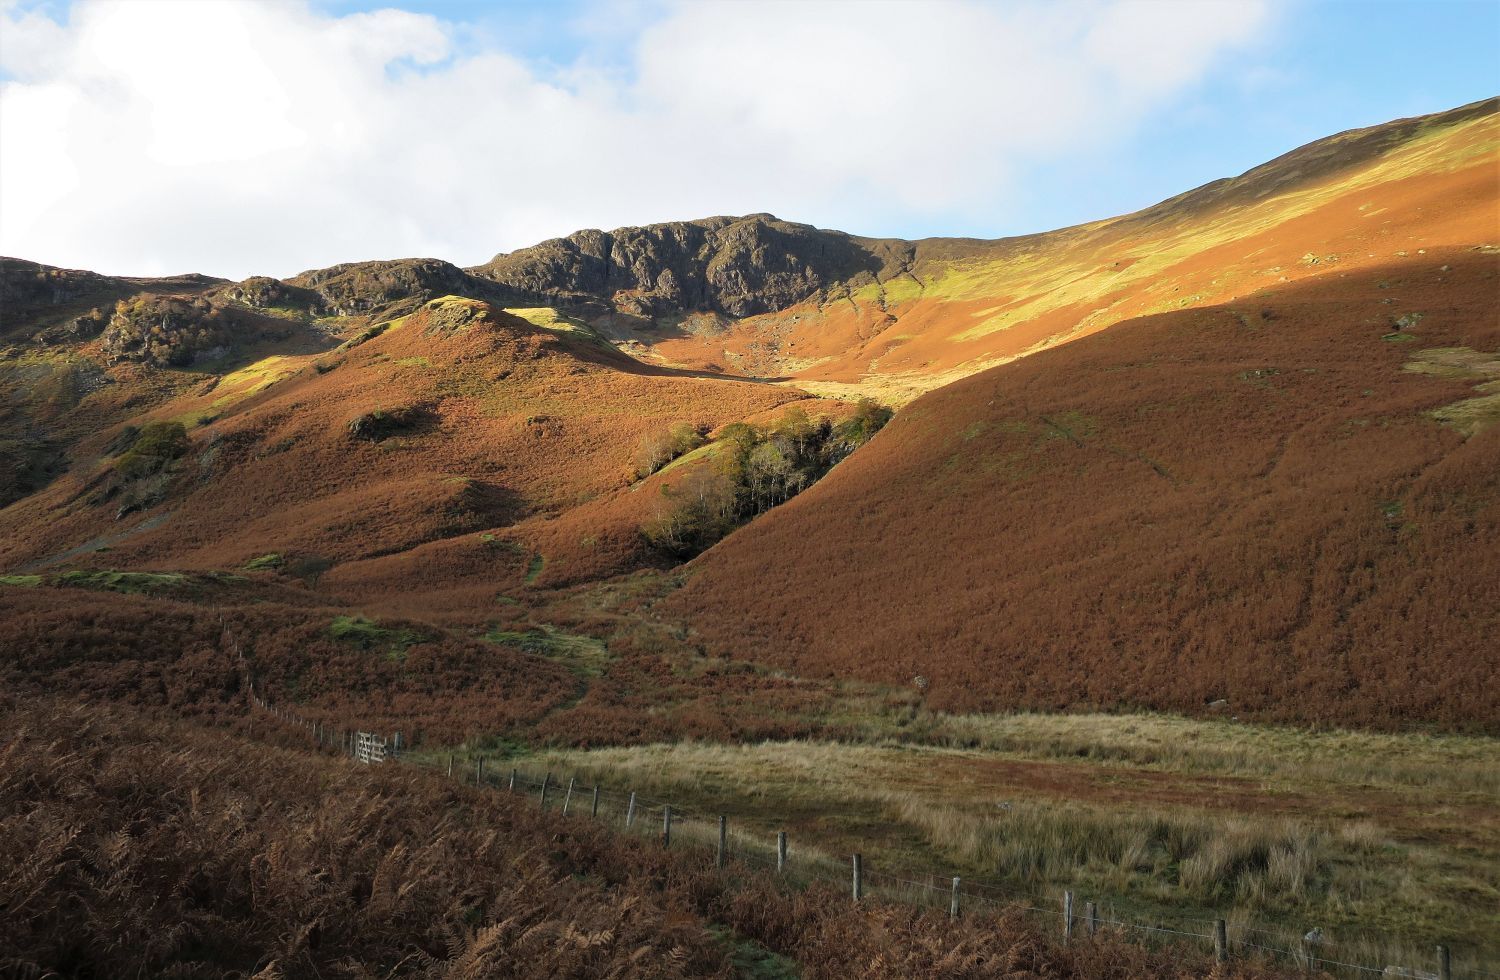
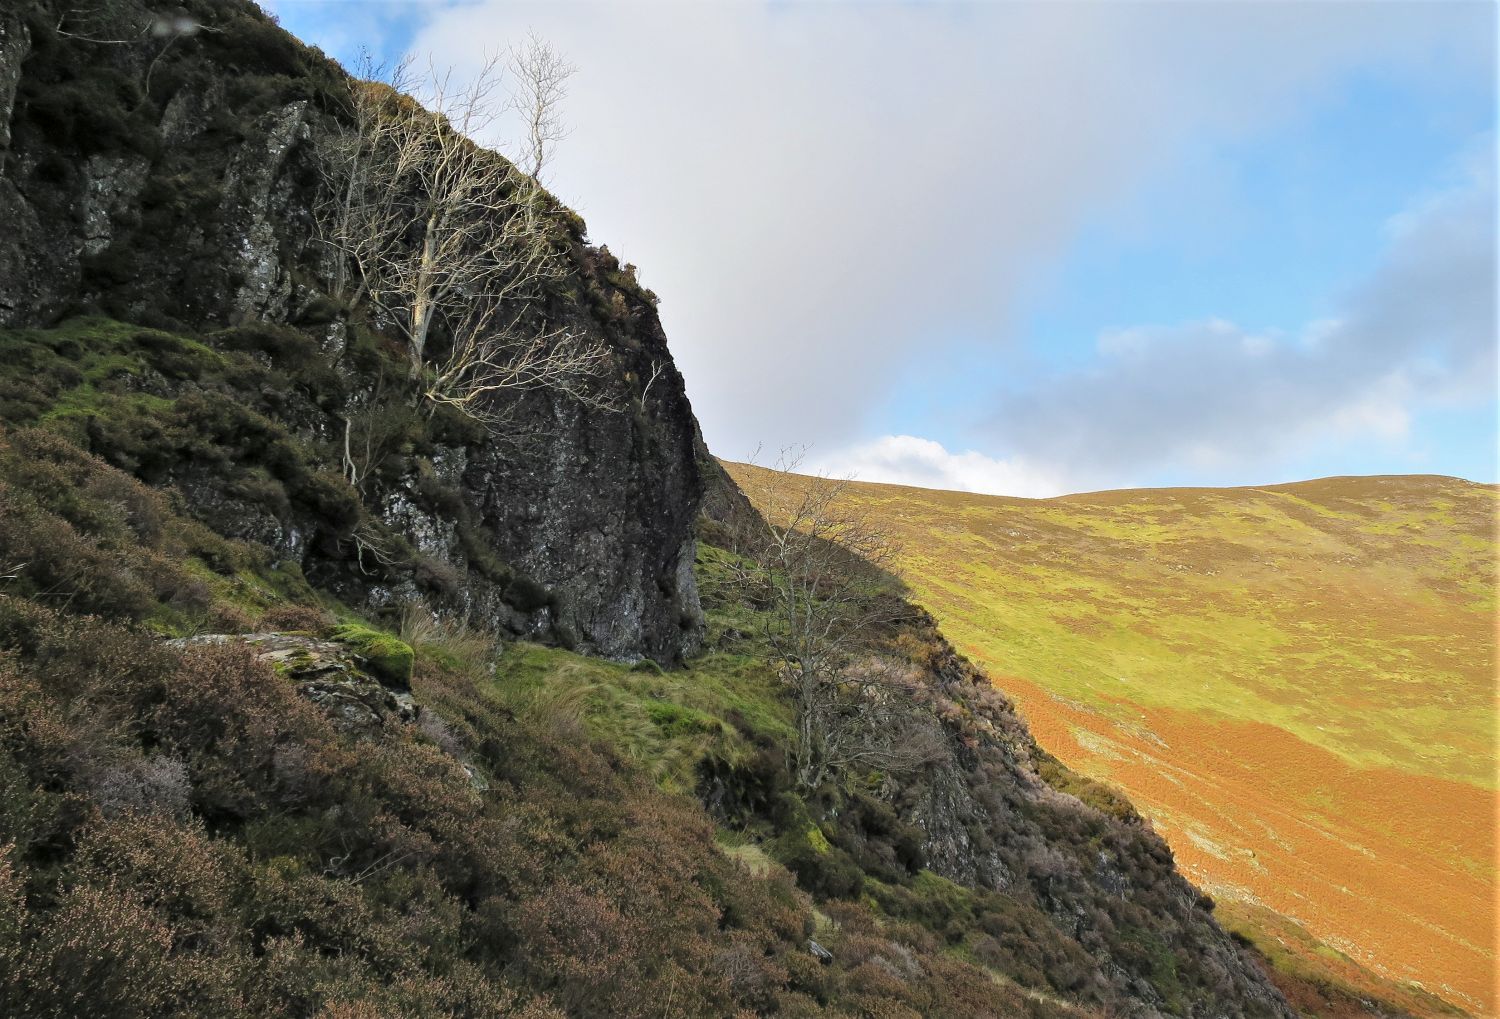
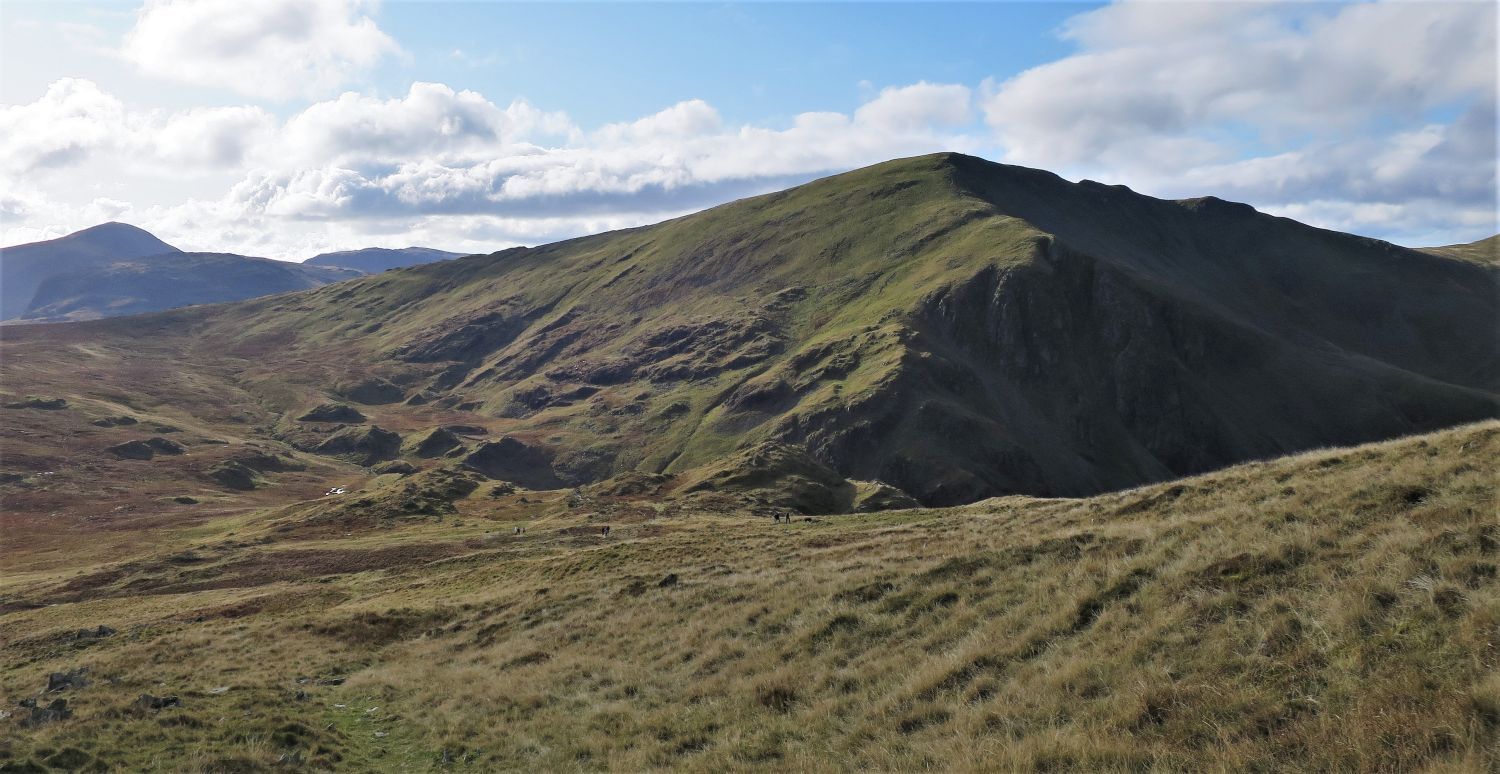
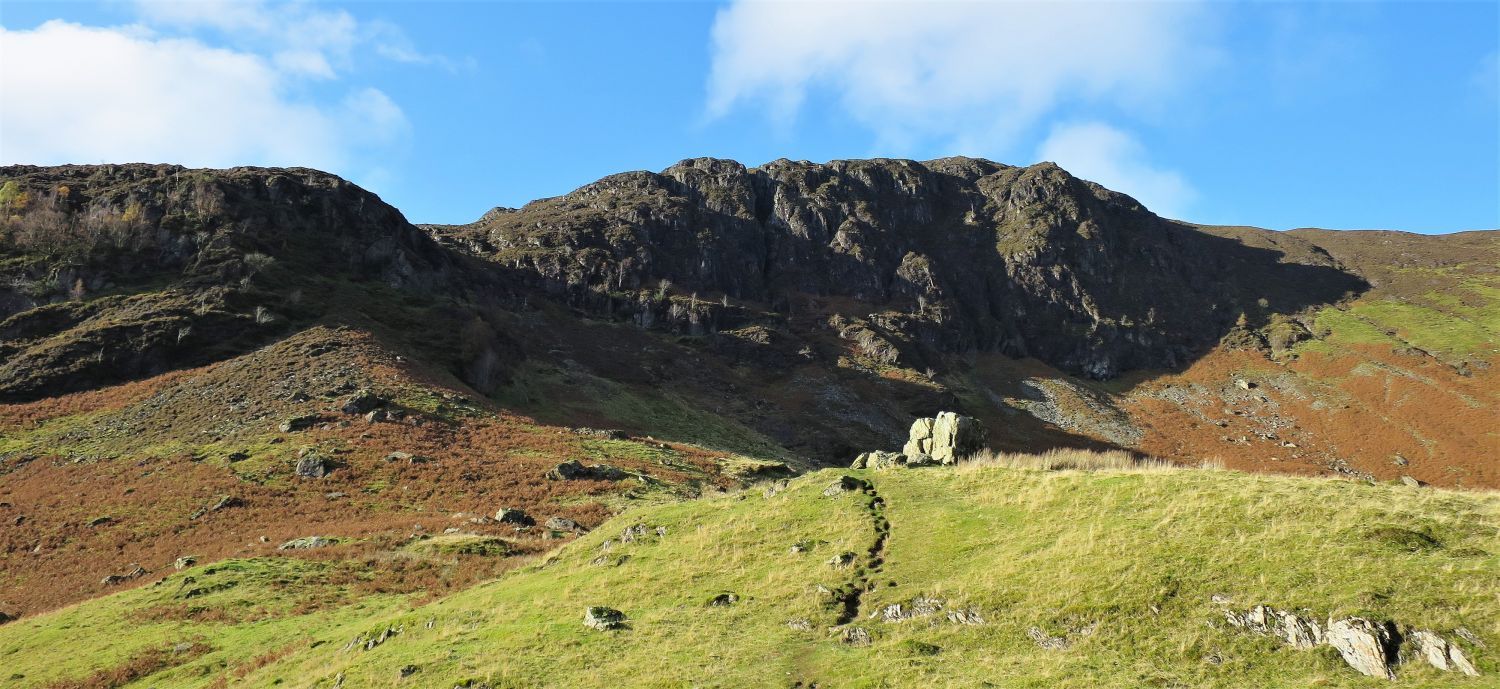 Blea Crag from Cockley How
A short distance away, above the ‘viewpoint’ top, large boulders crown the summit of Cockley How. The near horizontal shadow below Blea Crag shows the direction of High White Rake, however, the vertical cleft in the centre of the picture will be our next objective.
“High White Rake becomes more obvious as it is approached and, although rough, is a practicable route to the plateau above.” High Spy 6
AW
An easier route to the ‘plateau’ above can be gained by following an old drove road, seen here on the left in the picture; a sheepfold beyond the boulders marks the start point of both routes.
“From the sheepfold the drove road may be used instead; this avoids the steepness.” High Spy 6
AW
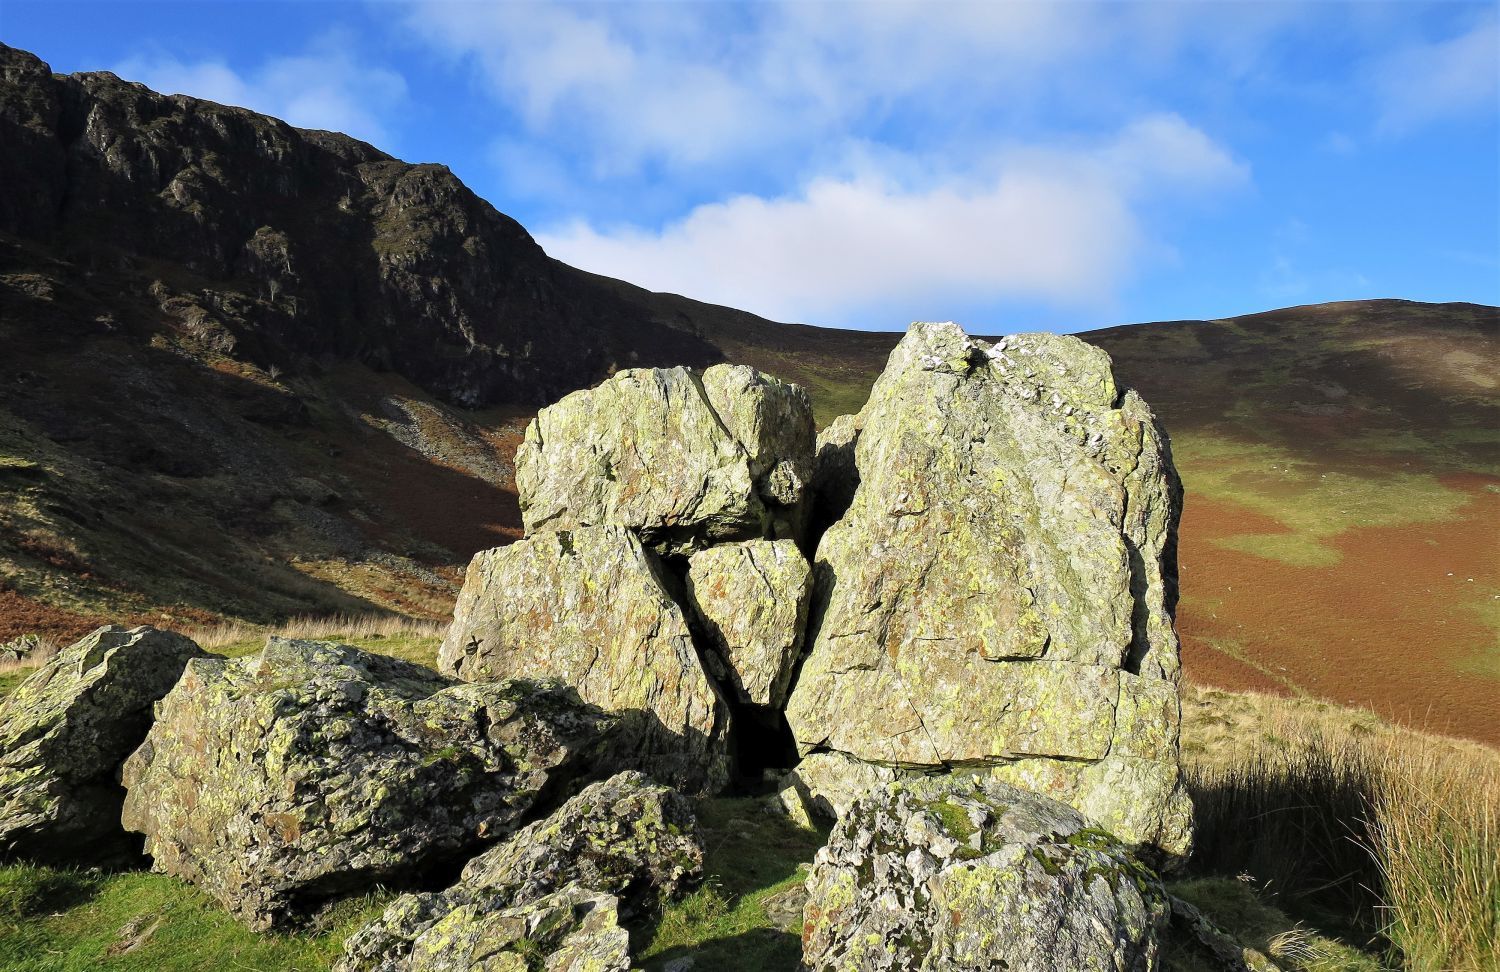 The ‘split boulder’ on Cockley How
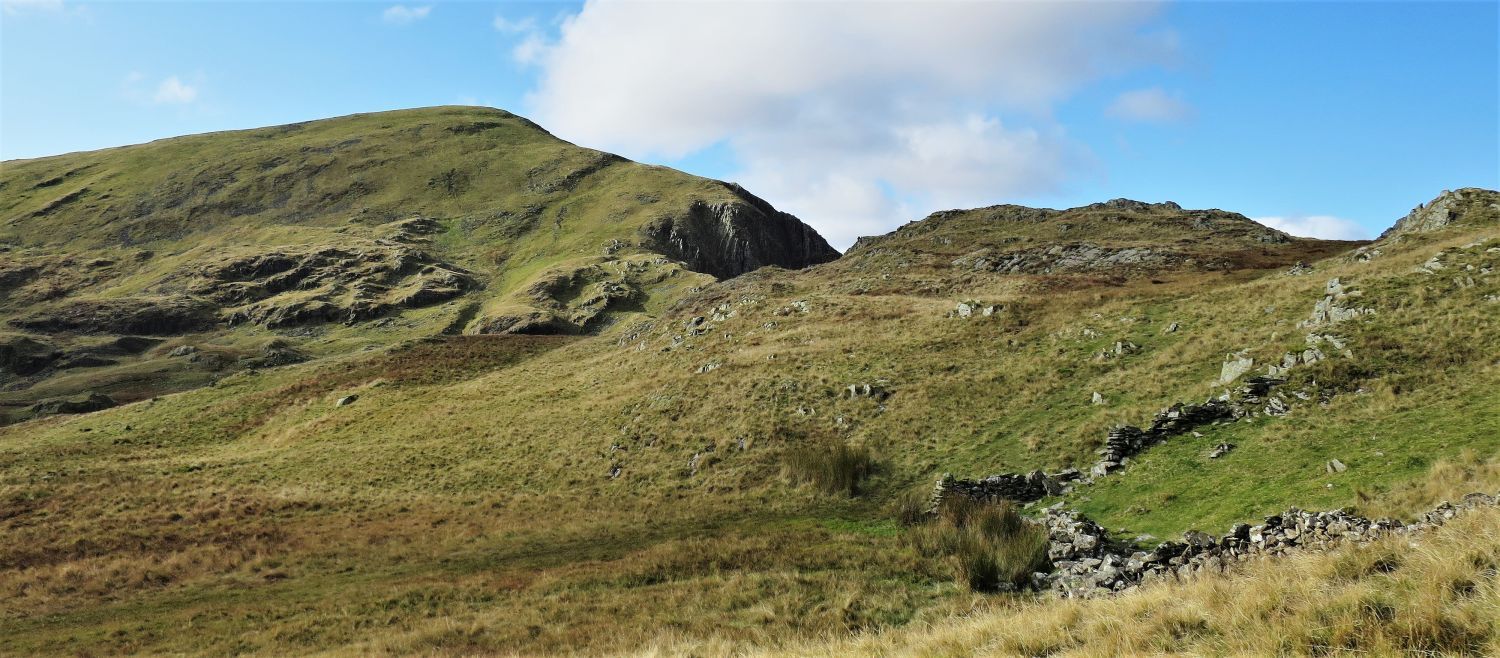
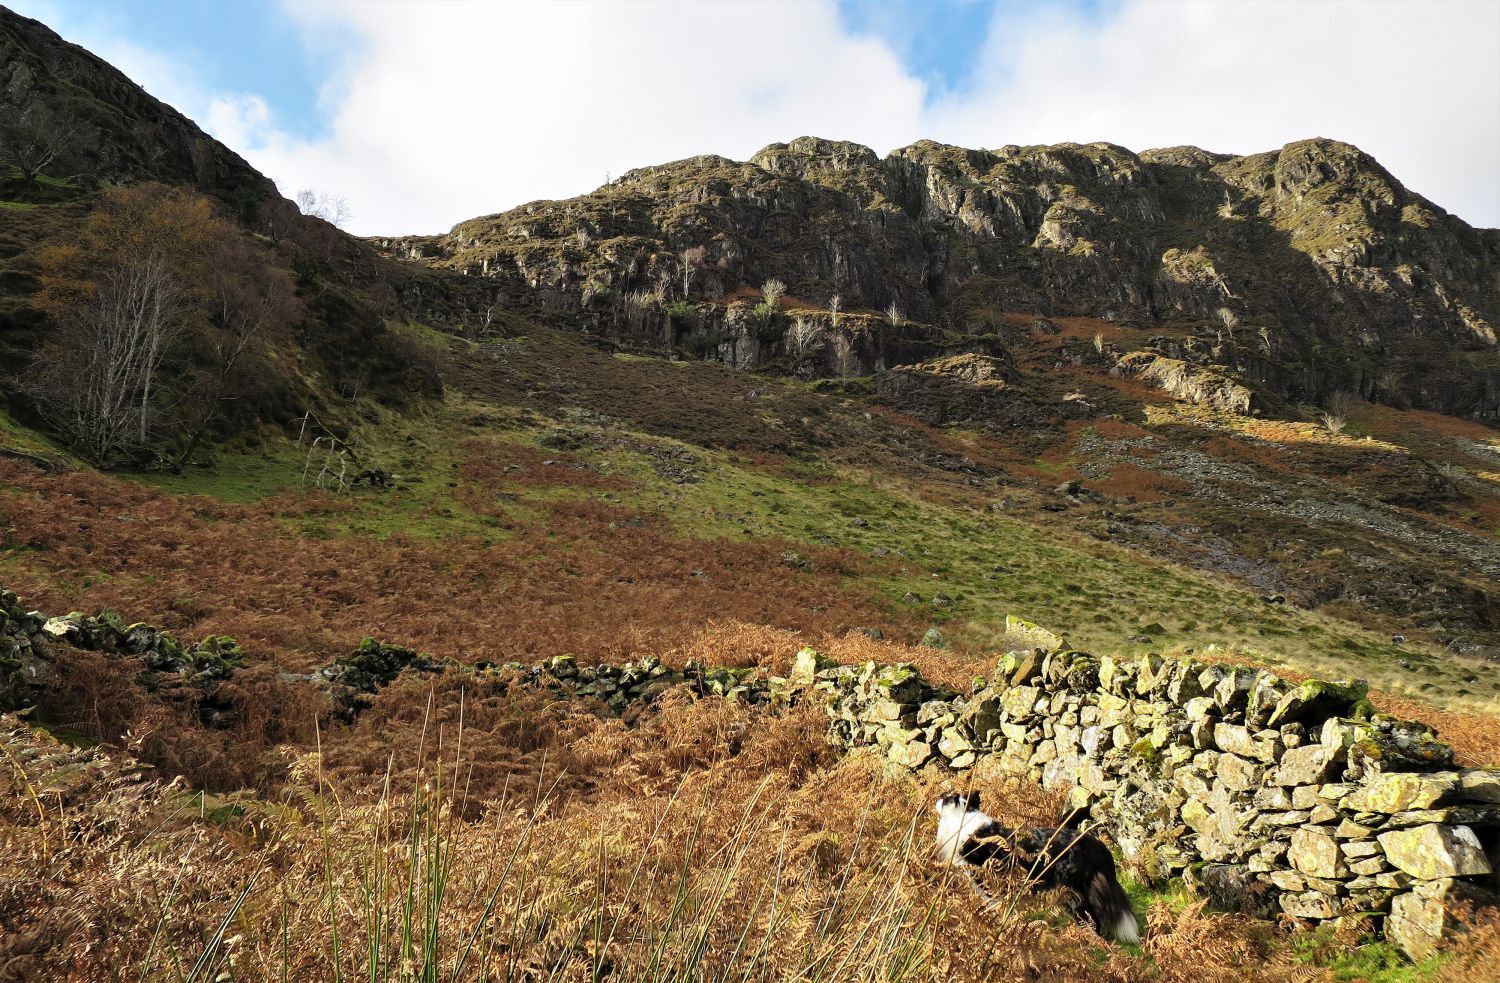 High White Rake and Blea Crag from the sheepfold above Cockley How
This grand sheepfold certainly served its purpose in the day, and was ideally located below High White Rake and at the foot of an old ‘drove road’. It’s surprisingly not named on present day OS maps, not like many less impressive sheepfolds that are dotted about in the High Spy area.
“Getting the sheep down through the escarpment to the valley, as is necessary on occasion, is a problem that has been solved by slanting a drove-way between the top of Low White Rake and the foot of High White Rake, and this is the only route by which sheep may safely be brought down from the tops.” High Spy 5
AW
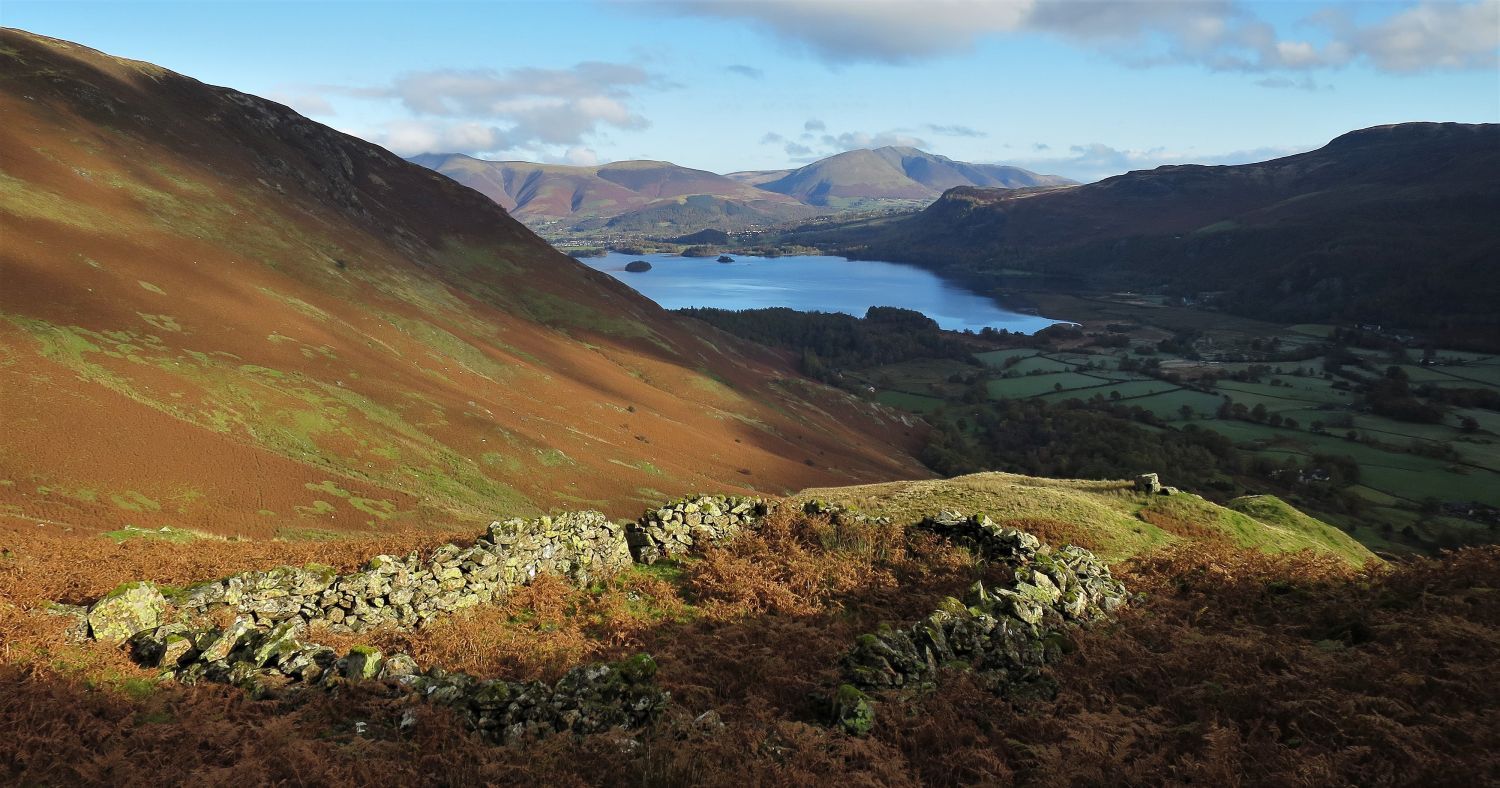 Looking back to Derwent Water and Cockley How from the sheepfold
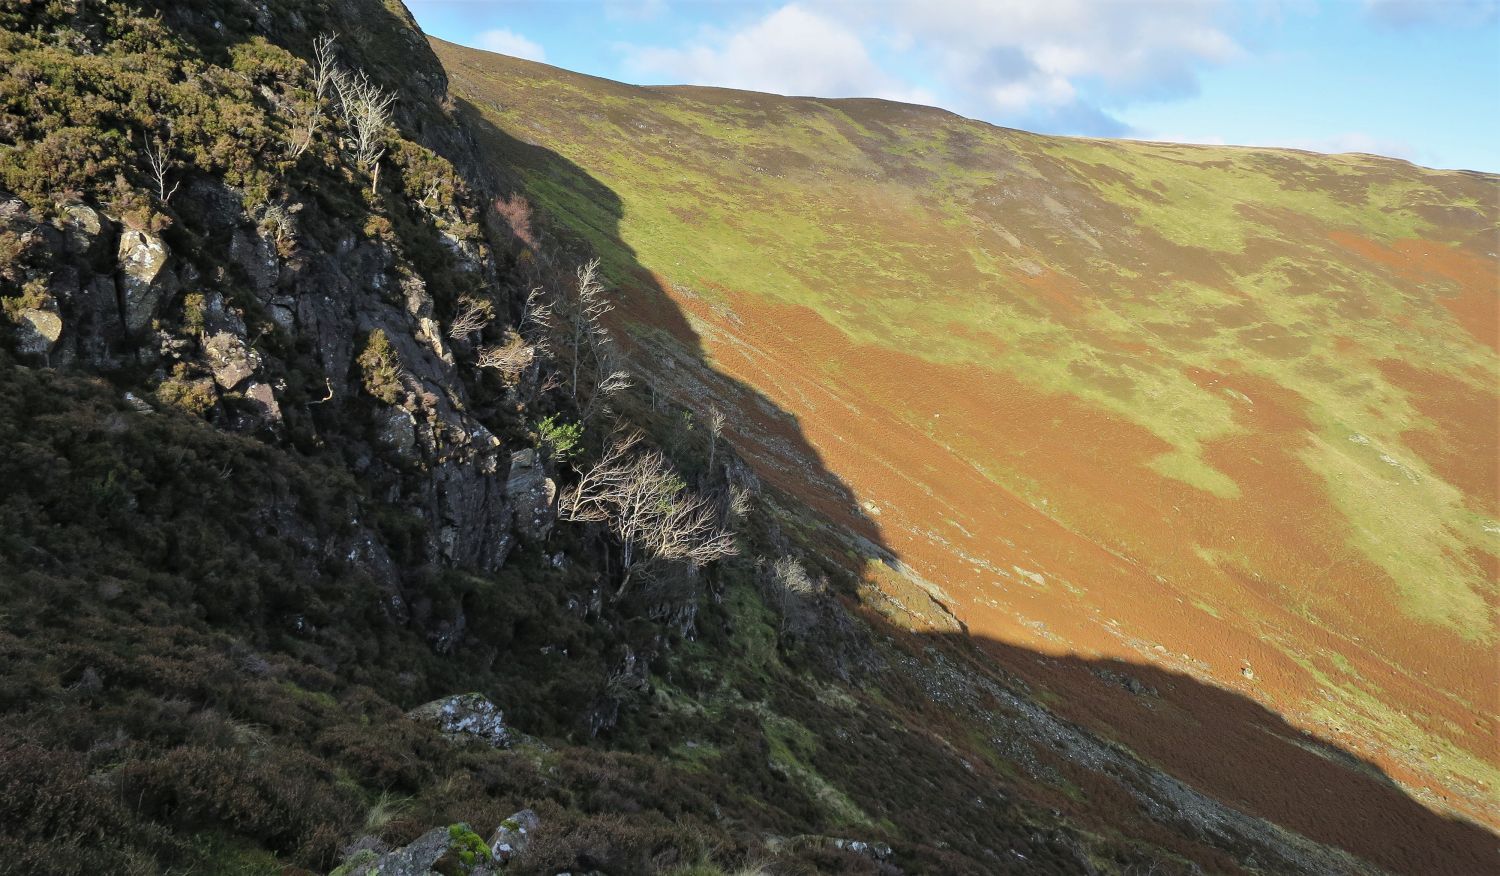
 Looking across to Maiden Moor from the foot of High White Rake
From the foot of High White Rake, turn right along a narrow grass terrace if you wish to investigate the cleft I had mentioned before.
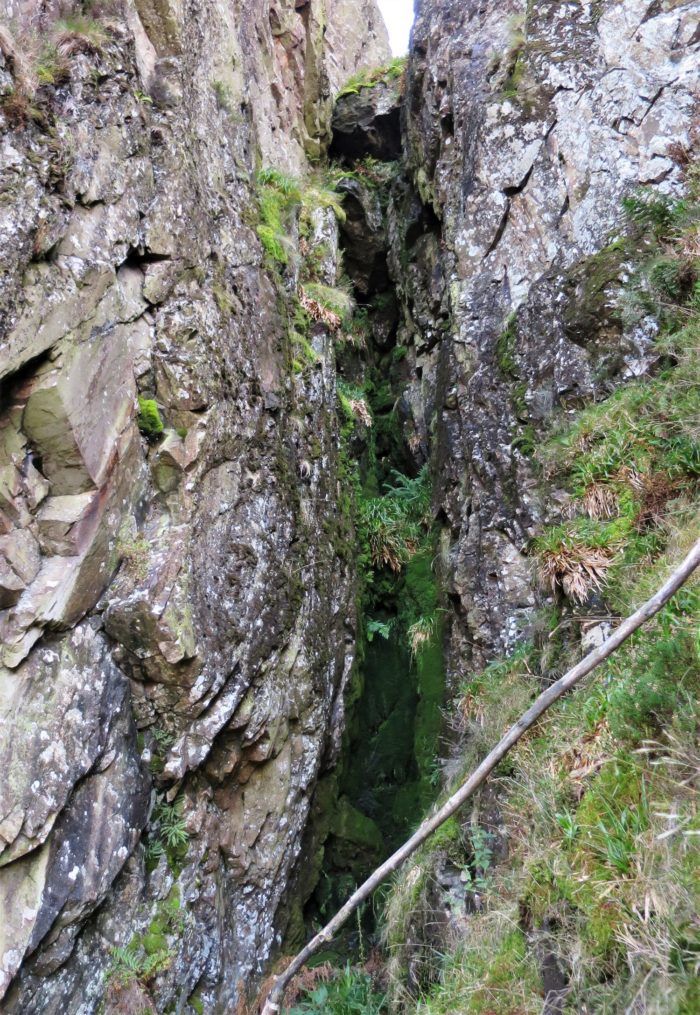 The ‘cleft’ on Blea Crag
I had visited this cleft before, but not entered so deep. It is a very tricky scramble up heather, moss and rock to reach this point, but only experienced climbers should go any further. It will eventually lead to the escarpment of Blea Crag, and like a lot of clefts, gullies, chimneys, and narrow ravines in Lakeland, a wedged boulder blocks any easy route above.
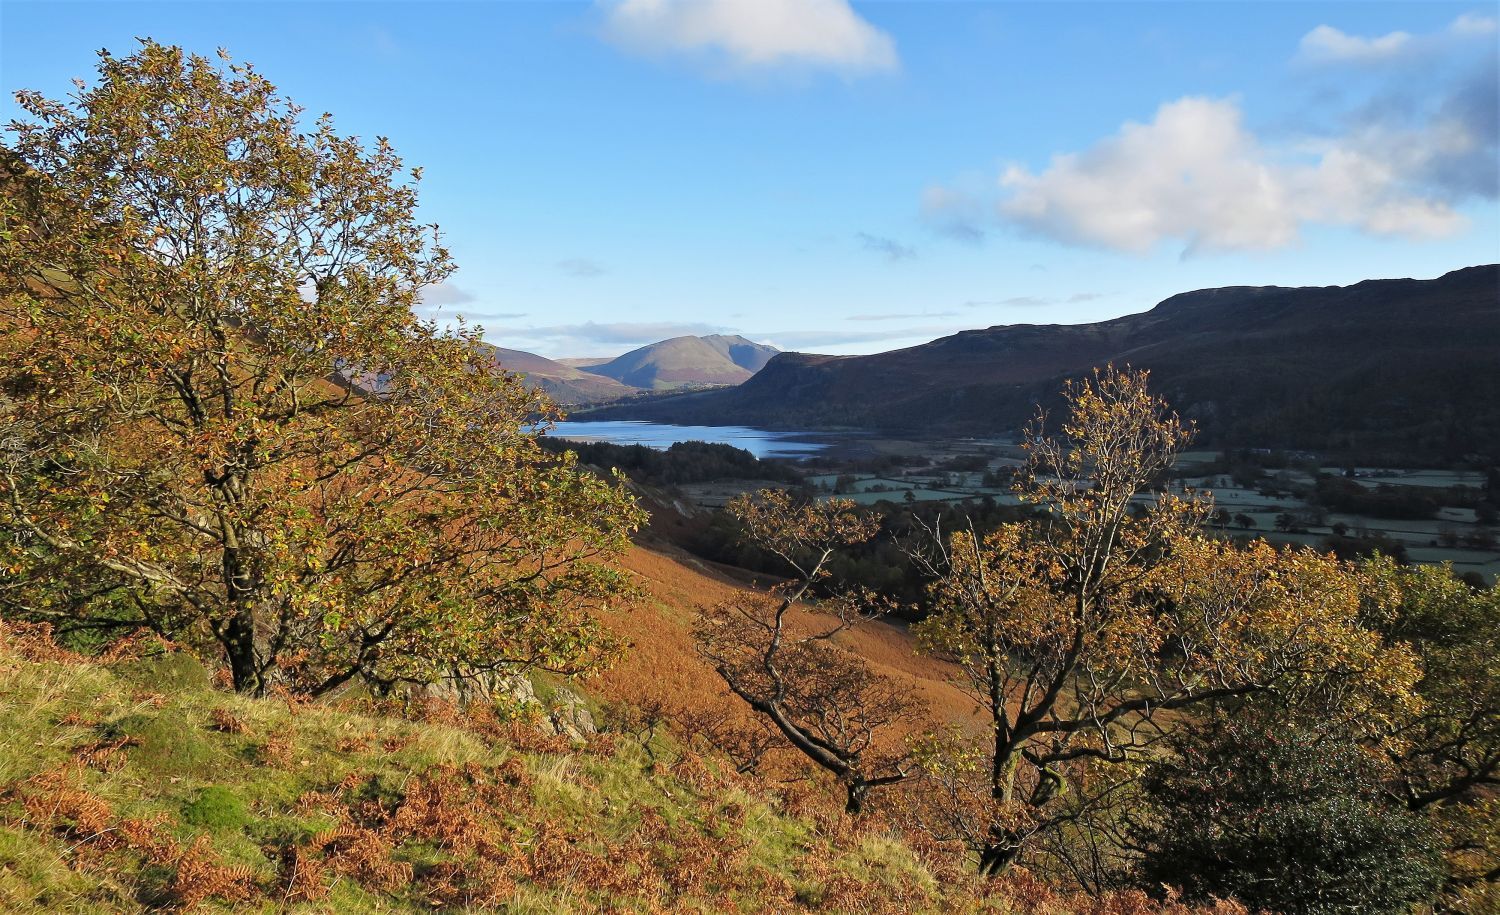
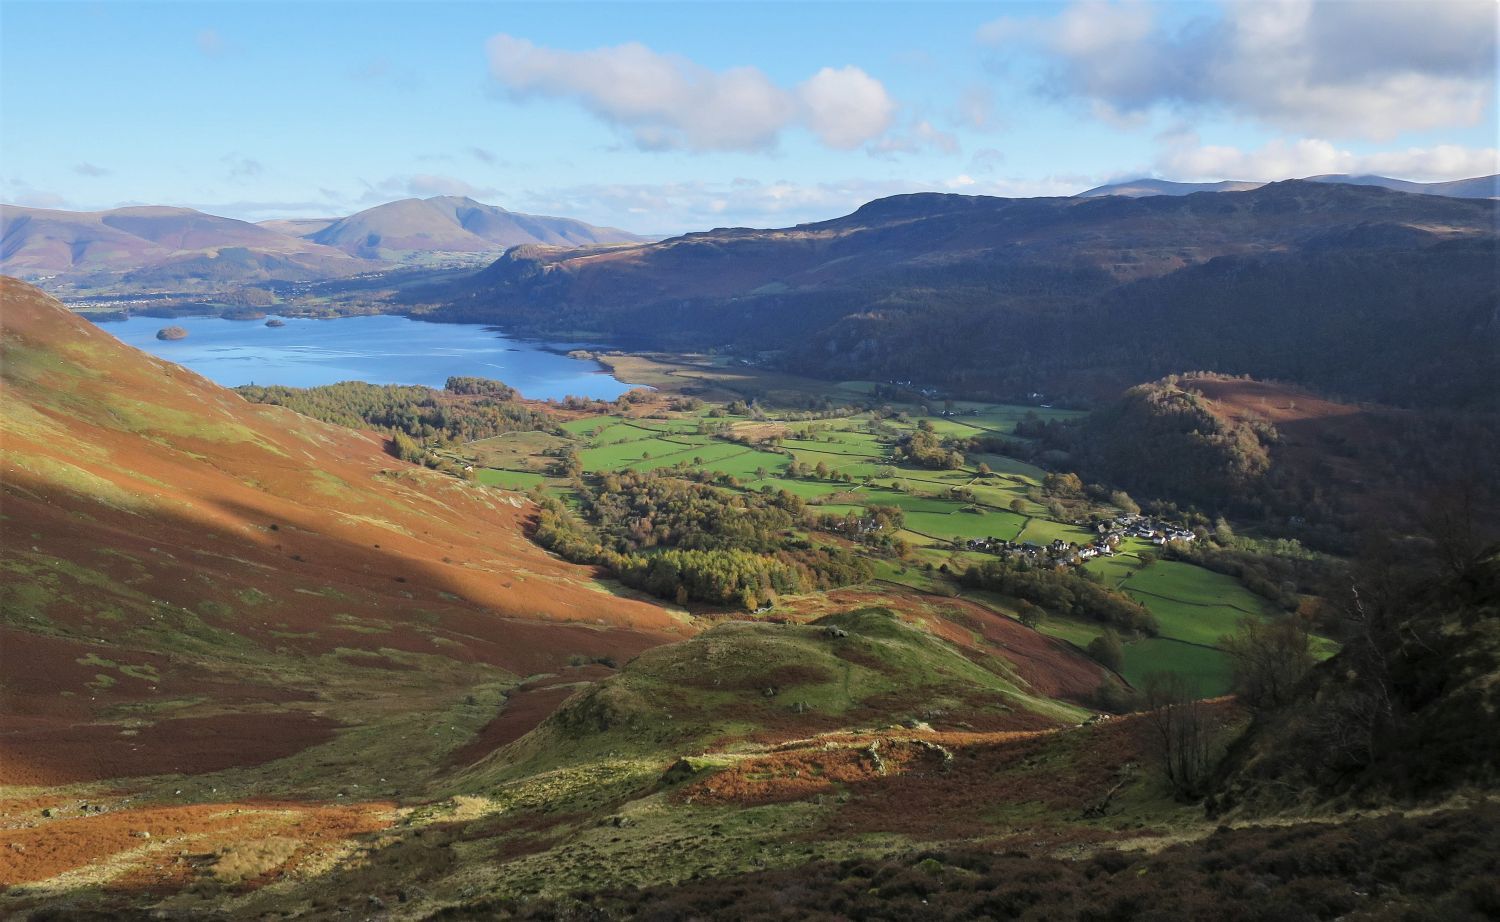 Looking back to Derwent Water and Grange from the foot of High White Rake
After some bum sliding down some very steep mossy sections, I eventually arrived back to the foot of High White Rake; this diversion may not be for everyone and you may feel it not worth the effort.
It’s now a matter of following Wainwright’s original route up the rake and onto Blea Crag.
 Looking back down High White Rake
 Heather and rock terrace above High White Rake
Once at the head of High White Rake, on your right take a pathless route up onto a heather and rock terrace; this will save any loss of height. A short distance away a narrow path in the heather suddenly appears and traverses towards the ‘amphitheatre’ above.
 Looking back down to Nitting Haws from the path to High Spy
The narrow path we had followed can be seen on the left in the photo. Here it joins the path from the ‘drove road’ which ascends to the ridge of High Spy. The col to the left of the pointy peak of Nitting Haws, is the exit point of the ‘drove road’.
 Minum Crag from the path to the ridge of High Spy
The path continues its ascent to the main ridge of High Spy, but….
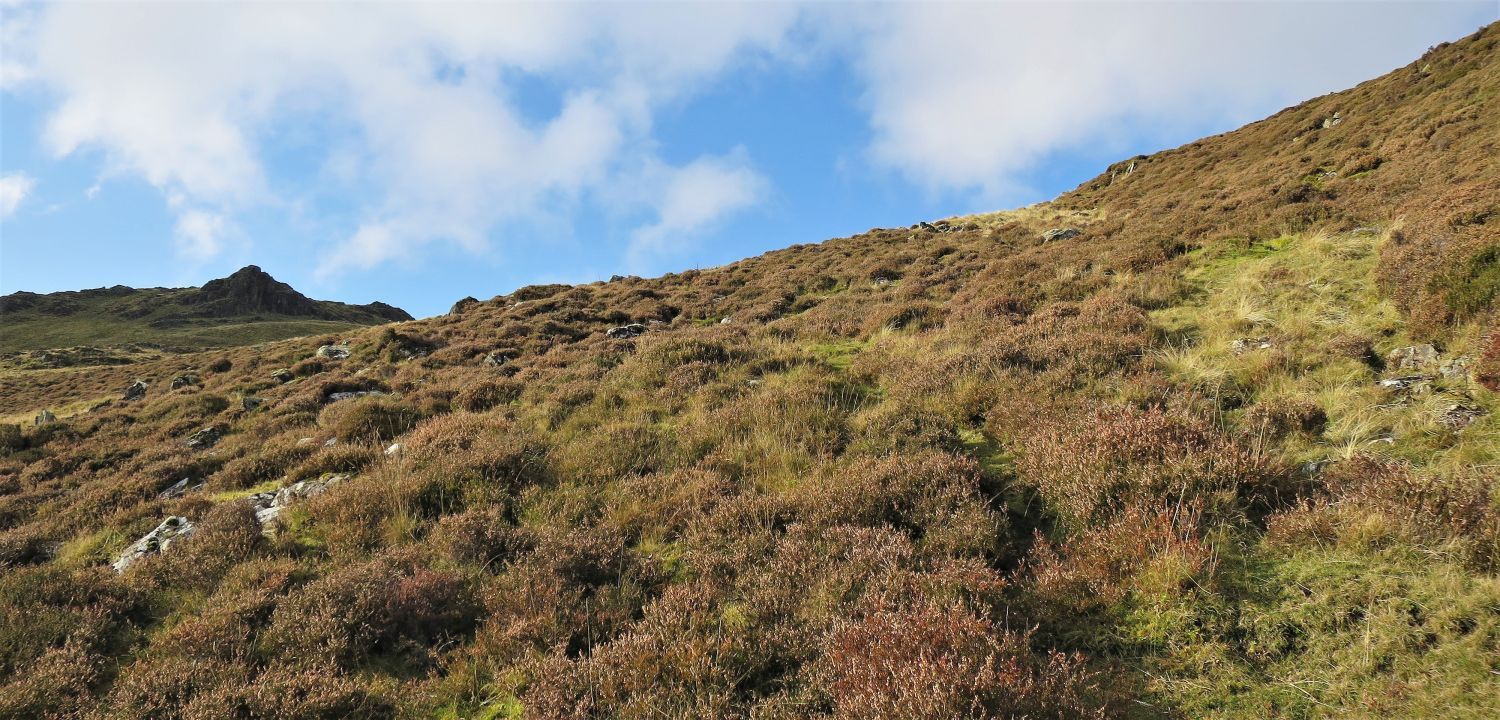
 The summit of Blea Crag from the path to the ridge of High Spy
….when the summit of Blea Crag appears on your right, take a direct route (pathless) towards it over easy ground.
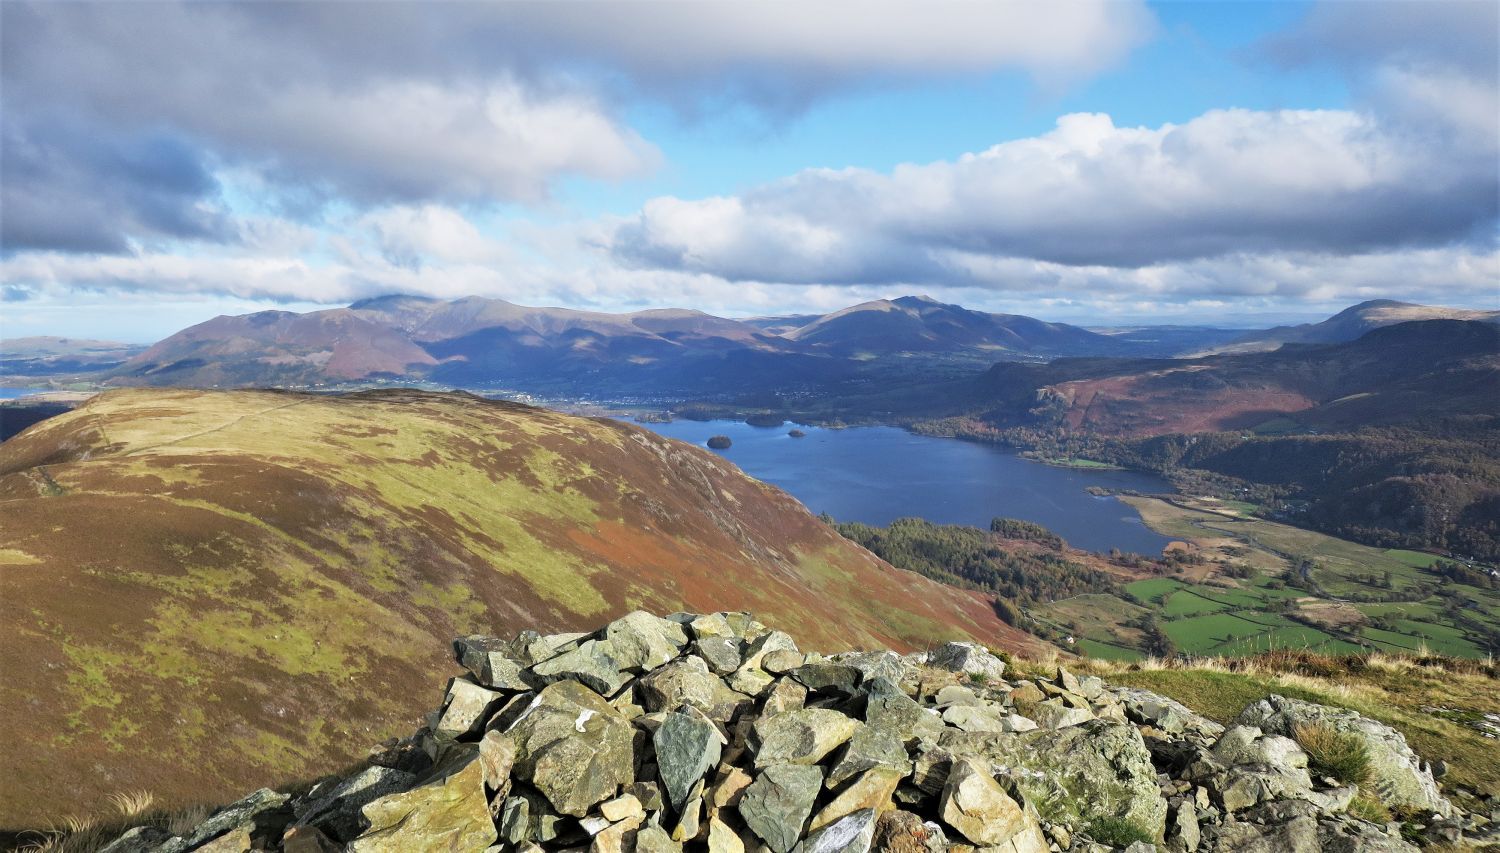 The Northern Fells and Derwent Water from the summit of Blea Crag
The diversion to Blea Crag is well worth it; this top is very underrated and rewards with a superb view.
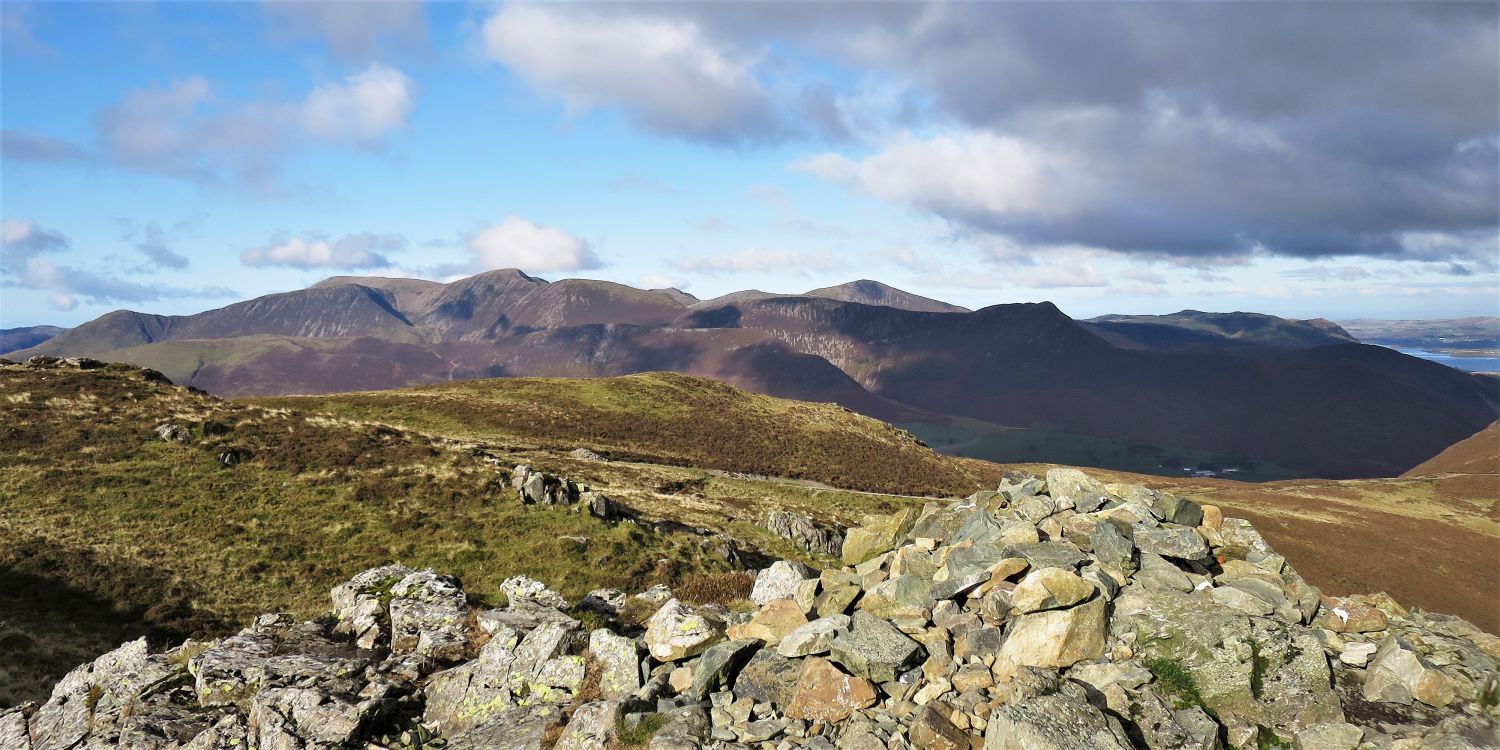 The Grasmoor group from the summit of Blea Crag
 Dale Head and Hindscarth over the ridge leading to High Spy (left)
Here, the ridge path leading to High Spy is only 150 yards from the summit cairn of Blea Crag.
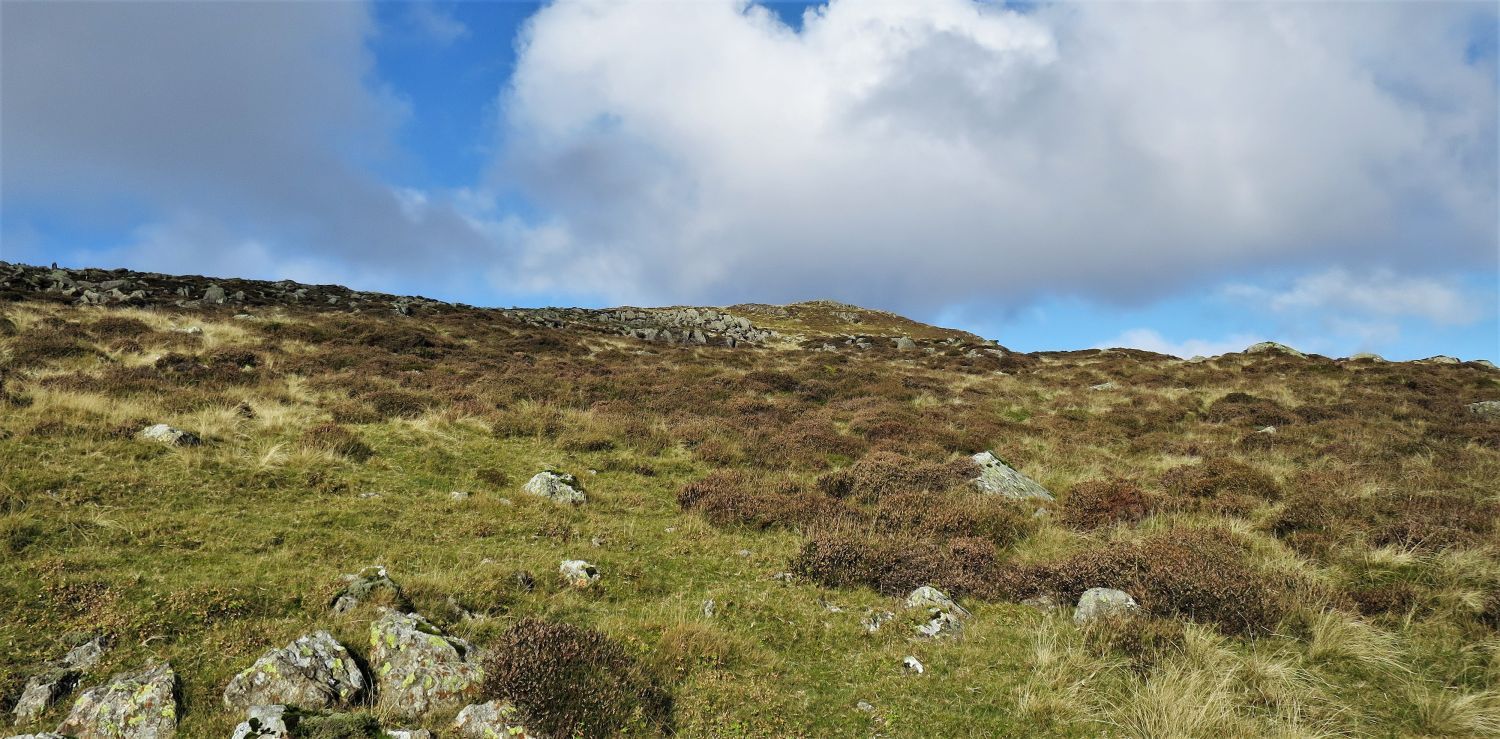
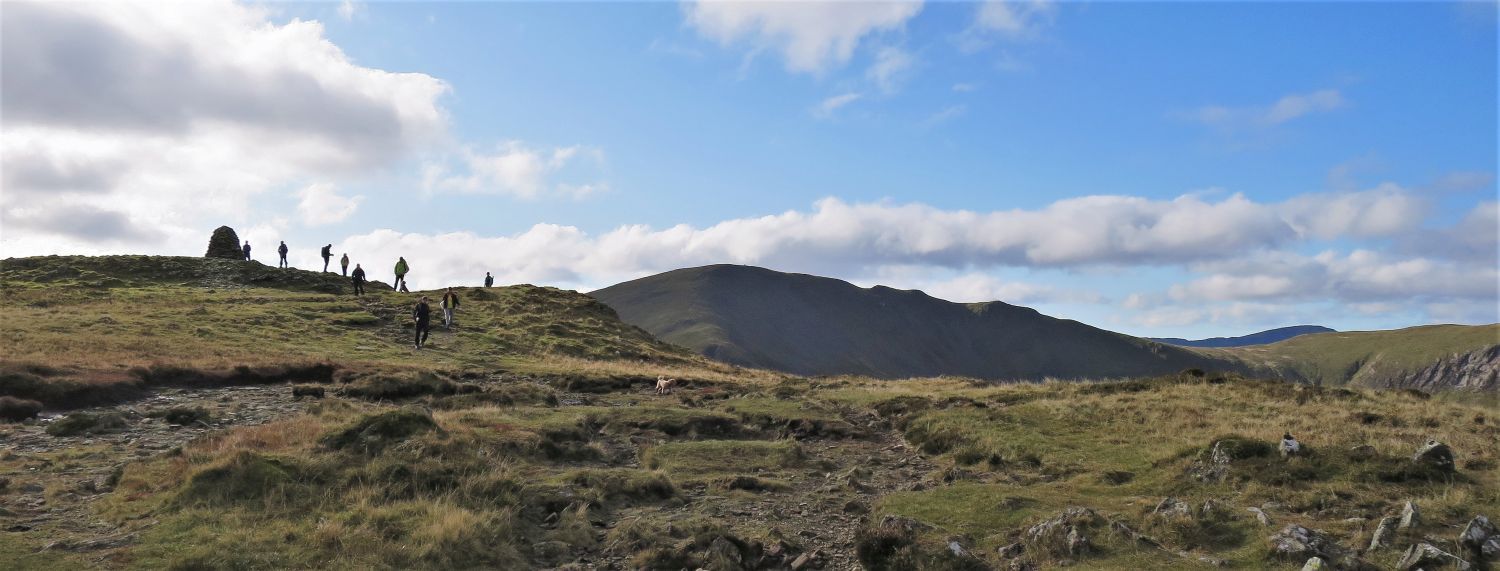 Approaching the summit of High Spy
Up to the point of arriving at the summit of Blea Crag, it is very unlikely that you will have met the presence of any other fellwalker, however, once the ridge leading to High Spy is joined, any sense of solitude will be lost.
 Hindscarth and Squat Knotts from the ridge of Eel Crags
The word ‘fell’ associated with most of the Lakeland fells, seems appropriate, while the word ‘mountain’ seems ambitious; the view of Hindscarth from Eel Crags disputes the latter though.
“As a viewpoint, the cairn is a little too far from the edge of the precipice to add drama to the scene, but there are several places nearby where profound glimpses down into the wild recesses of upper Newlands may be obtained.” High Spy 10
AW
 Book Six
The North Western Fells
High Spy 9
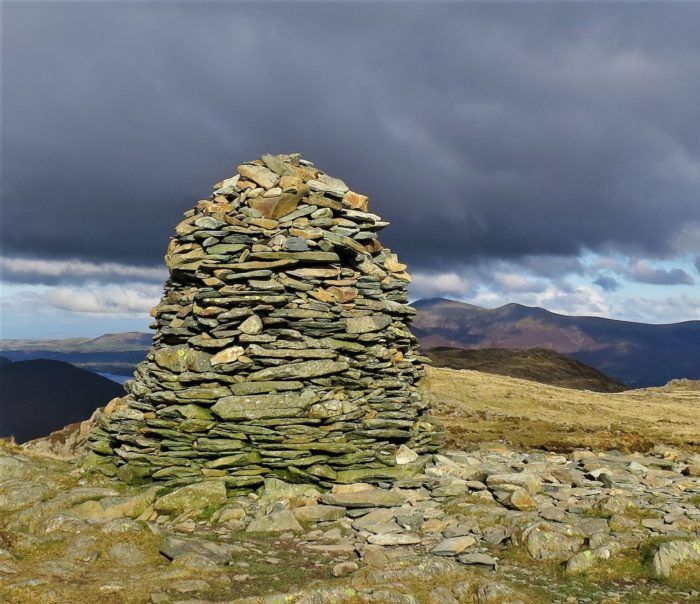
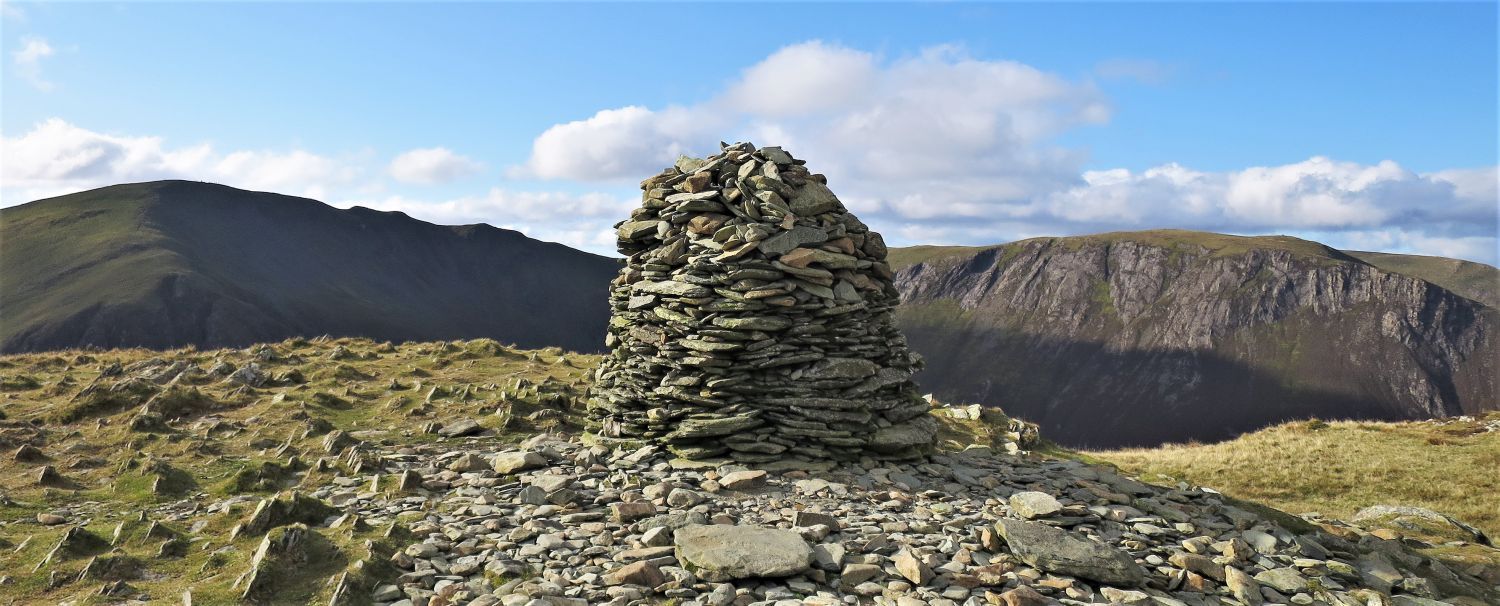
“The Summit”
“The summit cairn is a solid, well built structure, the result of diligent toil; a memorial to its unknown builders.” High Spy 9
AW
 Dale Head and Hindscarth from the summit of High Spy
From the summit leave the main ridge path and take a slight diversion to Robin Fold Edge.
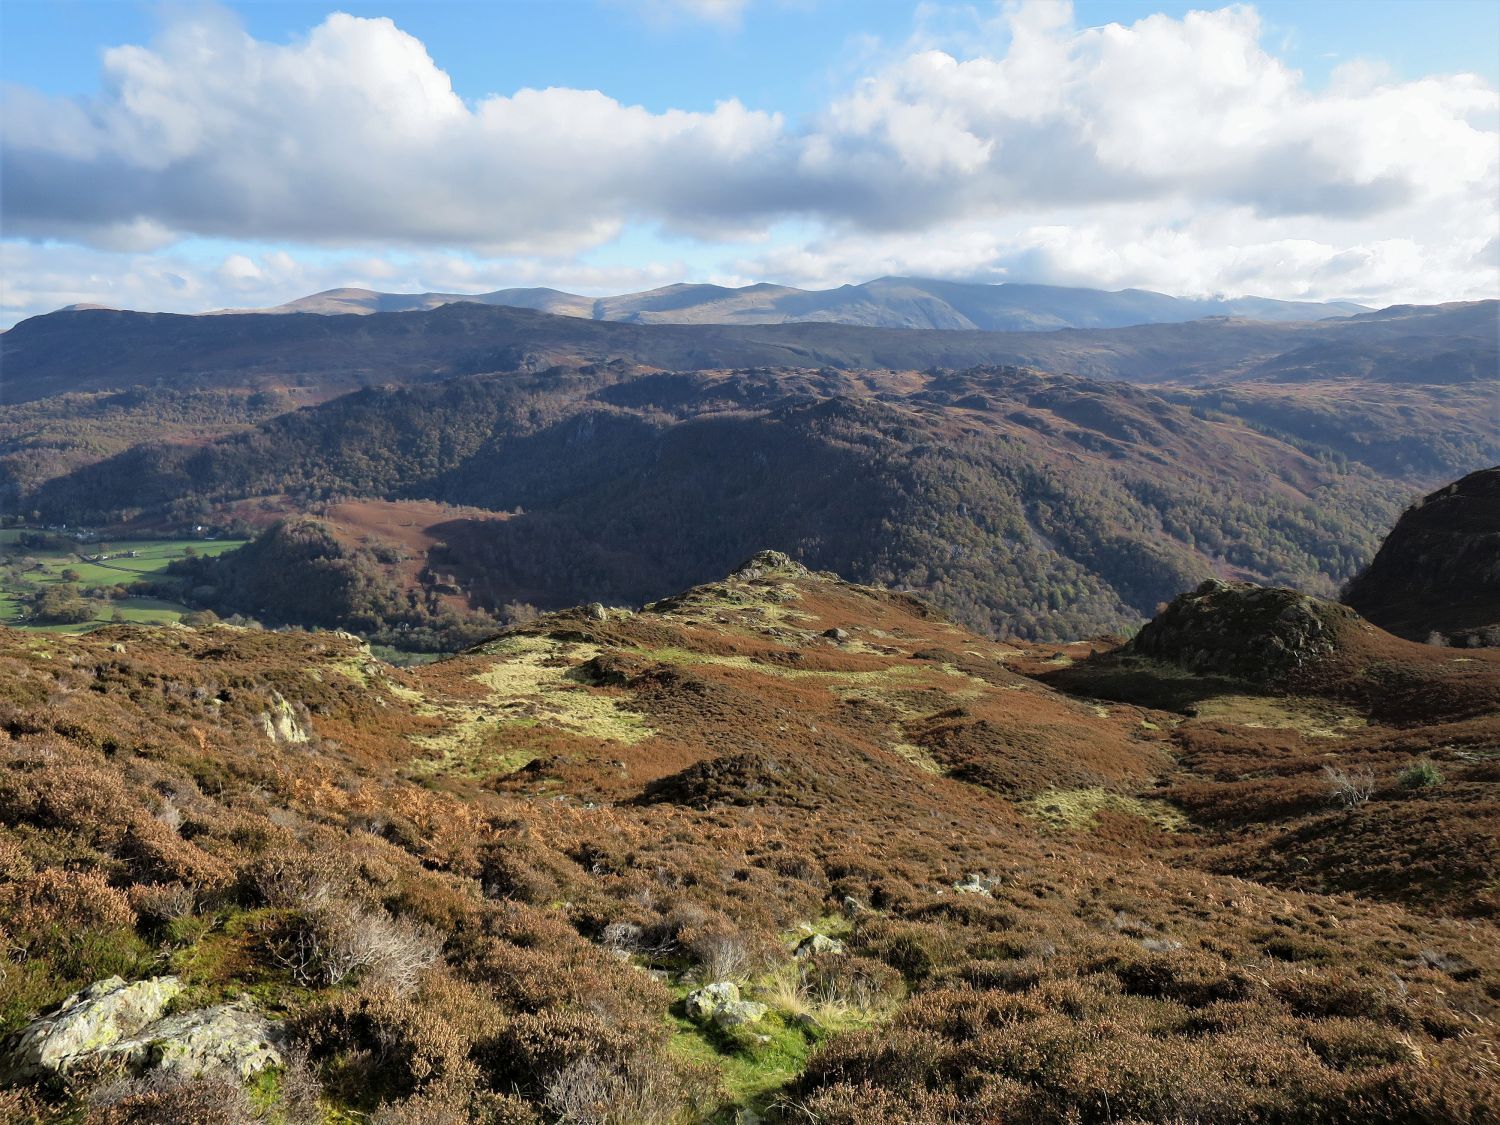
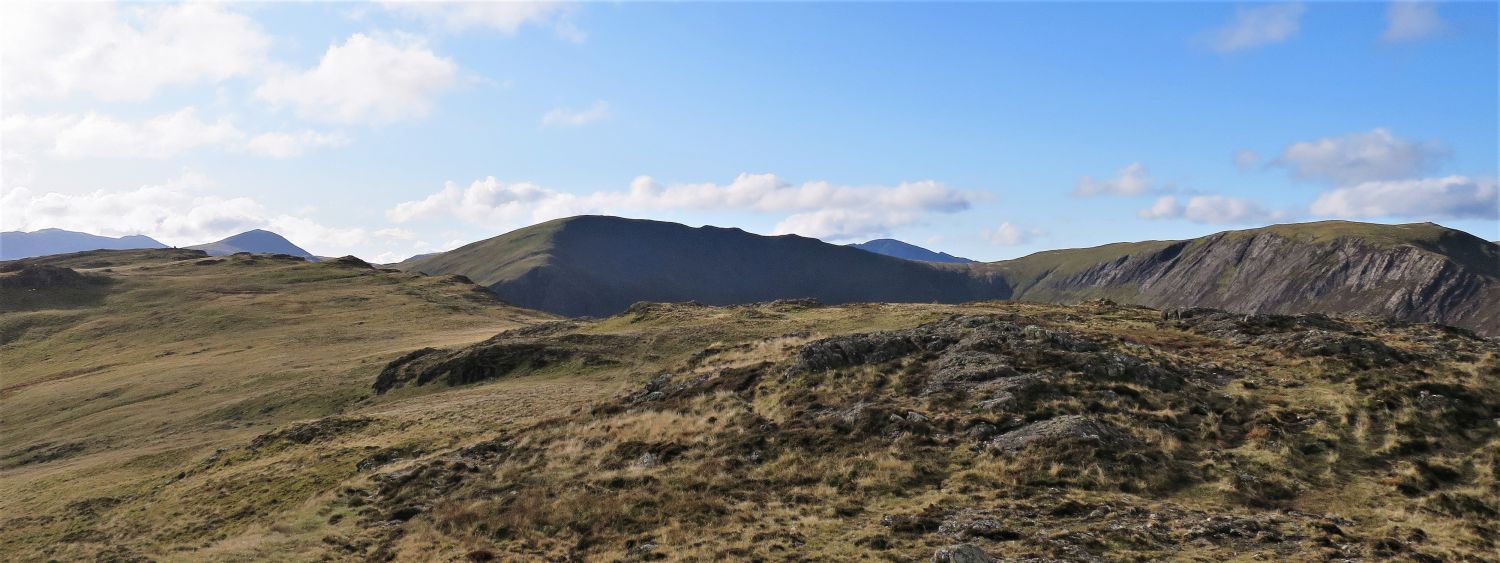
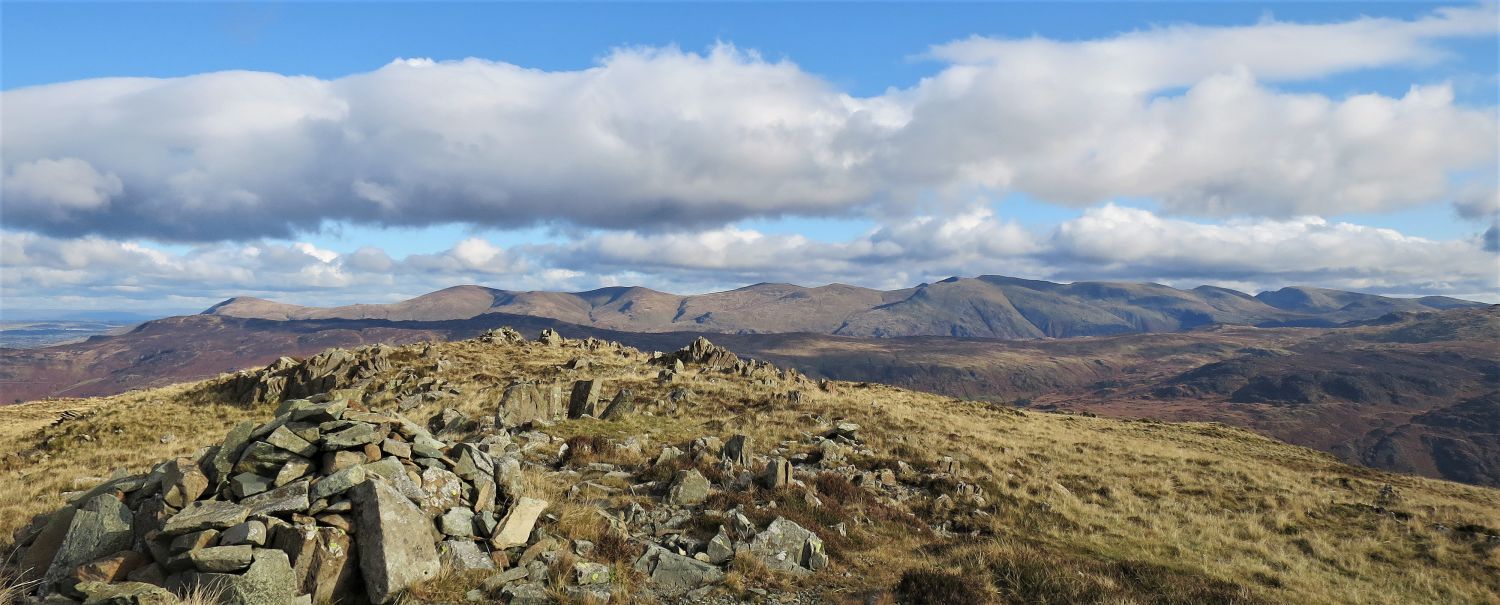 The Eastern Fells from the summit ridge of Robin Fold Edge
Two cairns, 50 yards apart, stand proud at each end of this summit ridge, but it is difficult to see which is the highest.
 Looking back to High Spy from the summit of Robin Fold Edge
The tops of Minum Crag and Blea Crag can be seen on the right; Blea Crag being the dark mass in the distance.
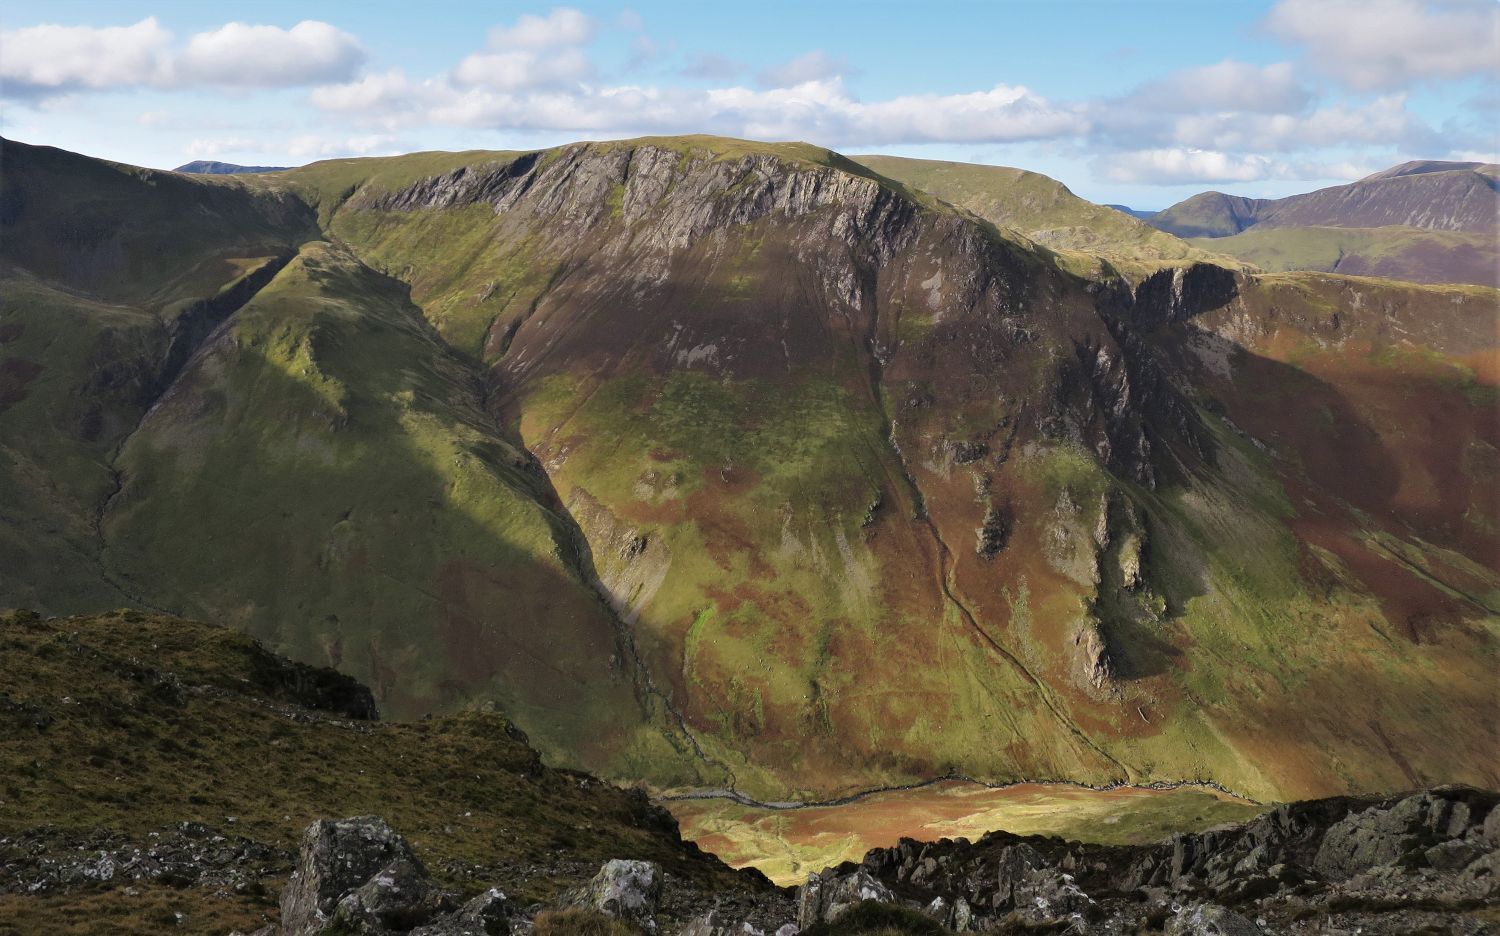
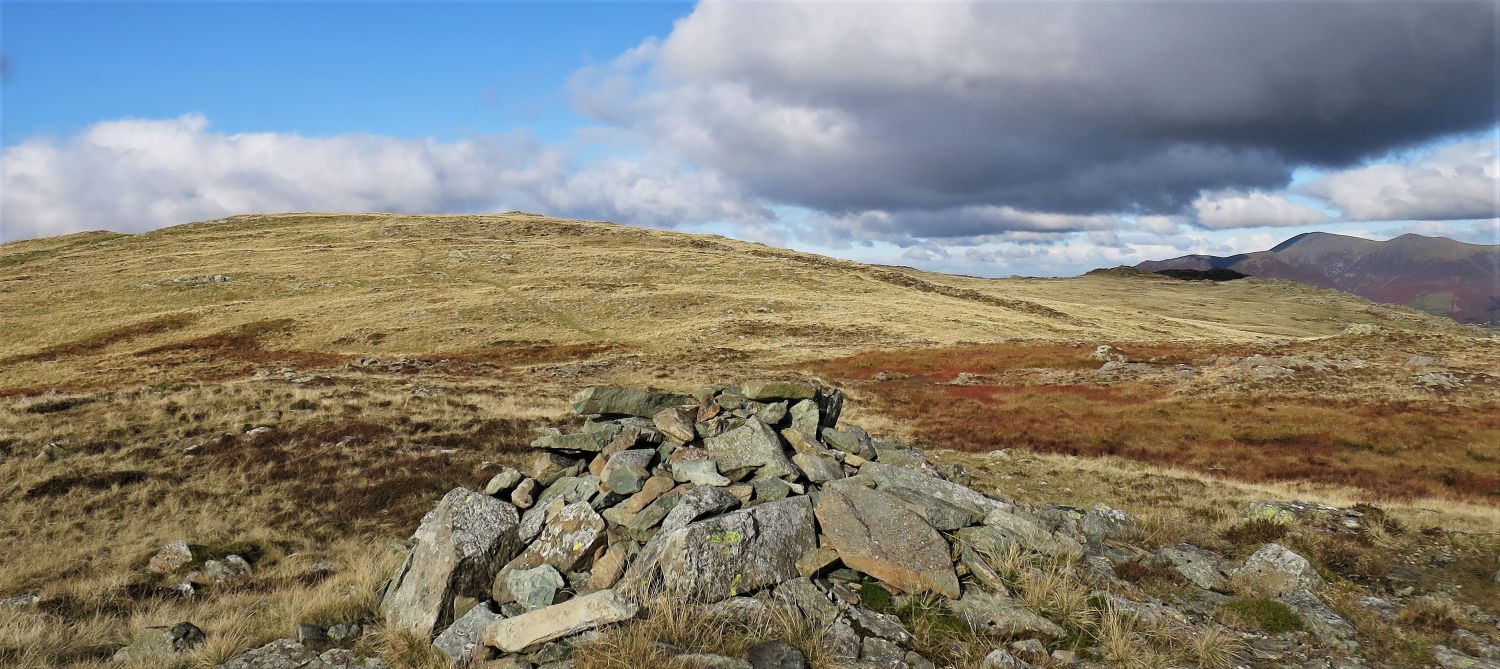
 Dale Head from the descent to Rigg Head
A small path leads down the grassy slope towards the plateau of Rigg Head. This depression between the heights of Dale Head, High Spy and High Scawdel, is a high level pass linking the valleys of Newlands and Borrowdale, and the mine at Honister.
 Dale Head from Wilson’s Bield
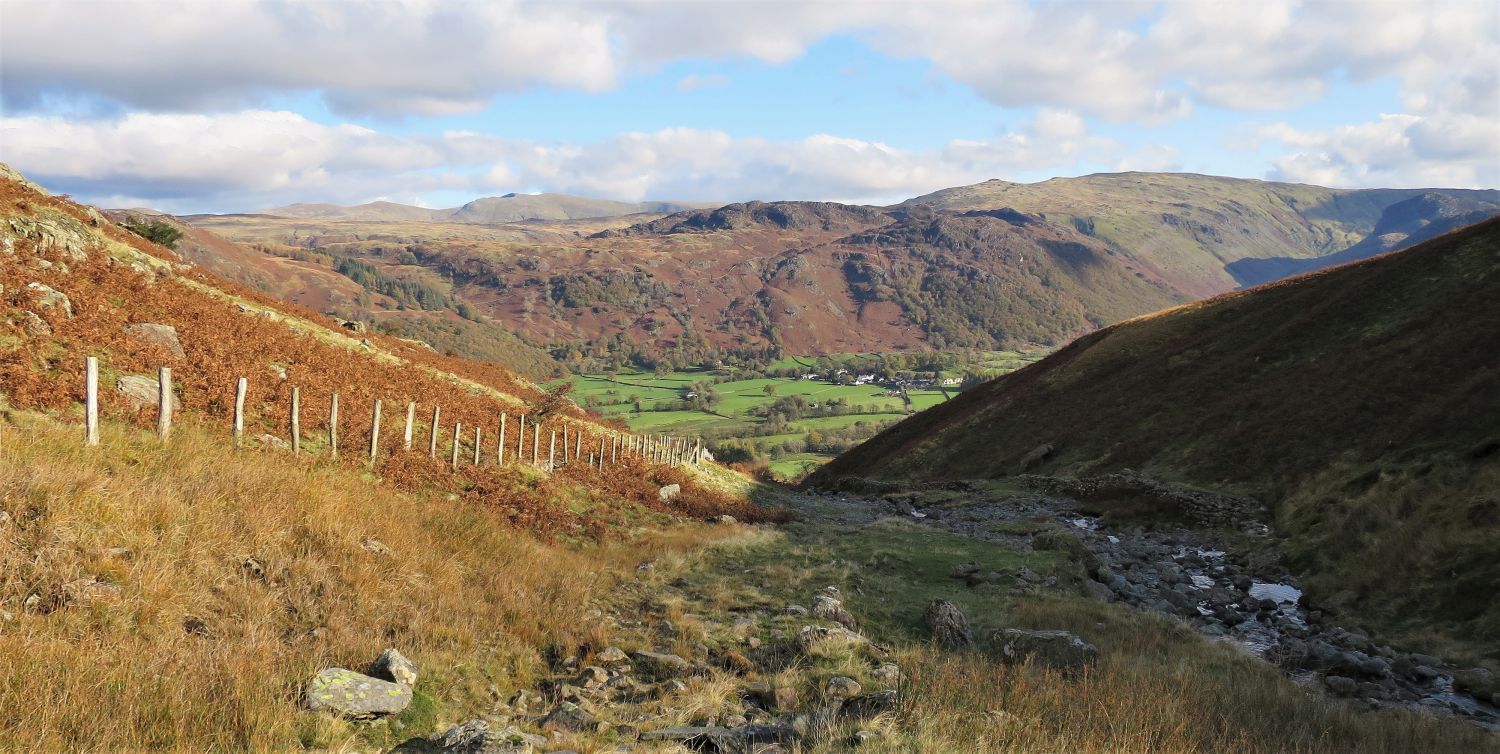
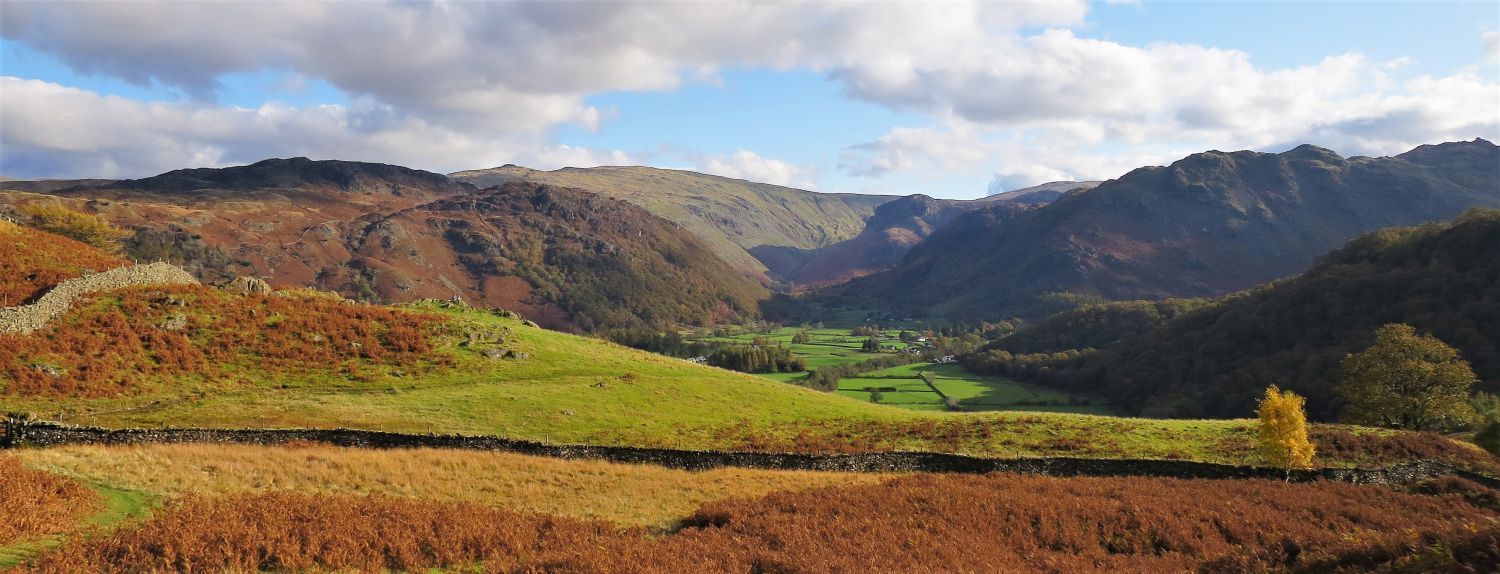
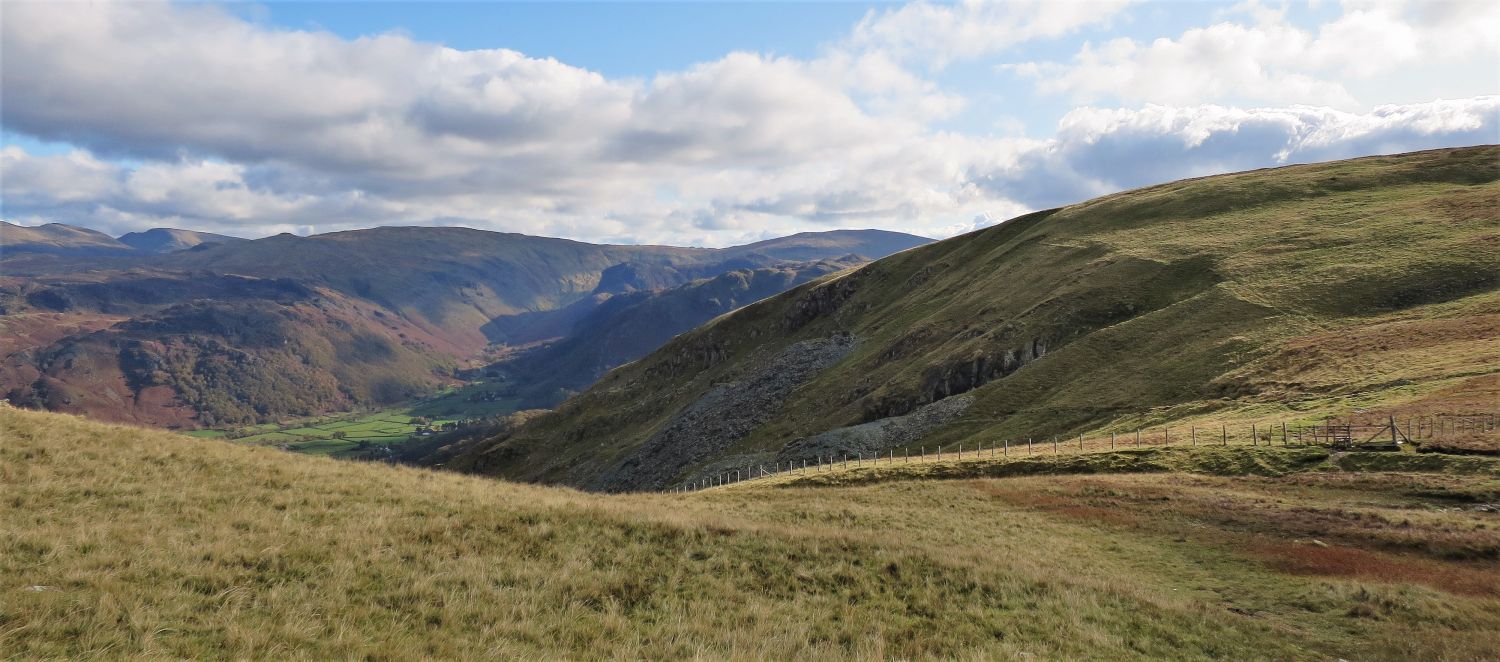 Borrowdale and the disused upper Rigghead Quarries from Rigg Head
Our next objective is to visit the disused Rigghead Quarries in Tongue Gill, while we descend into Borrowdale.
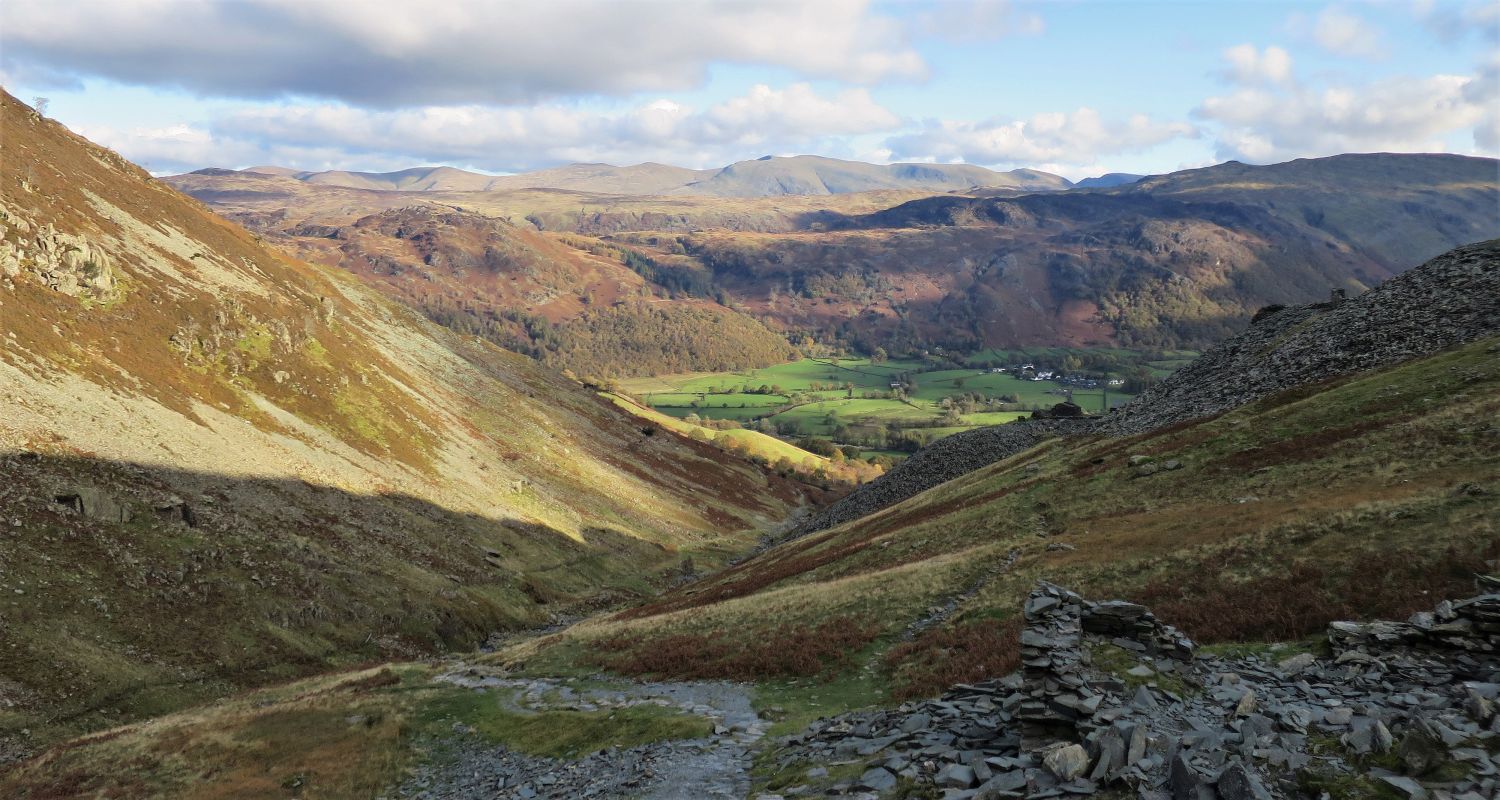
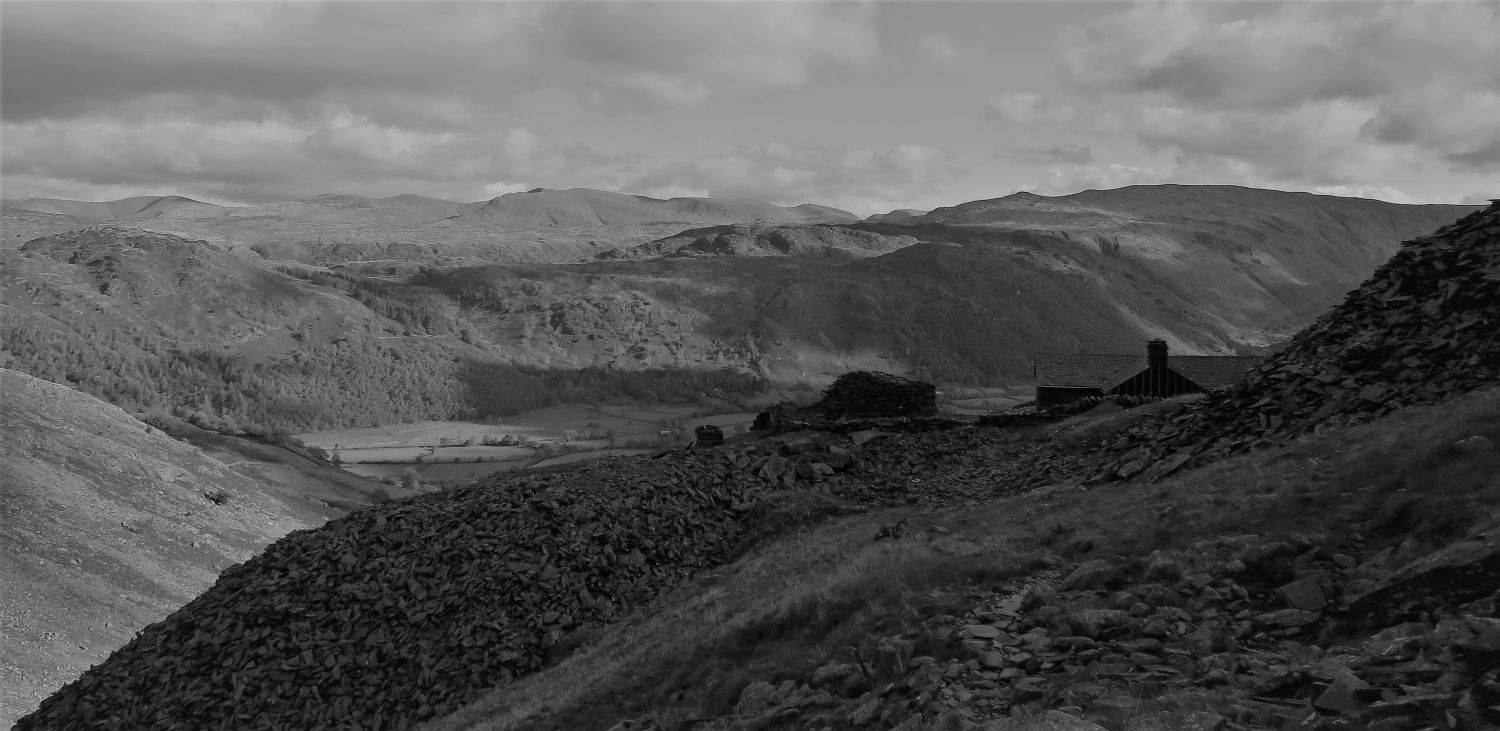
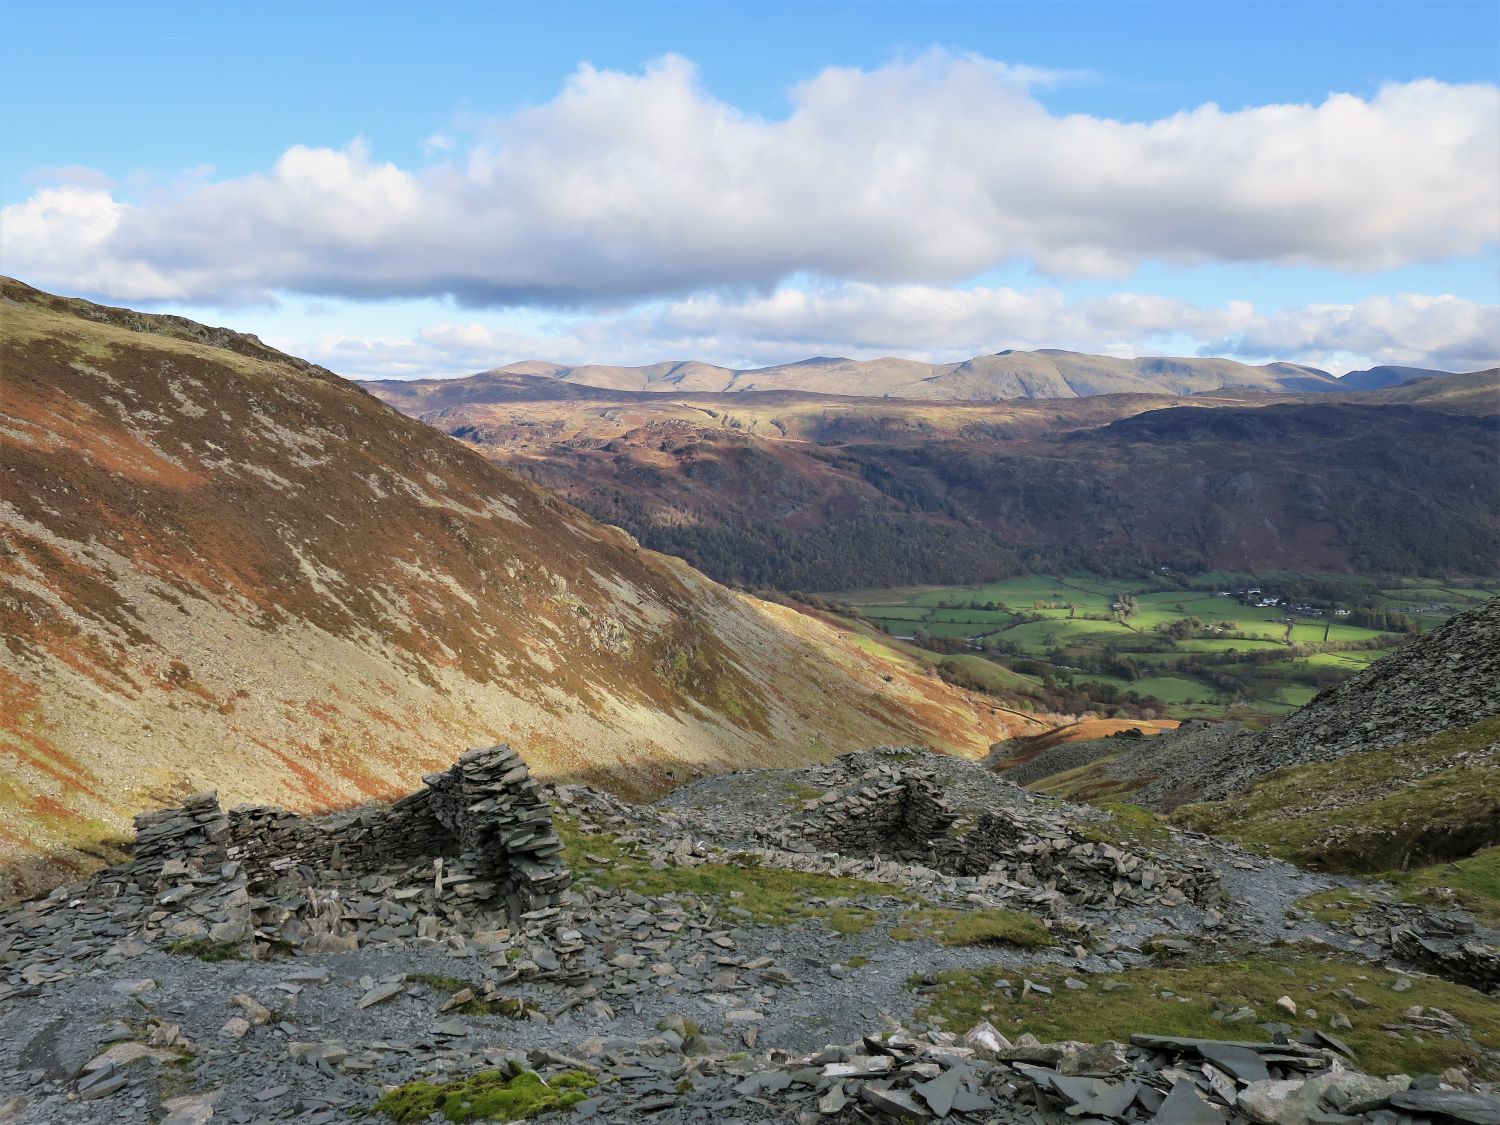 The village of Rosthwaite in Borrowdale from the ruined mine buildings
Thought to have been worked since the middle of the 18th century, Rigghead Quarries mined slate from the Kimberley band, which is the same slate band that had been worked at Yew Crags on the other side of the fell (High Scawdel). Rigg Head closed in 1945.
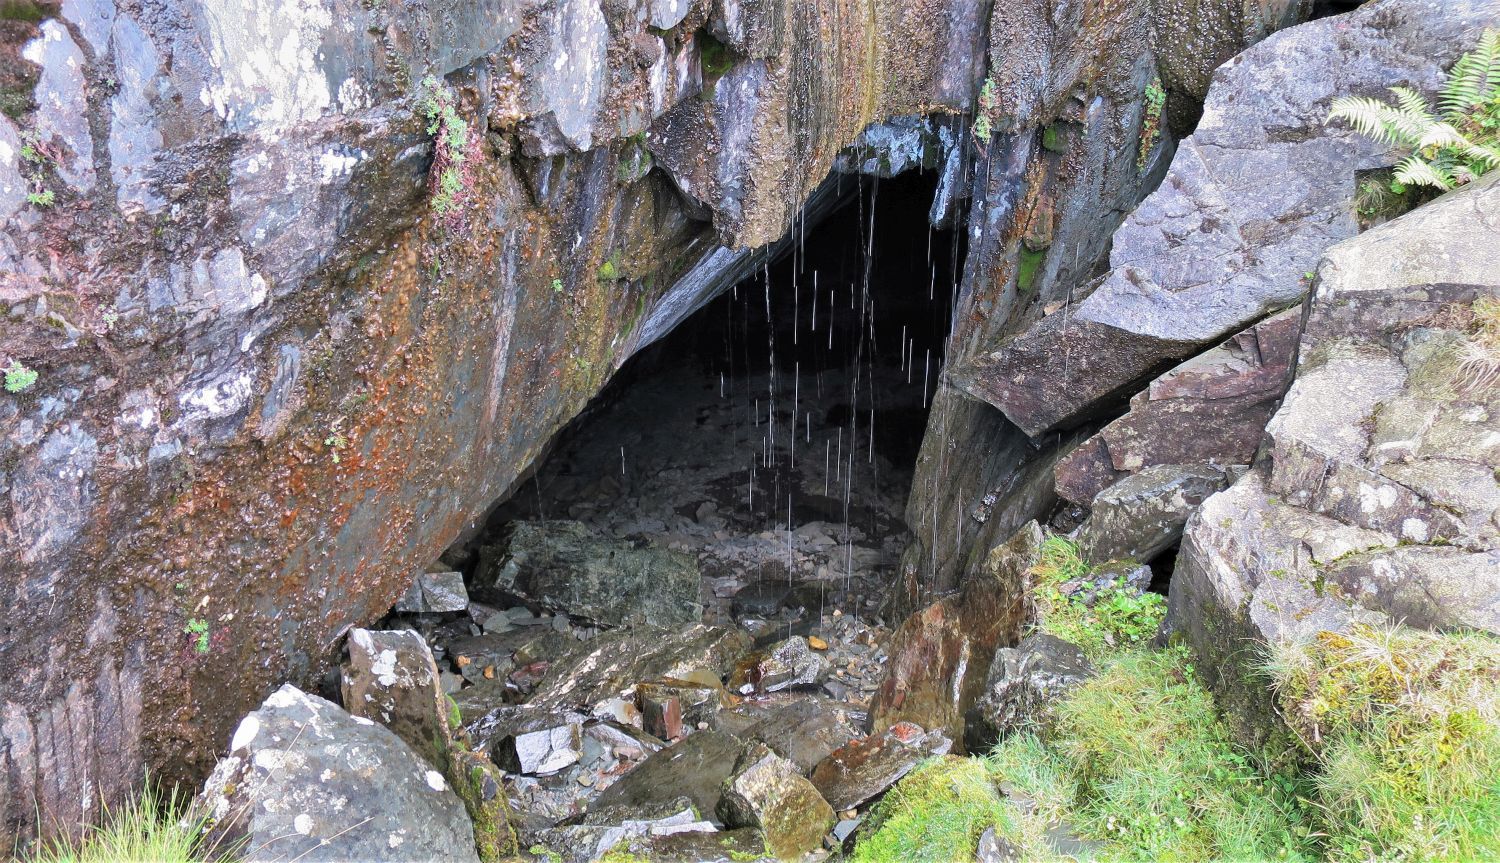 Mine adit of Rigghead Quarries
 Mine adit of Rigghead Quarries
There is much to explore around the quarries, but time is limited on this walk; a whole day could be spent searching among the many old buildings, adits, spoil heaps, and rusty pipes and rails.
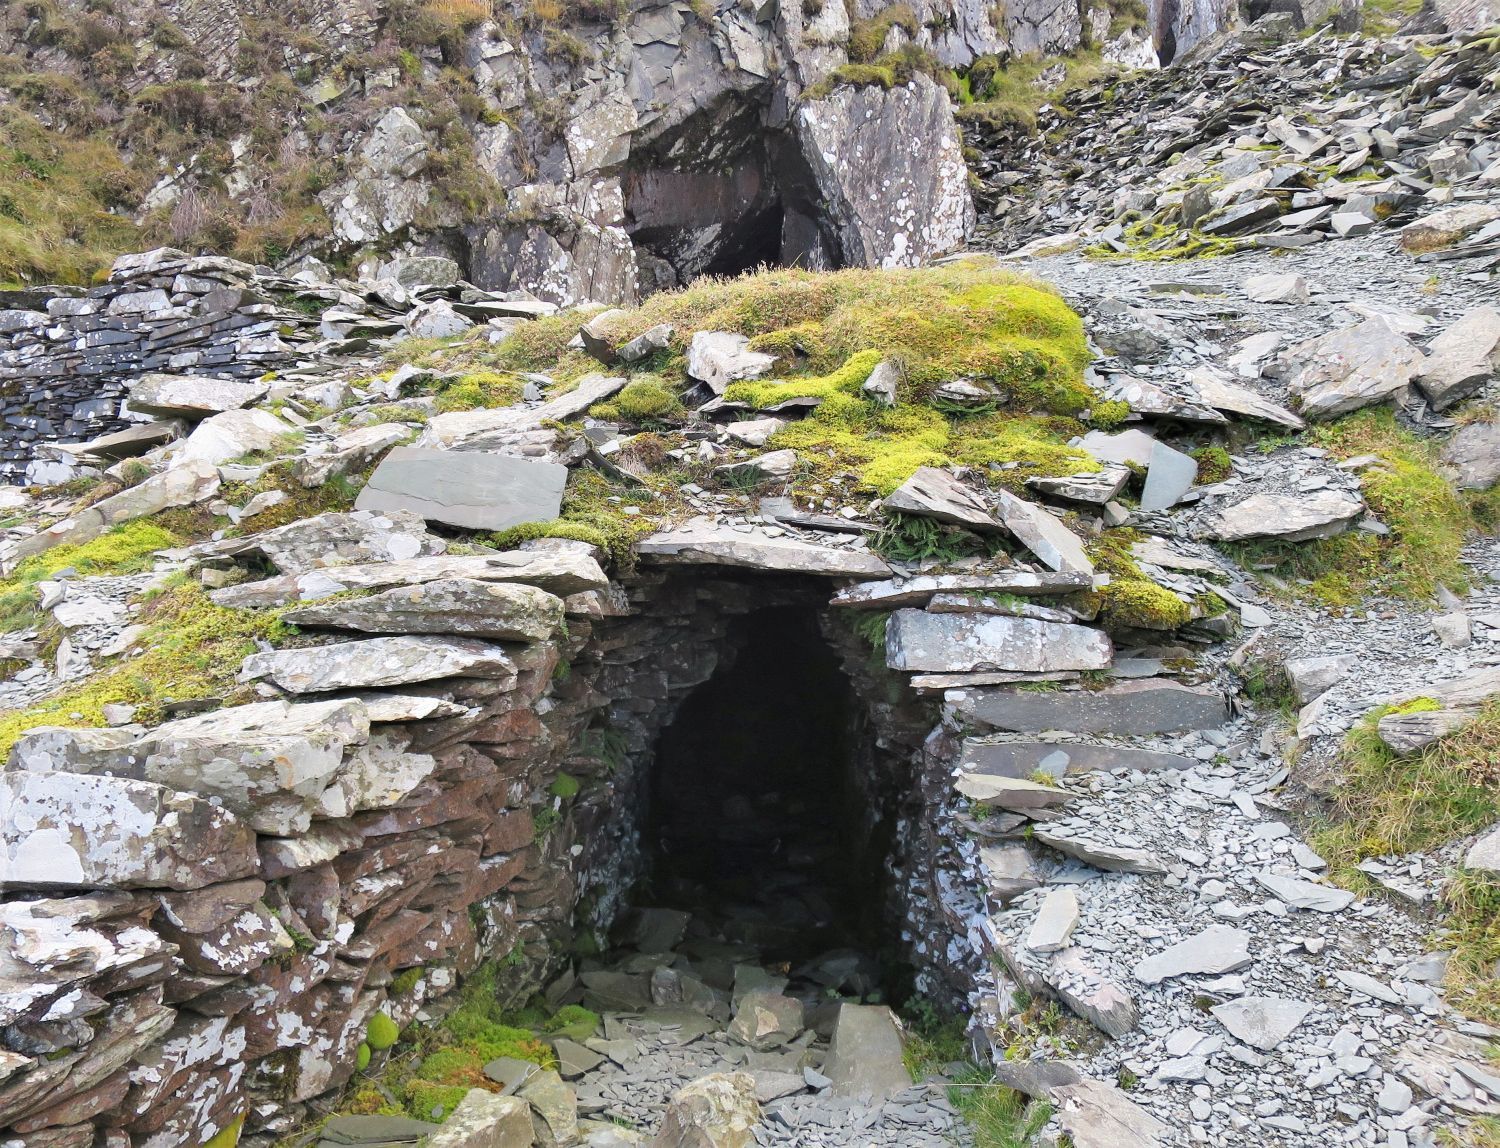
 Rigghead Hut and Tongue Gill from the upper quarries
Rather than continuing further into Tongue Gill, head slightly right and follow an old miners’ path towards Rigghead Hut and the lower quarries.
 The approach to Rigghead Hut
 The ‘old quarry road’ in Tongue Gill
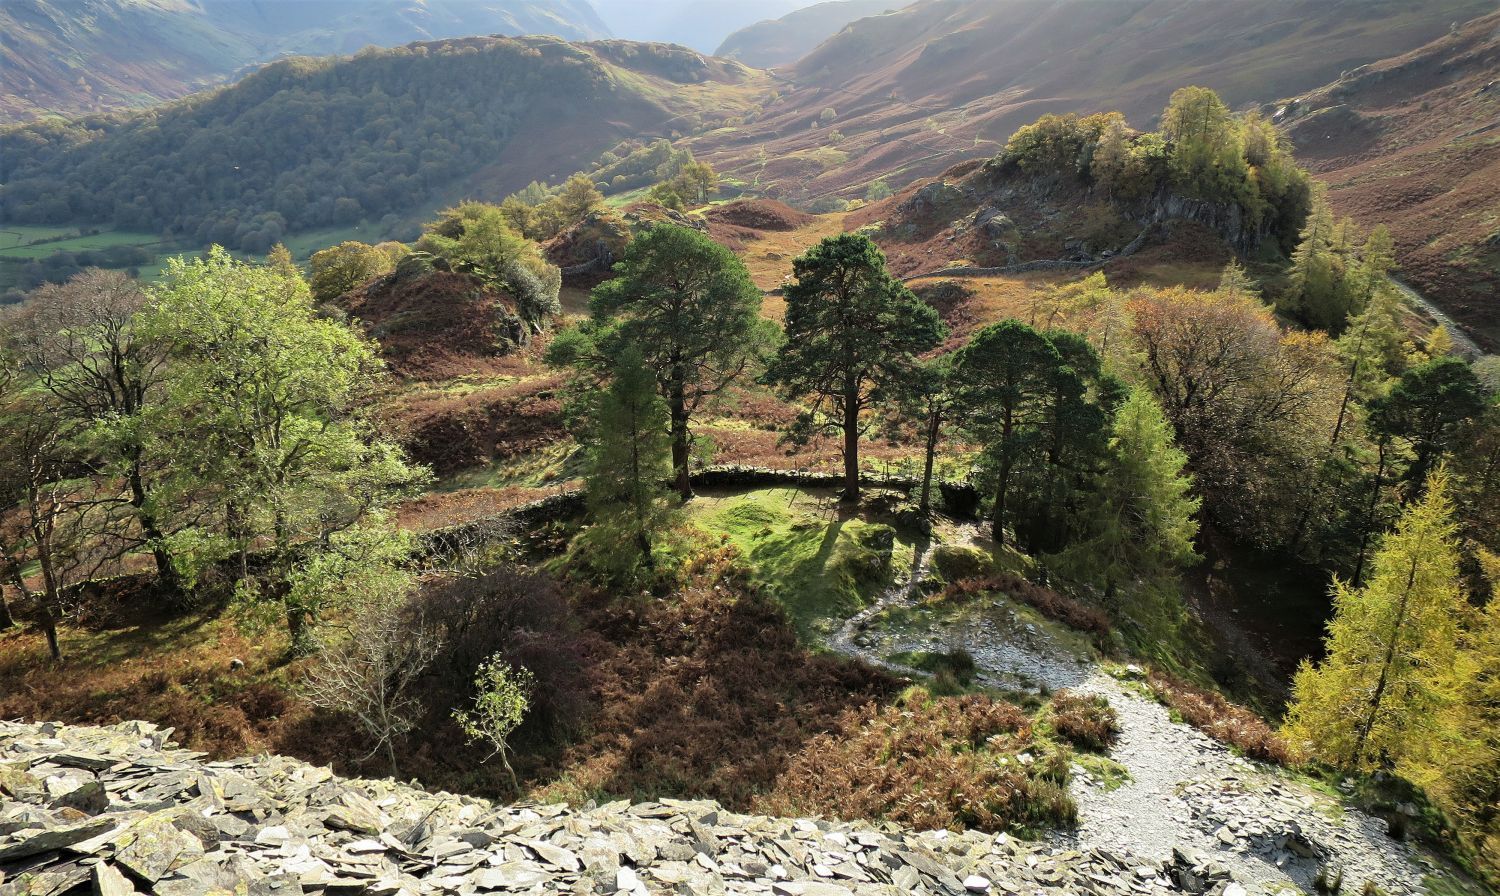
After leaving Rigghead Hut, it’s better to join the ‘old quarry road’ on the opposite side of Tongue Beck; the approach to Castle Crag via this old road is my favourite part of this walk, providing excellent views of Borrowdale and its side-valley of Stonethwaite.
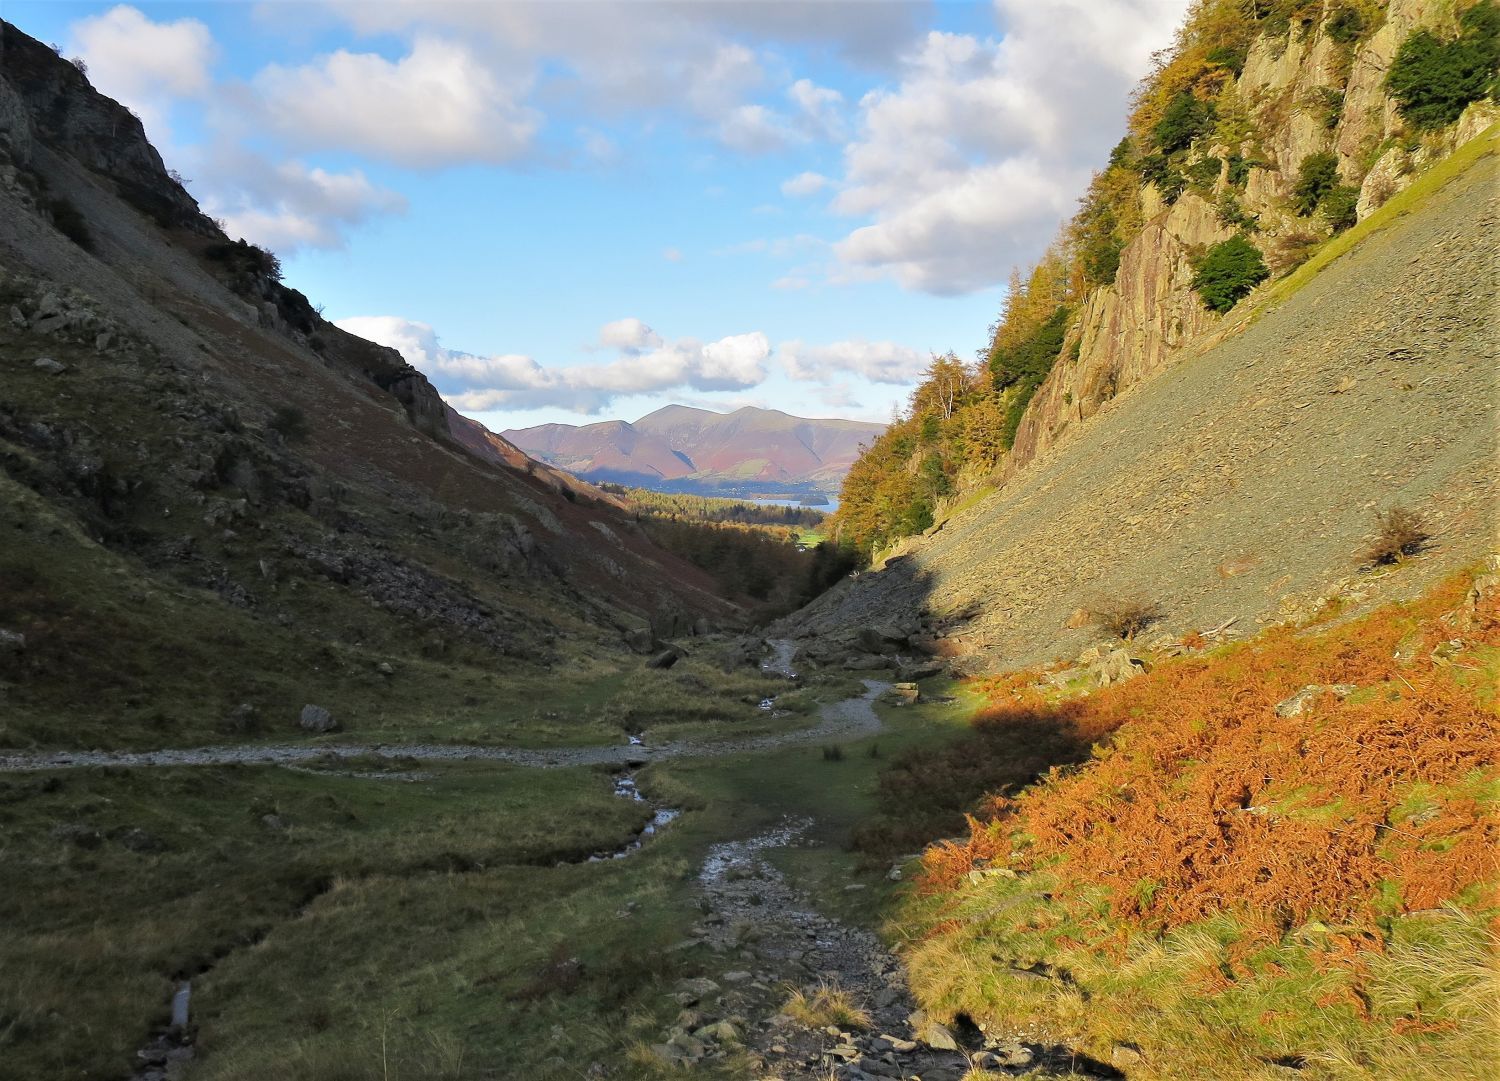
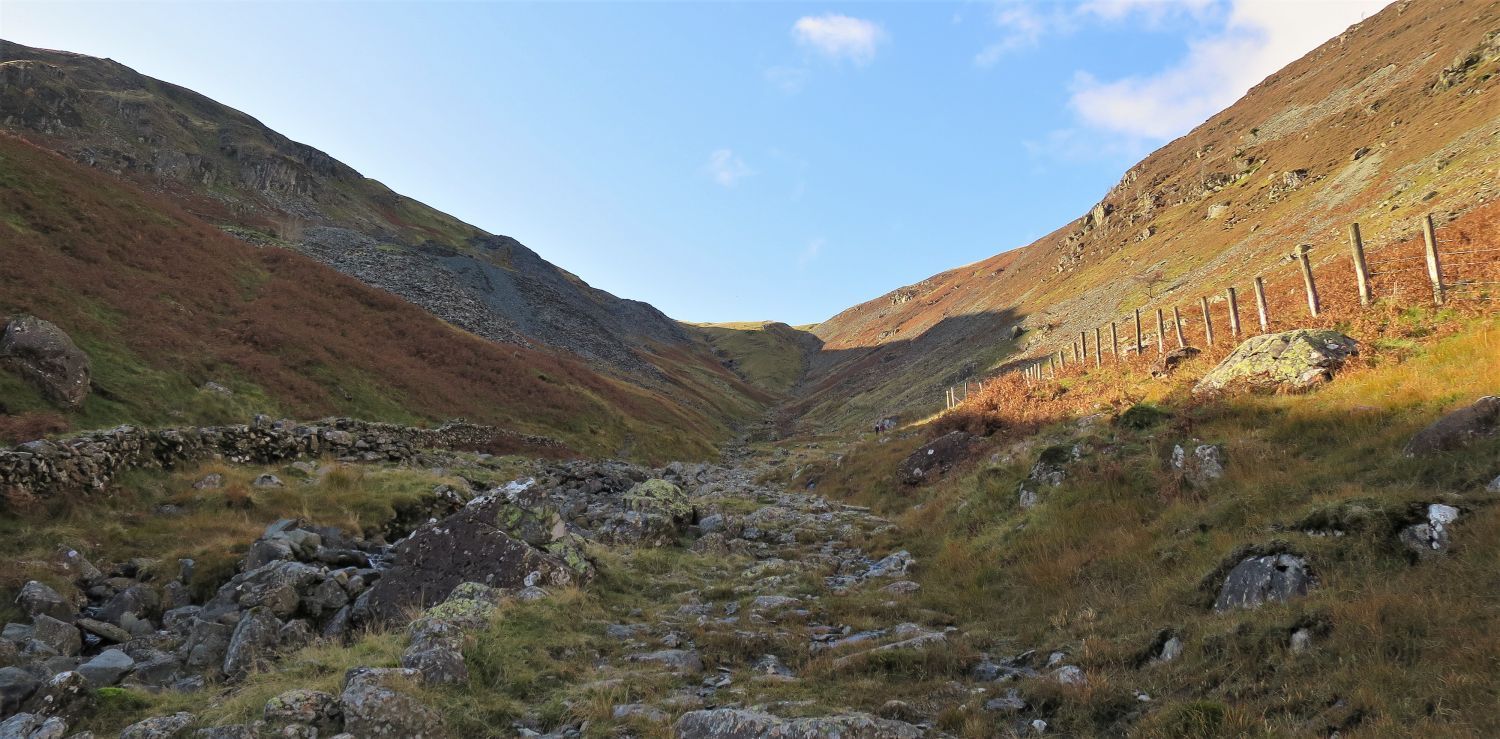 Looking back up Tongue Gill
“Tongue” refers to the grassy strip of ground at the head of the gill.
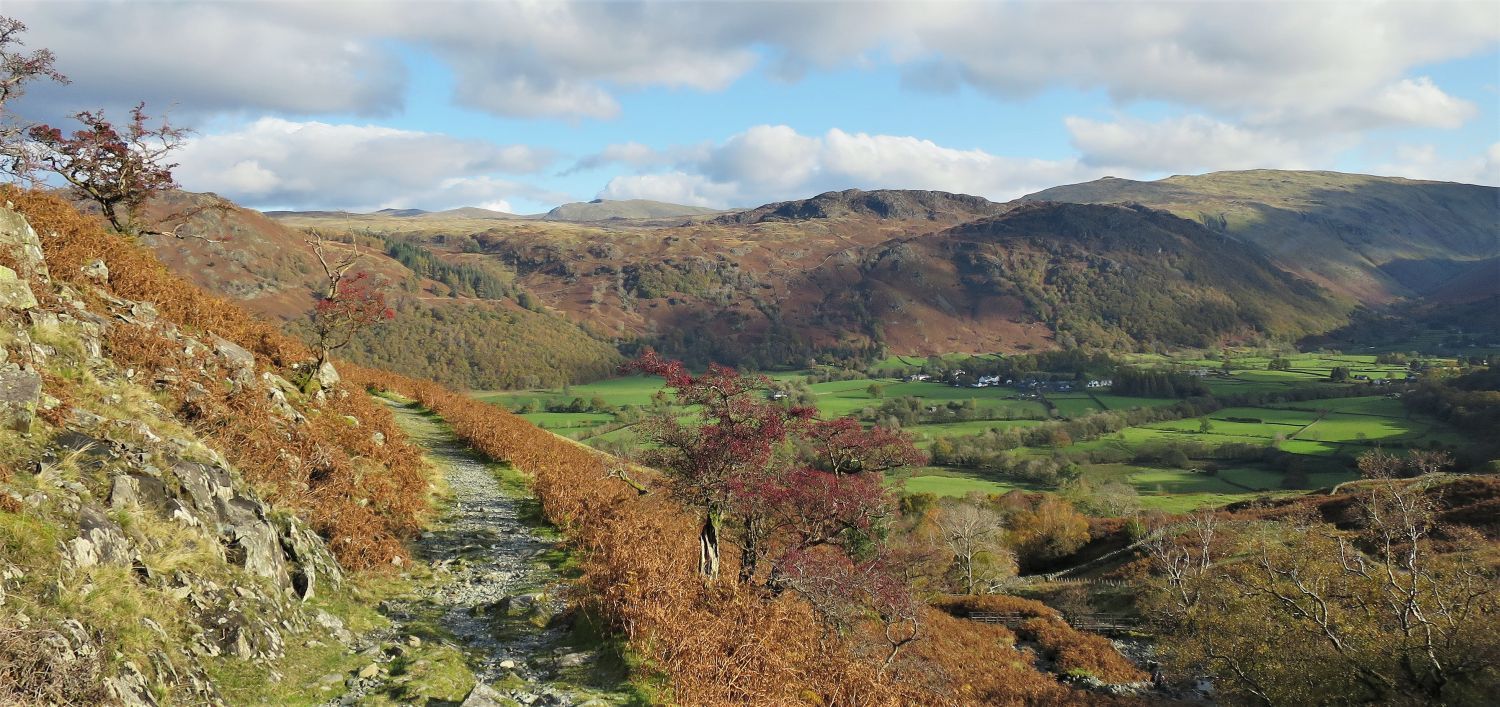 The village of Rosthwaite in Borrowdale from the ‘old quarry road’
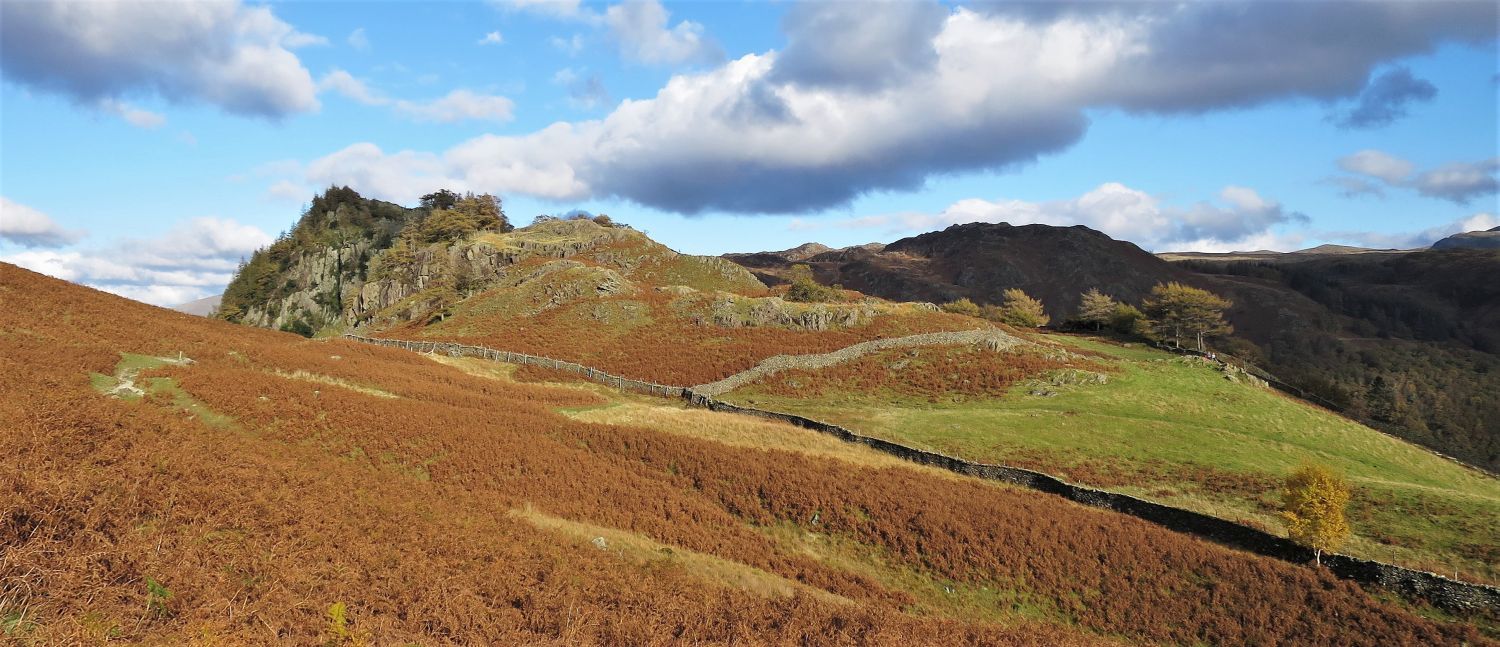 Castle Crag and Brund Fell from the approach to Castle Hawes
 Stonethwaite and Eagle Crag seen in the distance from the ‘old quarry road’
 Castle Crag from the head of Broadslack Gill (Castle Hawes)
Castle Hawes is a name that is now lost through time. The name “Hawes” is derived from the Old Norse word “hals”, meaning ‘neck’ or ‘pass between mountains’, and there are two other variants used in Lakeland: Hause and Haws.
Our final objective is Castle Crag; the gem of Borrowdale, and Lakeland at its best. A traverse path on the right provides a fine approach to Castle Crag.
 Book Six
The North Western Fells
Castle Crag 4
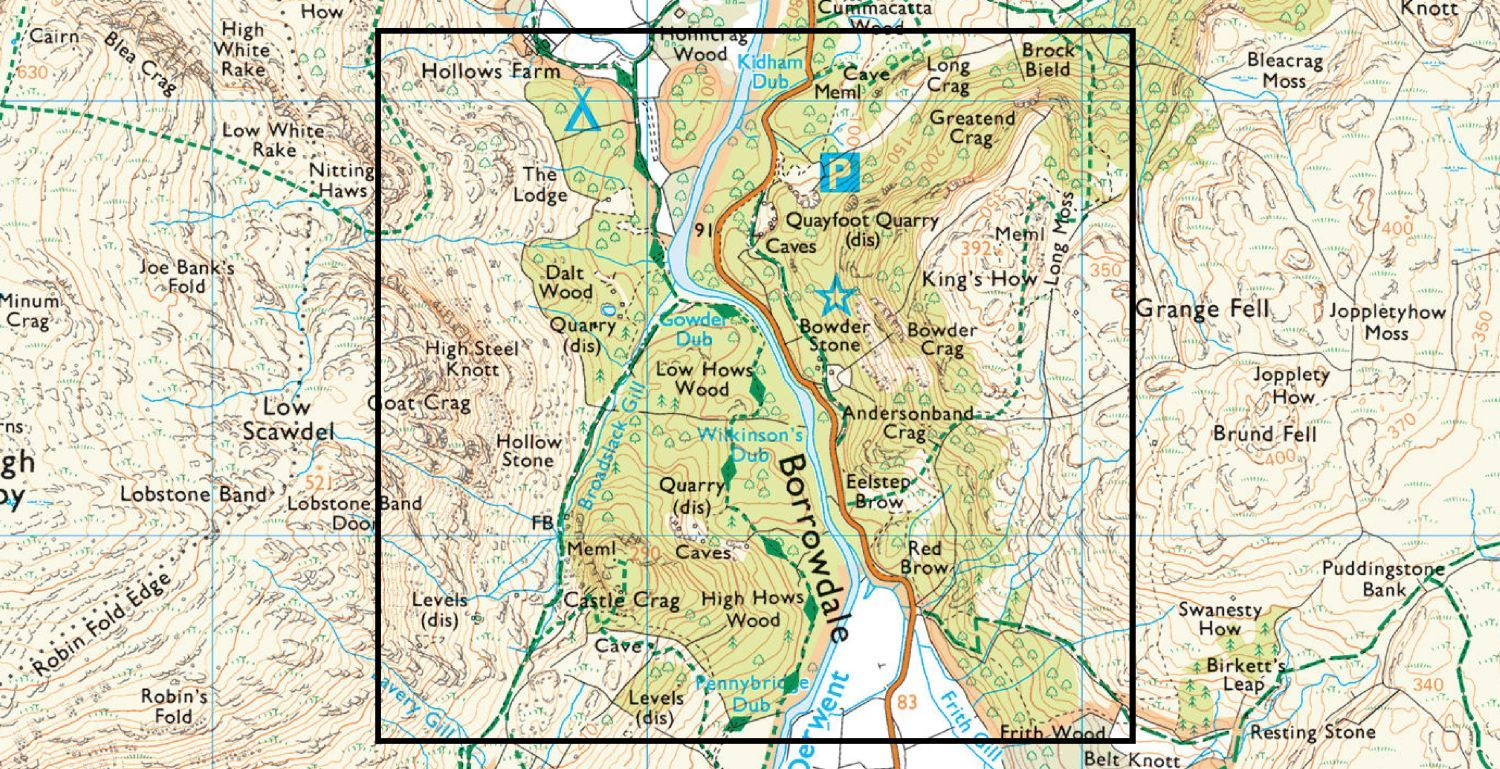
“Map”
“The thick line forming a square has a special significance. It encloses one mile of country containing no high mountain, no lake, no famous crag, no tarn, but, in the author’s humble submission, it encloses the loveliest square in Lakeland – the Jaws of Borrowdale.” Castle Crag 4
AW
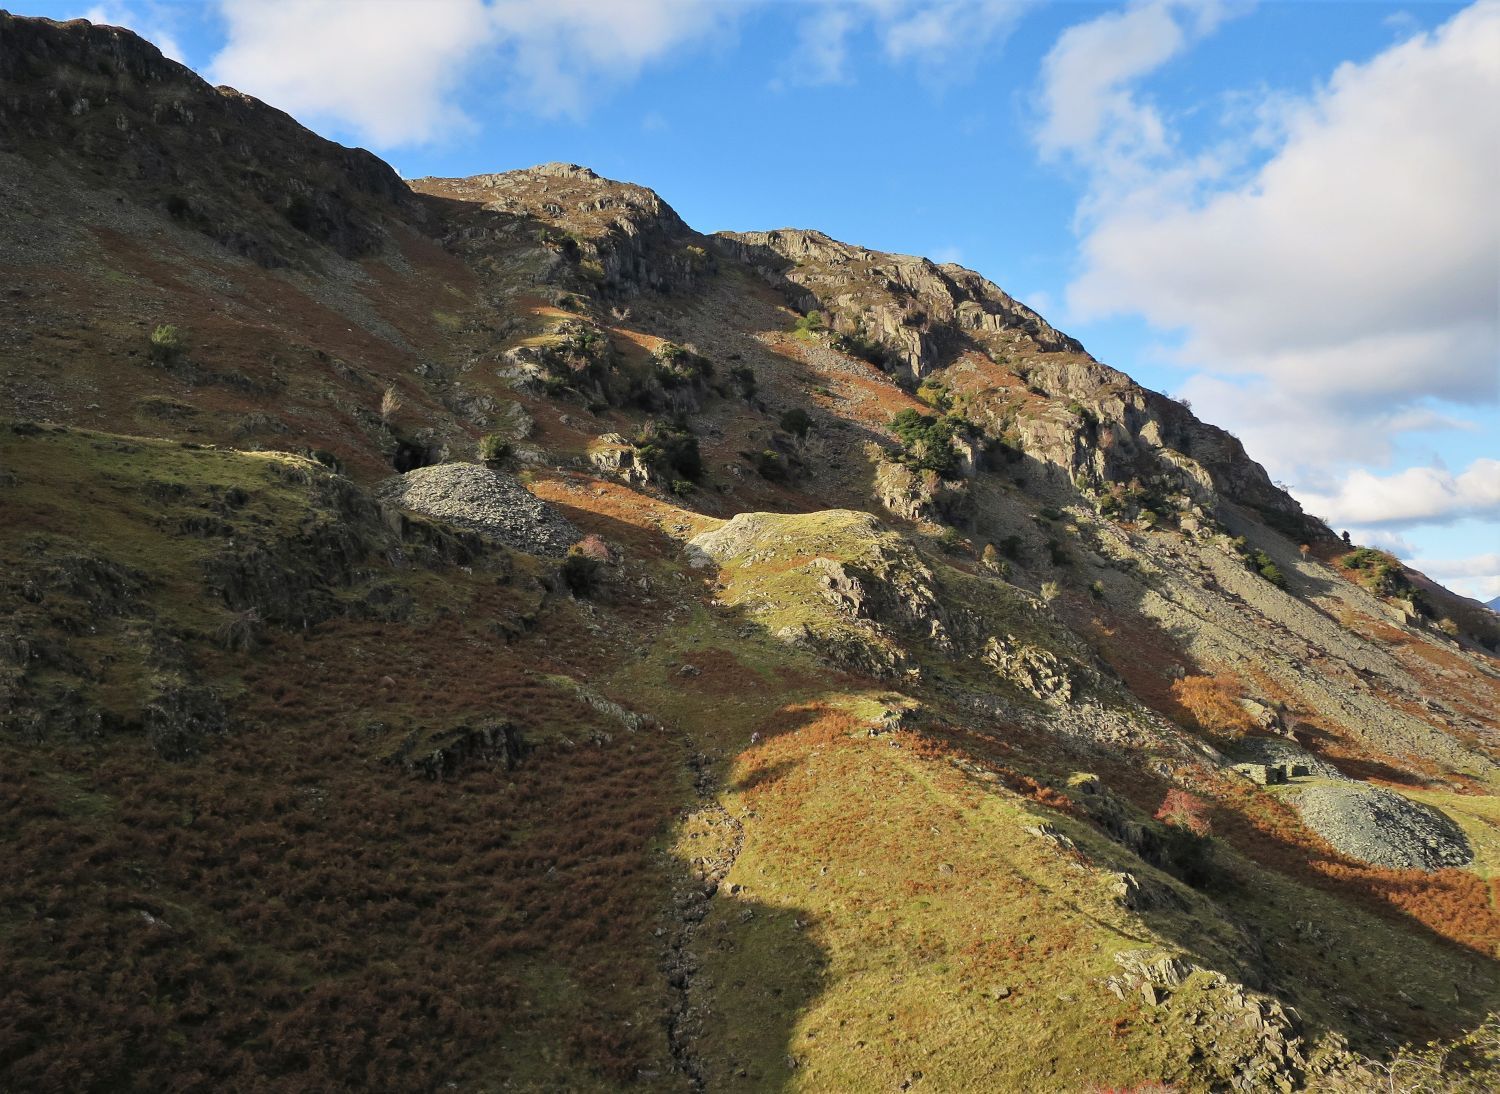 Old mine levels and spoil heaps below Lobstone Band
To our left, on the lower eastern flank of High Spy, there is much evidence of early slate mining.
 Broadslack Gill and Castle Crag
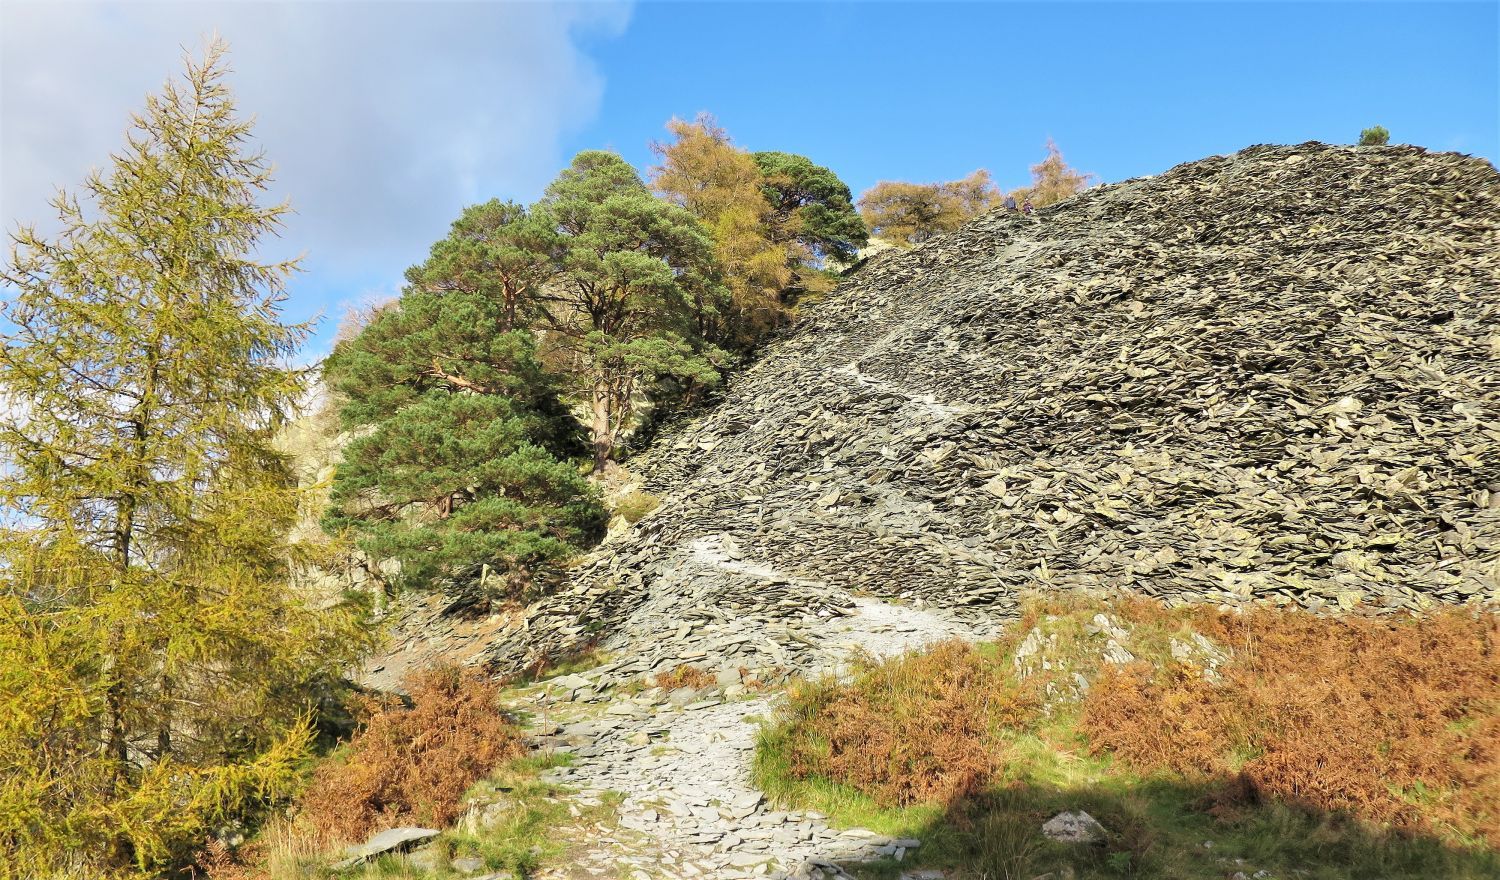 Castle Crag’s summit quarry spoil heap
“Now the spoil heap ahead is climbed by a zig-zag path carved in the naked stones, after which the way to the summit is clear.” Castle Crag 6
AW
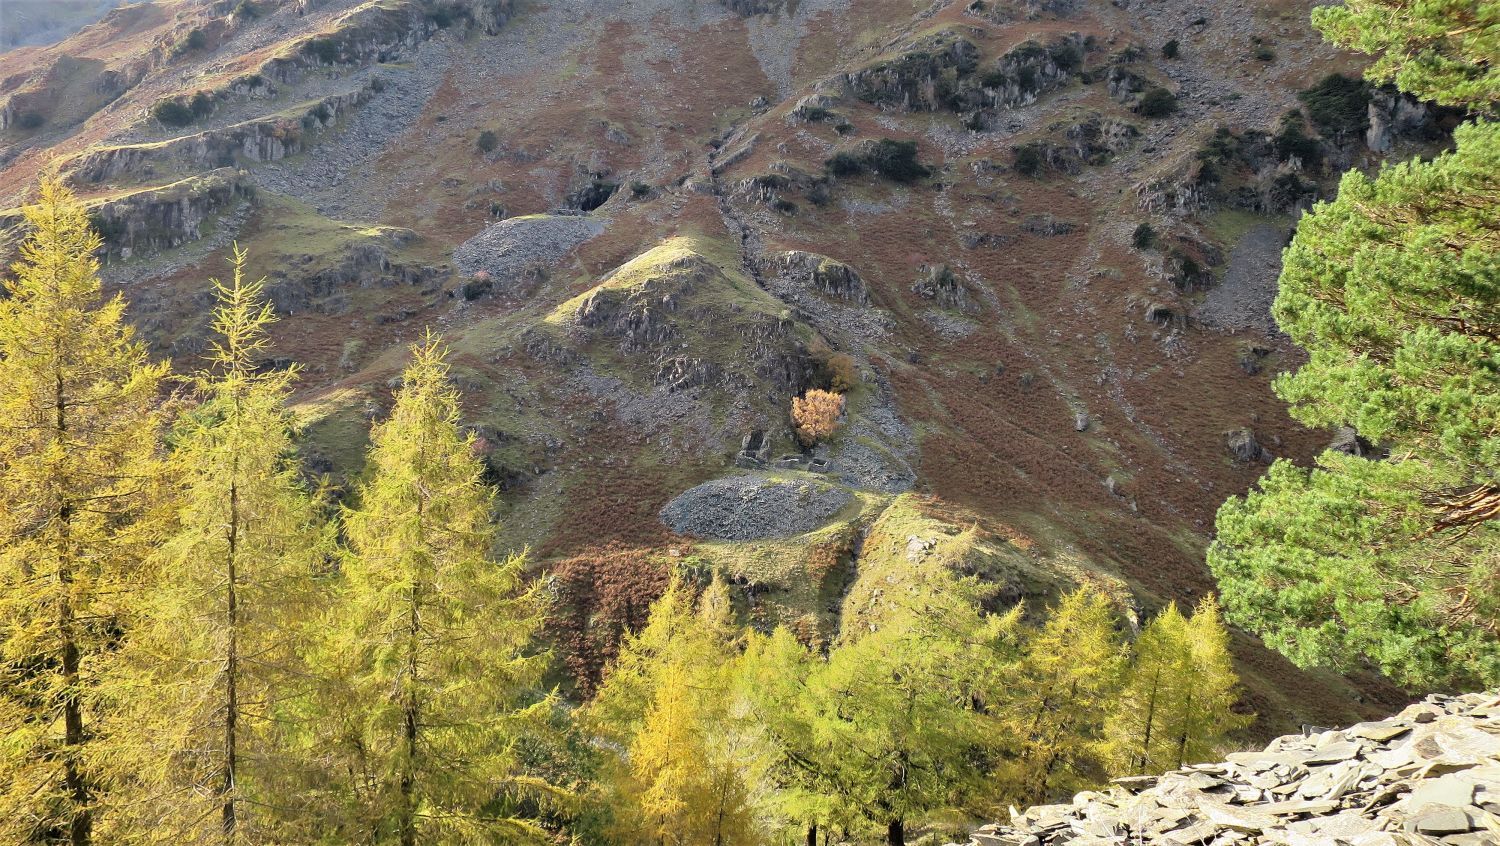 Looking across Broadslack Gill to the old mine levels and spoil heaps on High Spy
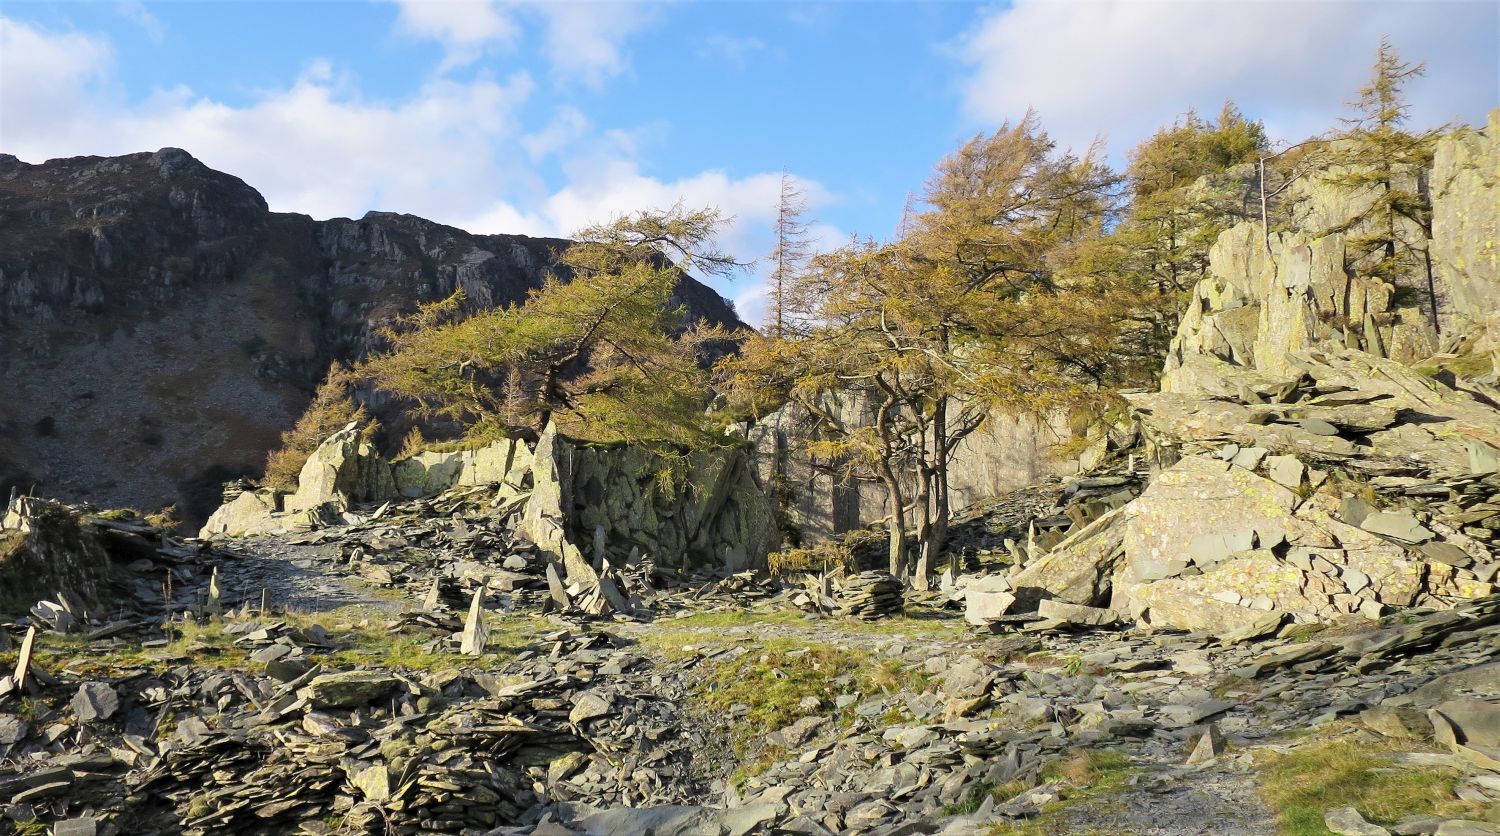 Castle Crag’s old summit quarry
“Authorities agree that there was once a fort here, probably early British, but it needs a trained eye to trace any earthworks – which, in any case, must have been severely disturbed by an old quarry that has cut a big slice out of the summit and, be it noted, constitutes an unprotected danger. Photographers (who have a habit of taking backwards steps when composing their pictures) should take care lest they suddenly vanish.” Castle Crag 7
AW
 The village of Rosthwaite and the River Derwent from Castle Crag
Towards the south-east, on the same level has the old quarry, a large cairn marks the place of one of the finest views in Lakeland.
 Book Six
The North Western Fells
Castle Crag 7
“The Summit”
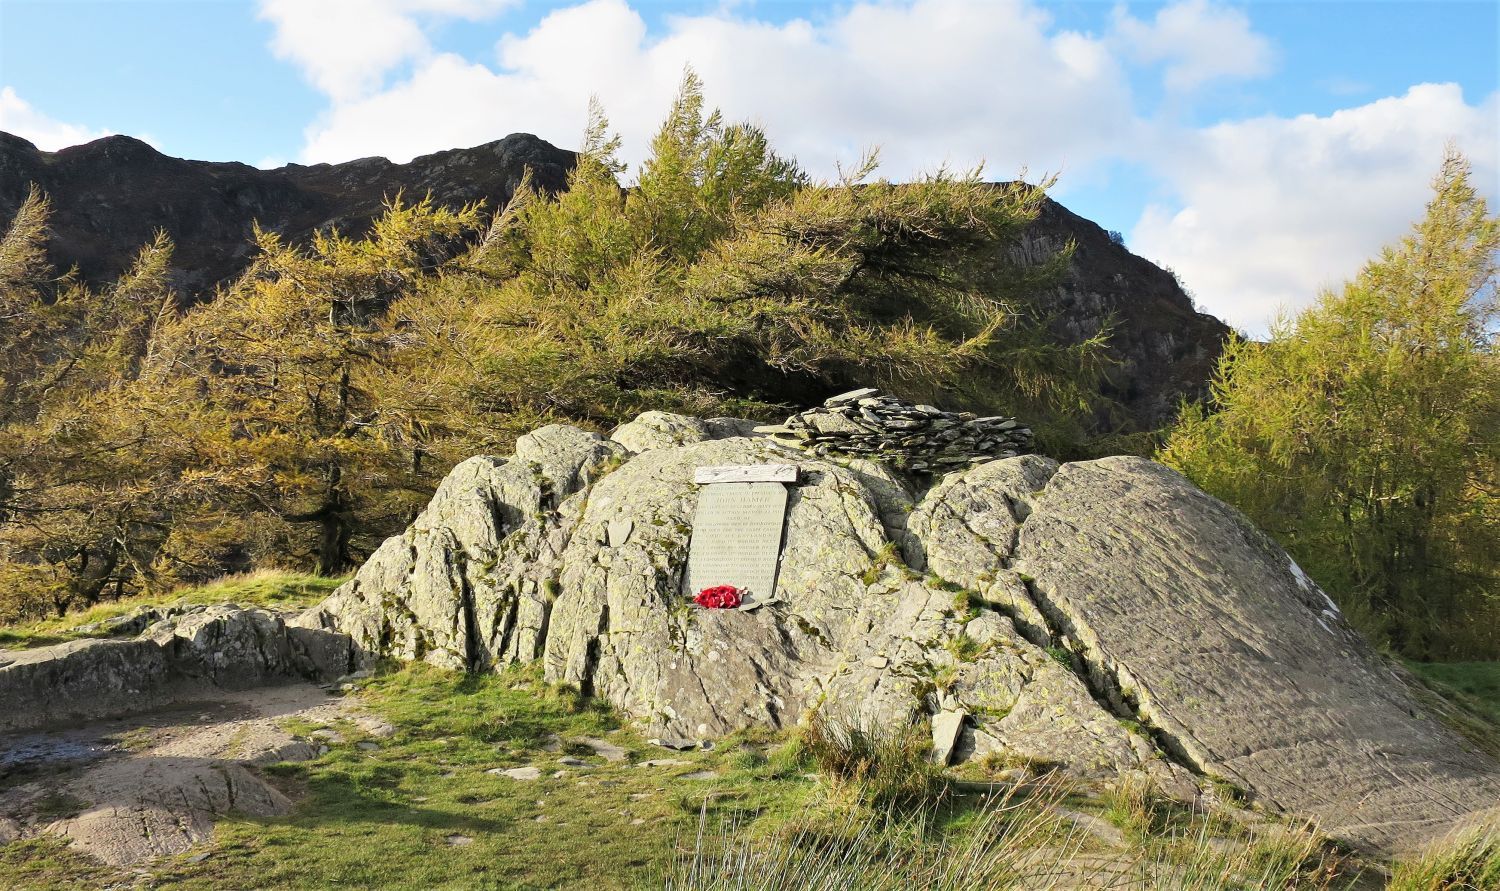
“The highest point is a boss of rock, and this is crowned by a low horseshoe-shaped wall, below which, set in the rock, is a commemorative tablet: a war memorial to the men of Borrowdale, effective and imaginative. Immediately to the west of the summit is a large tree that blocks out much of High Spy, and other specimens surround the perimeter.” Castle Crag 7
AW (revised by CJ)
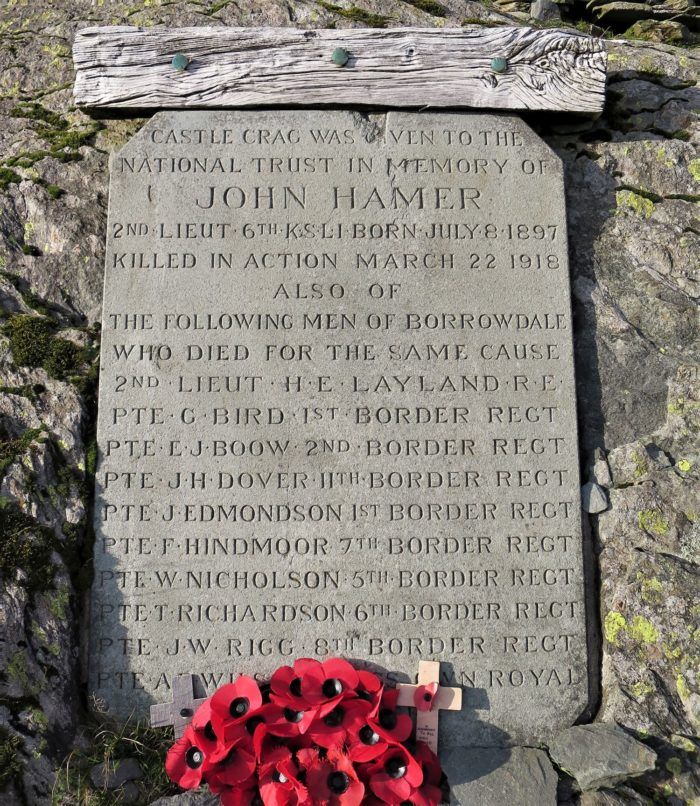 Castle Crag’s War Memorial
Castle Crag was given to the
National Trust in memory of
JOHN HAMER
2nd Lieut 6th KSLI Born July 8 1897
Killed in action March 22 1918
Also of
The following men of Borrowdale
Who died for the same cause
2nd Lieut H.E. Layland R.E.
Pte G. Bird 1st Border Regt
Pte E. J. Boow 2nd Border Regt
Pte J.H. Dover 11th Border Regt
Pte J. Edmondson 1st Border Regt
Pte F. Hindmoor 7th Border Regt
Pte W. Nicholson 5th Border Regt
Pte T. Richardson 6th Border Regt
Pte J.W. Rigg 8th Border Regt
Pte A.E. Wilson Kings Own Royal Lancasters
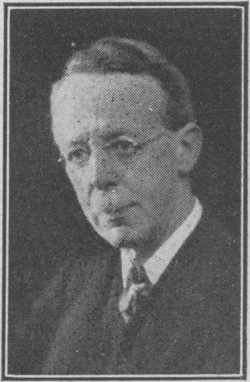 Sir William Heaton Hamer
William Heaton Hamer was born in Leeds in 1862, the eldest son of John Hamer, J.P. He was a scholar of Christ’s College, Cambridge, and graduated twelfth wrangler in 1882. He adopted the profession of medicine, and was Kirkes Scholar and Lawrence Scholar at St. Bartholomew’s Hospital Medical School. He qualified M.R.C.S. in 1886, and graduated M.B. in the following year. Hamer became a member of the Royal College of Physicians of London in 1889, and became a M.D. in 1890. He entered the medical service of the London County Council in 1892, and joined the British Medical Association in 1893. He was elected F.R.C.P. in 1895. In 1912 he succeeded Sir Shirley Murphy as Medical Officer of Health and School Medical Officer. Hamer was awarded the Bissett Hawkins medal in 1920, and received the honour of knighthood in January 1923. He retired on the 31st December 1925.
In 1918, Sir William and his wife, Agnes, purchased the land on top of Castle Crag for £150 from the executors of the Estate of Colonel CV Conway Gordon, as a memorial to their son, John, aged 20, who was killed in France during the First World War in March 1918. In 1920, William and Agnes handed over the land to the National Trust, with a request that a plaque affixed to the summit rock on Castle Crag to be solely in memory of their son. However, shortly before his death on 28th May 1920, Canon Hardwicke Drummond Rawnsley, one of the founder members of the National Trust, suggested that the dedication should also include the ten men of Borrowdale who also died in the First World War. Canon Rawnsley was also Chaplain to the King and Chaplain to the Border Regiment Territorials (and the army rank of Colonel). The plaque, made from local green slate, was erected on 11th June 1921.
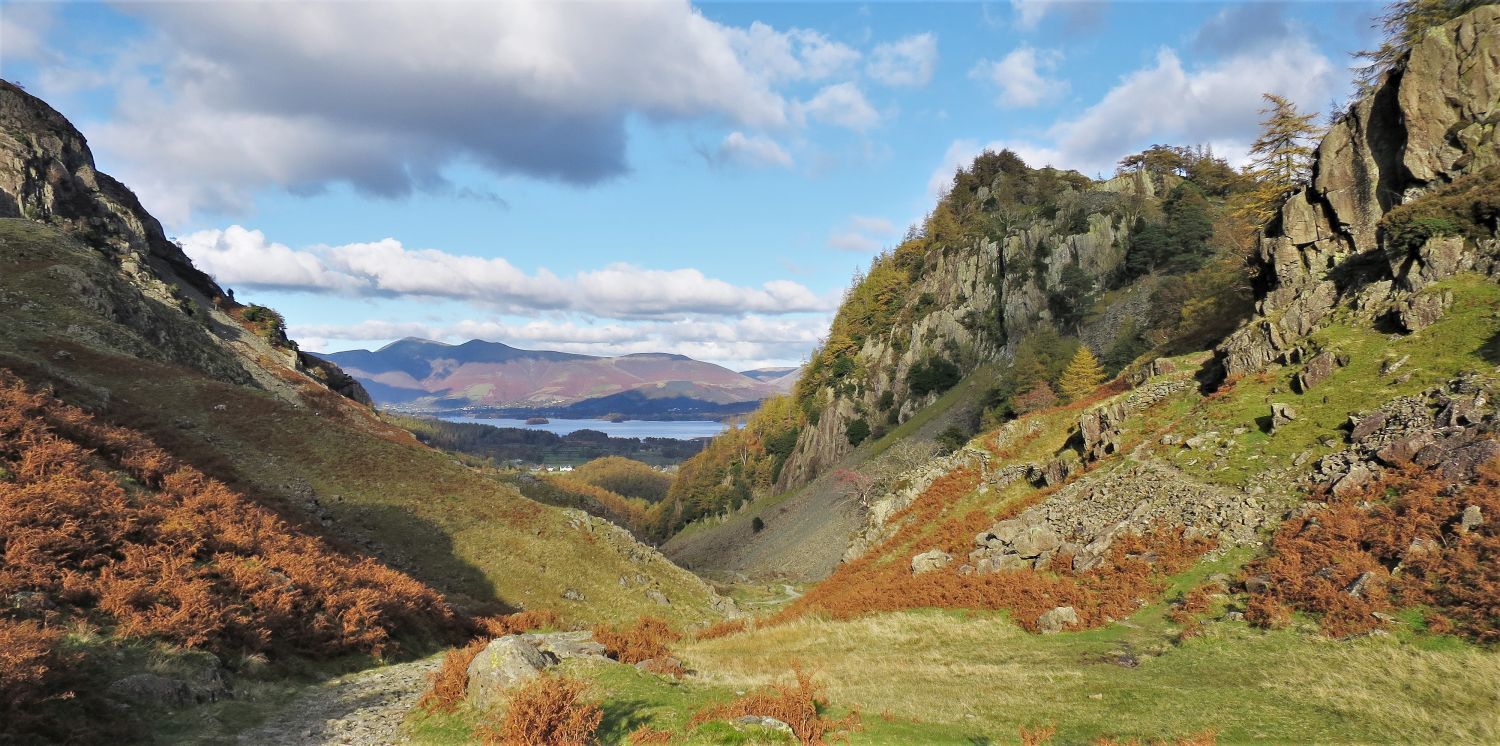
 The Northern Fells and Derwent Water from the summit of Castle Crag
“The view is circumscribed but is open to the north, where Derwent Water, backed by Skiddaw, makes a fine scene.” Castle Crag 8
AW
 The view from the summit quarry spoil heap
From the base of the spoil heap, head right and follow a small track down towards Broadslack Gill.
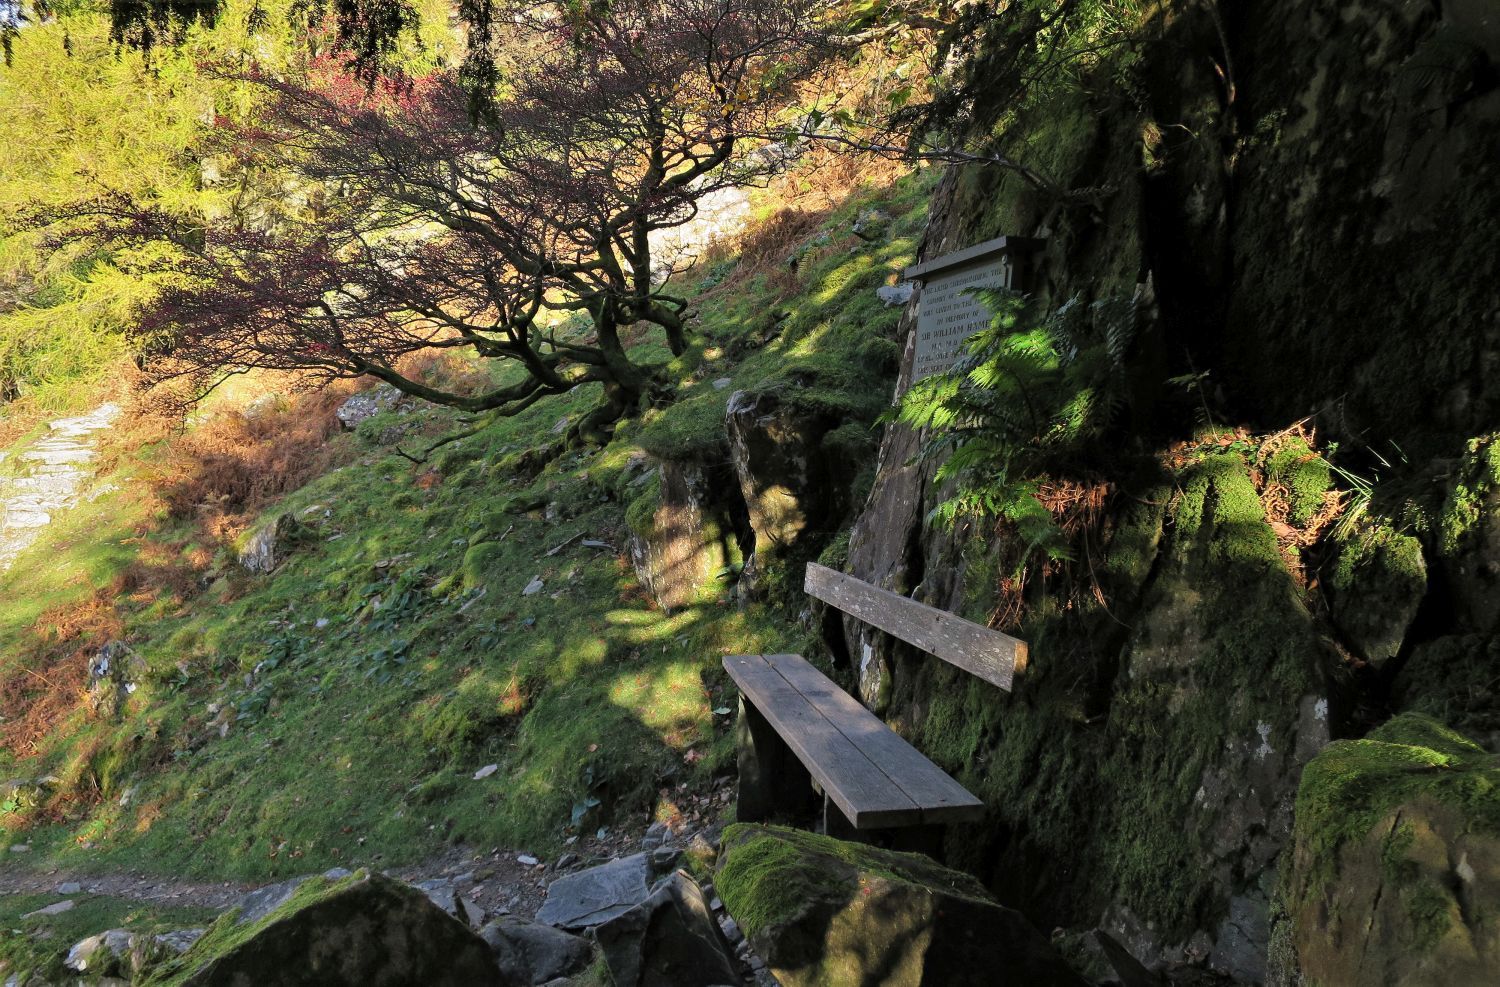 The Sir William Hamer Memorial
The land surrounding the summit of Castle Crag
was given to the nation in memory of
SIR WILLIAM HAMER M.A. M.D. F.R.C.P.
by his wife AGNES whom this seat commemorates
1959
Sir William Hamer died at the age of seventy-four years on the 7th July 1936. In 1938, acting on behalf of Agnes, Samuel Hamer asked William Heelis, the husband of Beatrix Potter, to seek the possibility of purchasing the wooded slopes of Castle Crag. As a result of the purchase, the 23 acre Hows Wood was given to the National Trust by the family in memory of Sir William Hamer.
William and Agnes lived at 55 Dartmouth Park Hill, London. I don’t know of any other connection the family had with the Lake District, either by owning any land or property in the area, however, William’s brother, Samuel Hamer, was the secretary of the National Trust from 1911 to 1933, and the family clearly had a fondness for Castle Crag and the surrounding area.
 The Northern Fells seen from Broadslack Gill
 King’s How from Gowder Dub in the River Derwent
Thank you for visiting.
Richard Jennings