A very rewarding winter walk from Grasmere. During the winter months, the village of Grasmere is a good place to begin a walk, especially any routes heading westerly or northerly; the low-lying sun takes a while to start its day, but the wide open vale warms up much earlier than some of the narrower valleys. With the sun on our backs we follow Far Easedale Gill to its upper waterfalls, and then return back to Grasmere via the mile-long ridge that includes Calf Crag, Gibson Knott and Helm Crag.
GPX Route: Download
PDF Map: Download
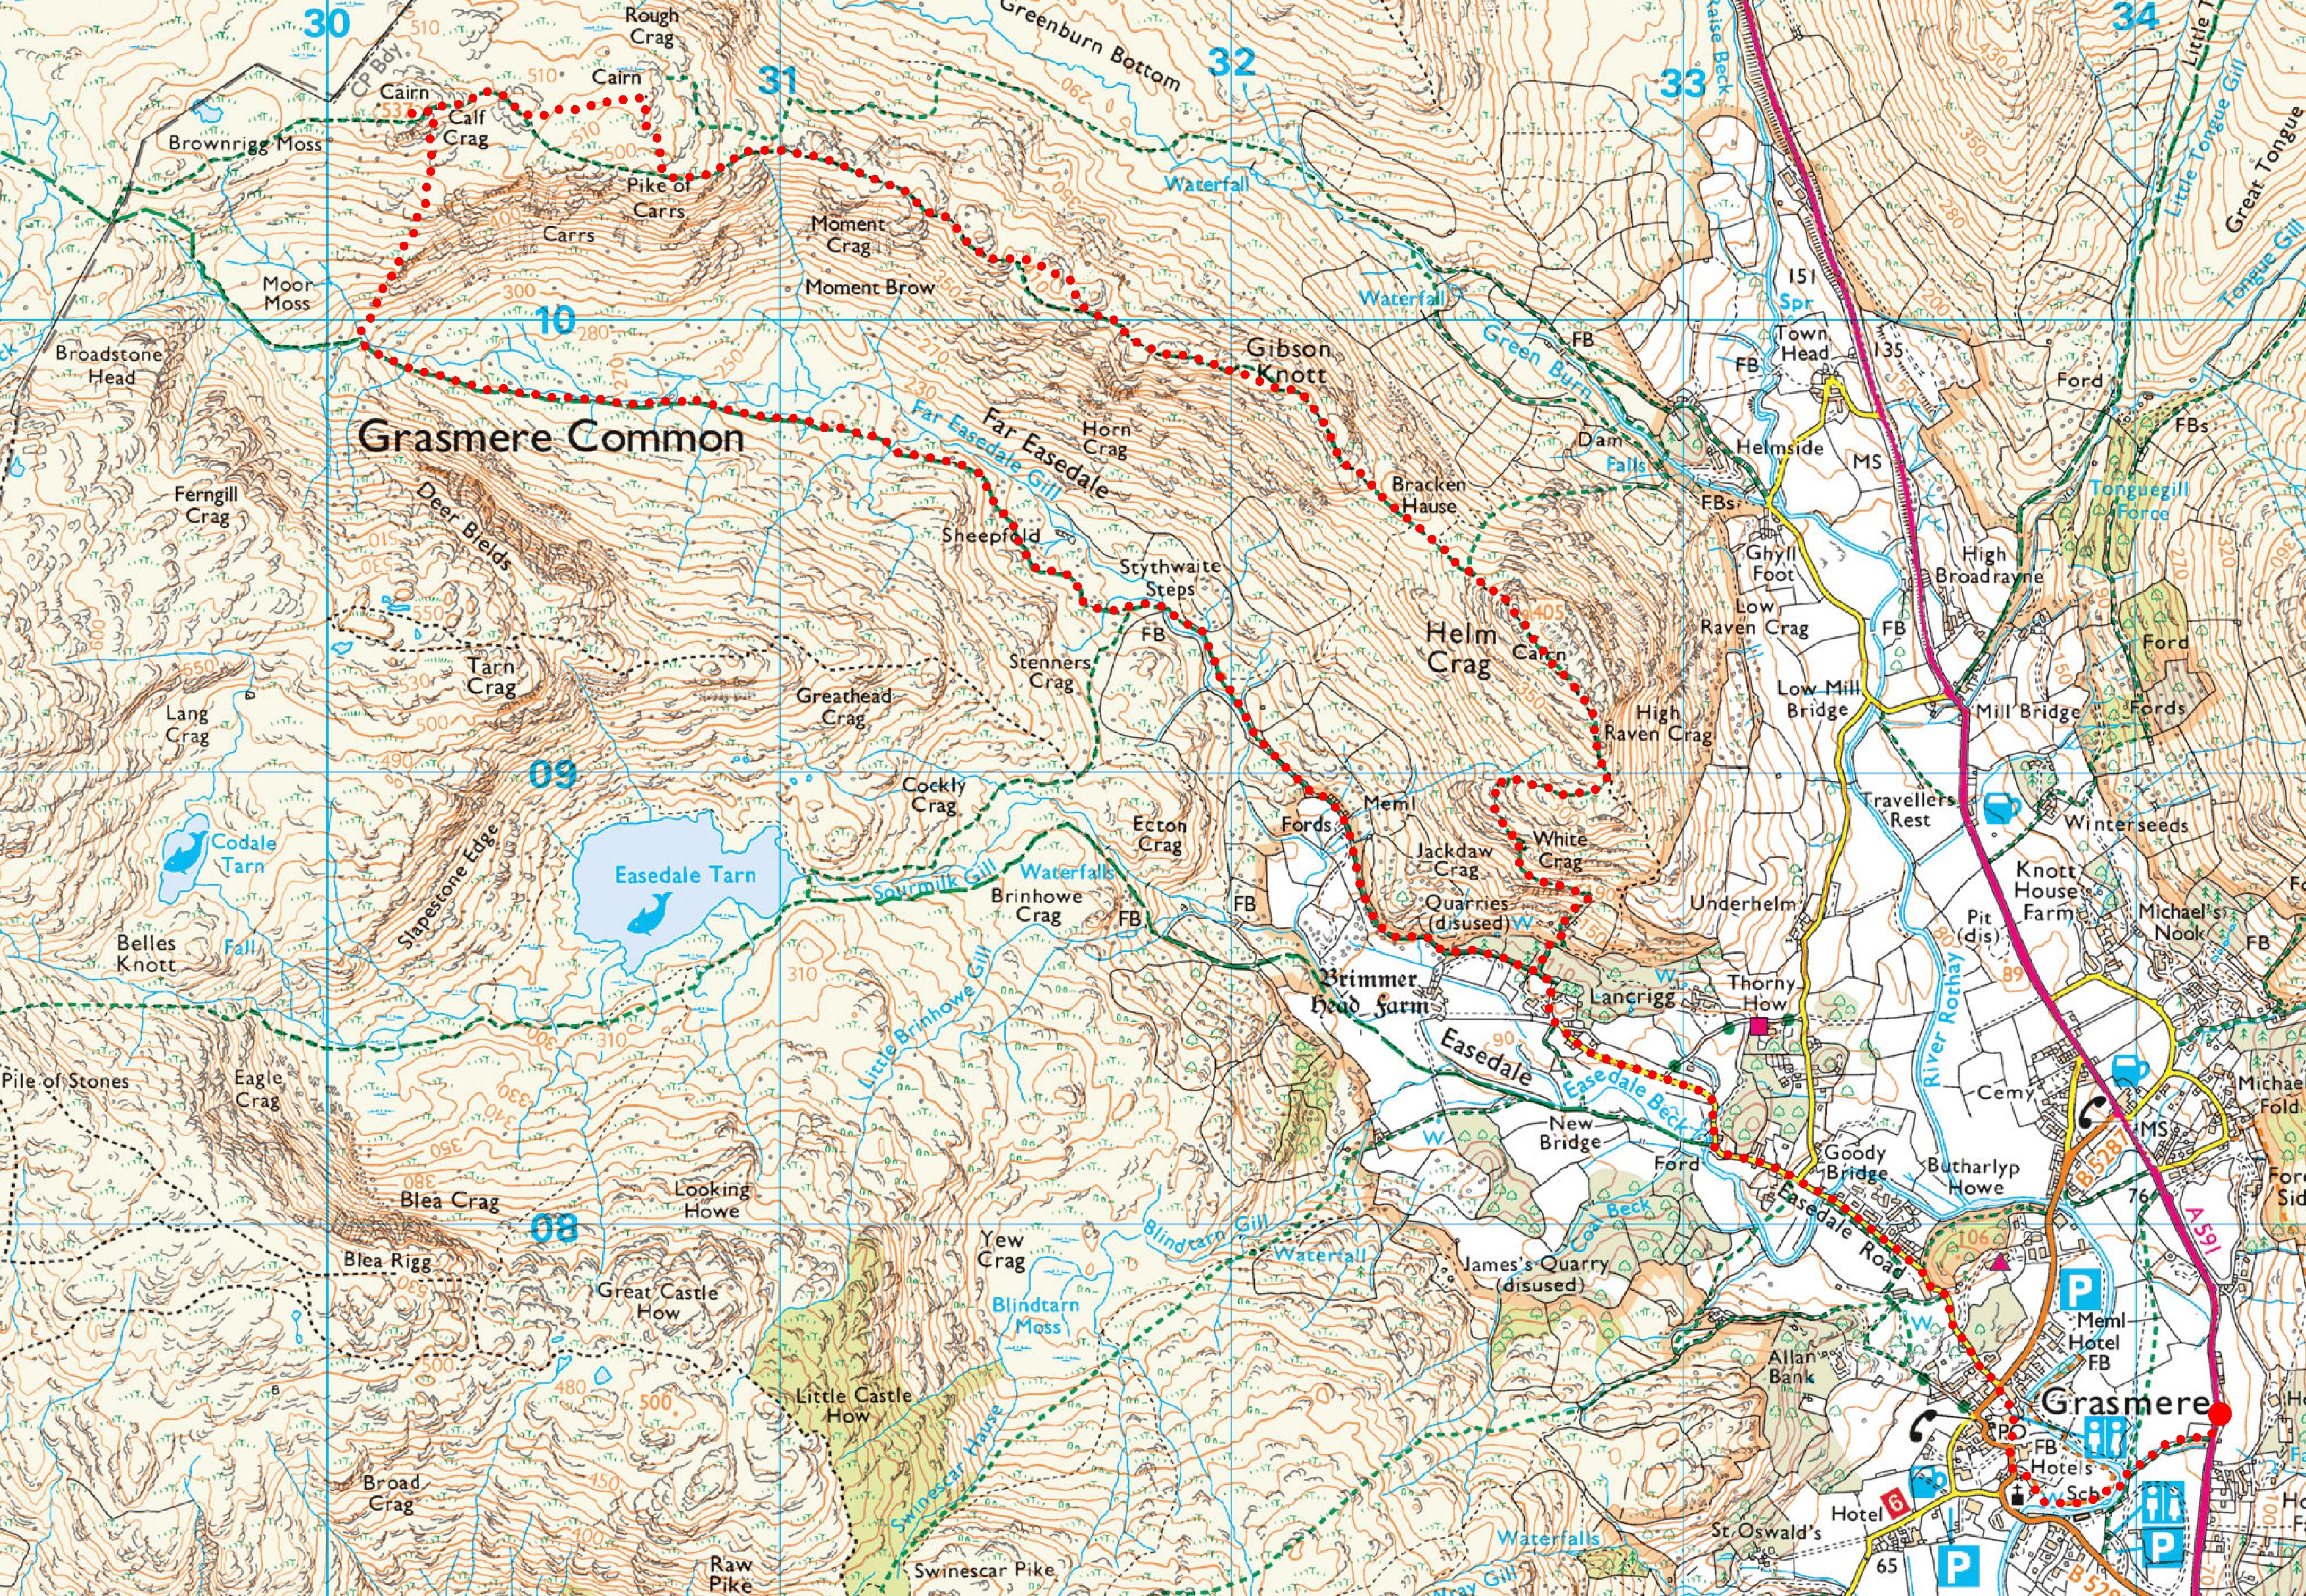
Grasmere > Easedale Road > Easedale > Brimmer Head > High Easedale > Stythwaite Steps > Far Easedale > Carrs > Calf Crag > Rough Crag > Pike of Carrs > Moment Brow > Gibson Knott > Bracken Hause > Helm Crag > Easedale > Grasmere
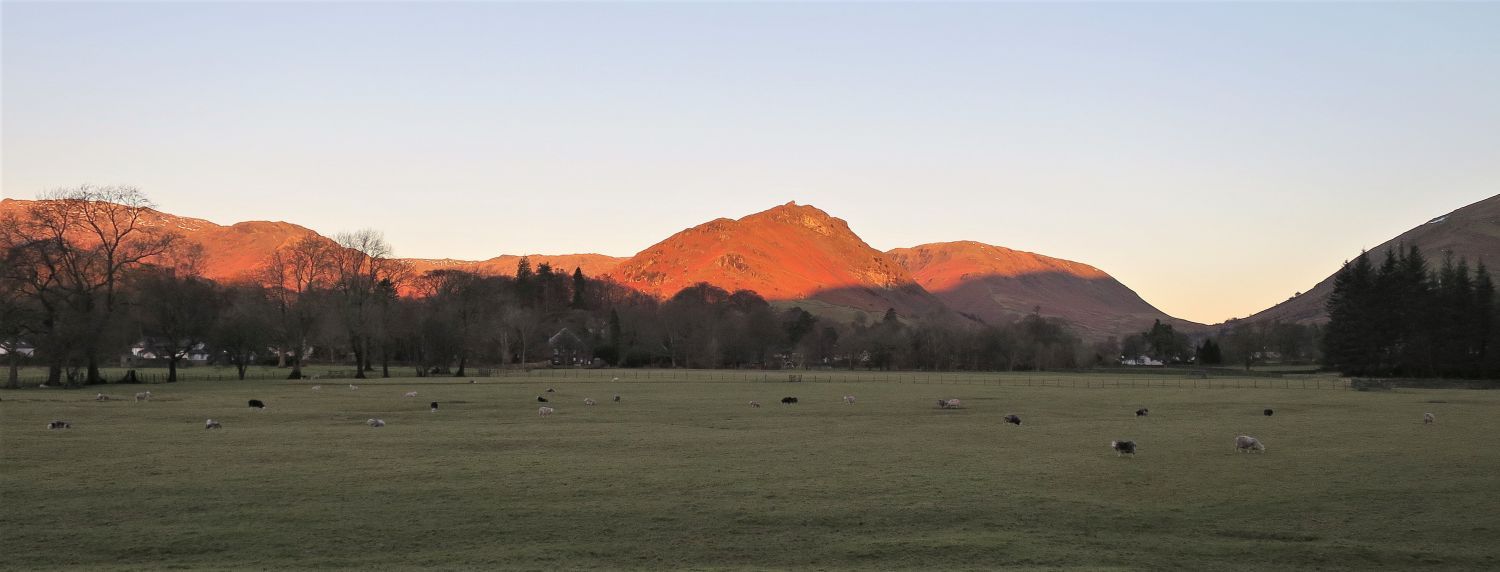 Helm Crag seen over the village of Grasmere
We start our walk from the large lay-by on the A591, just on the outside of the village, where free parking is provided. Arrive early though as it soon fills up.
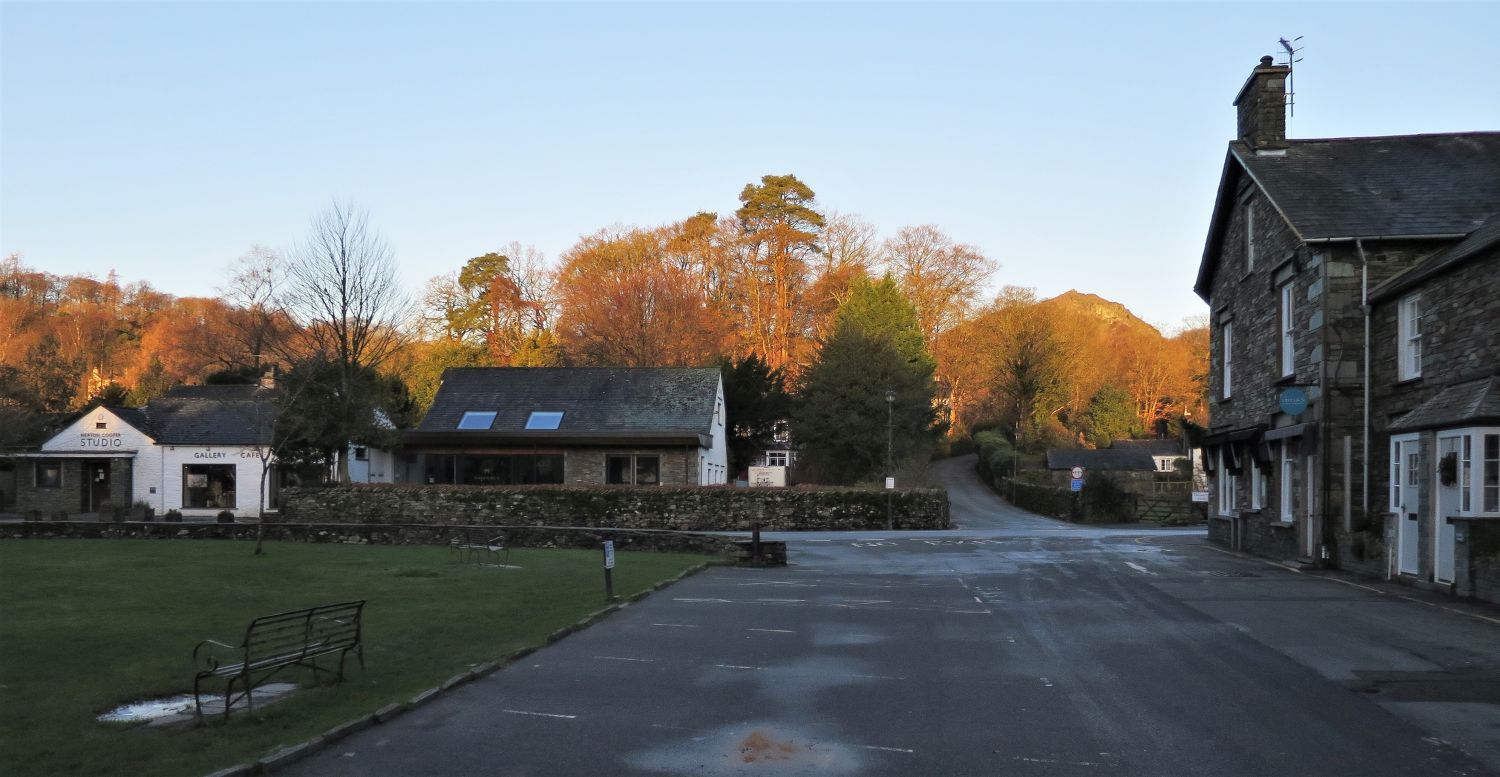 The village of Grasmere
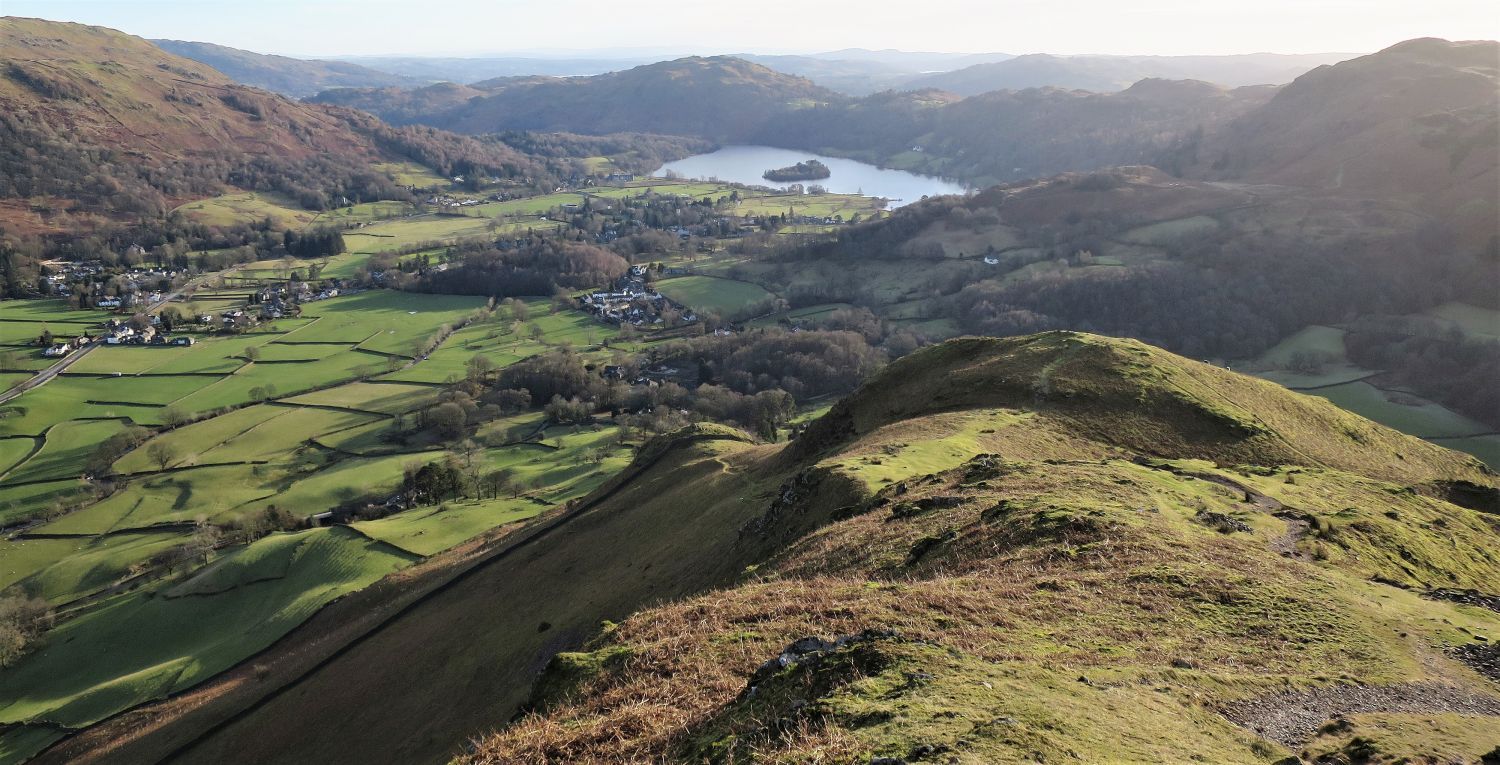
Morning light approaching a sleeping Grasmere. Helm Crag, our last fell to climb on this walk, is seen on the right over Easedale Road, which we follow into the heart of the valley.
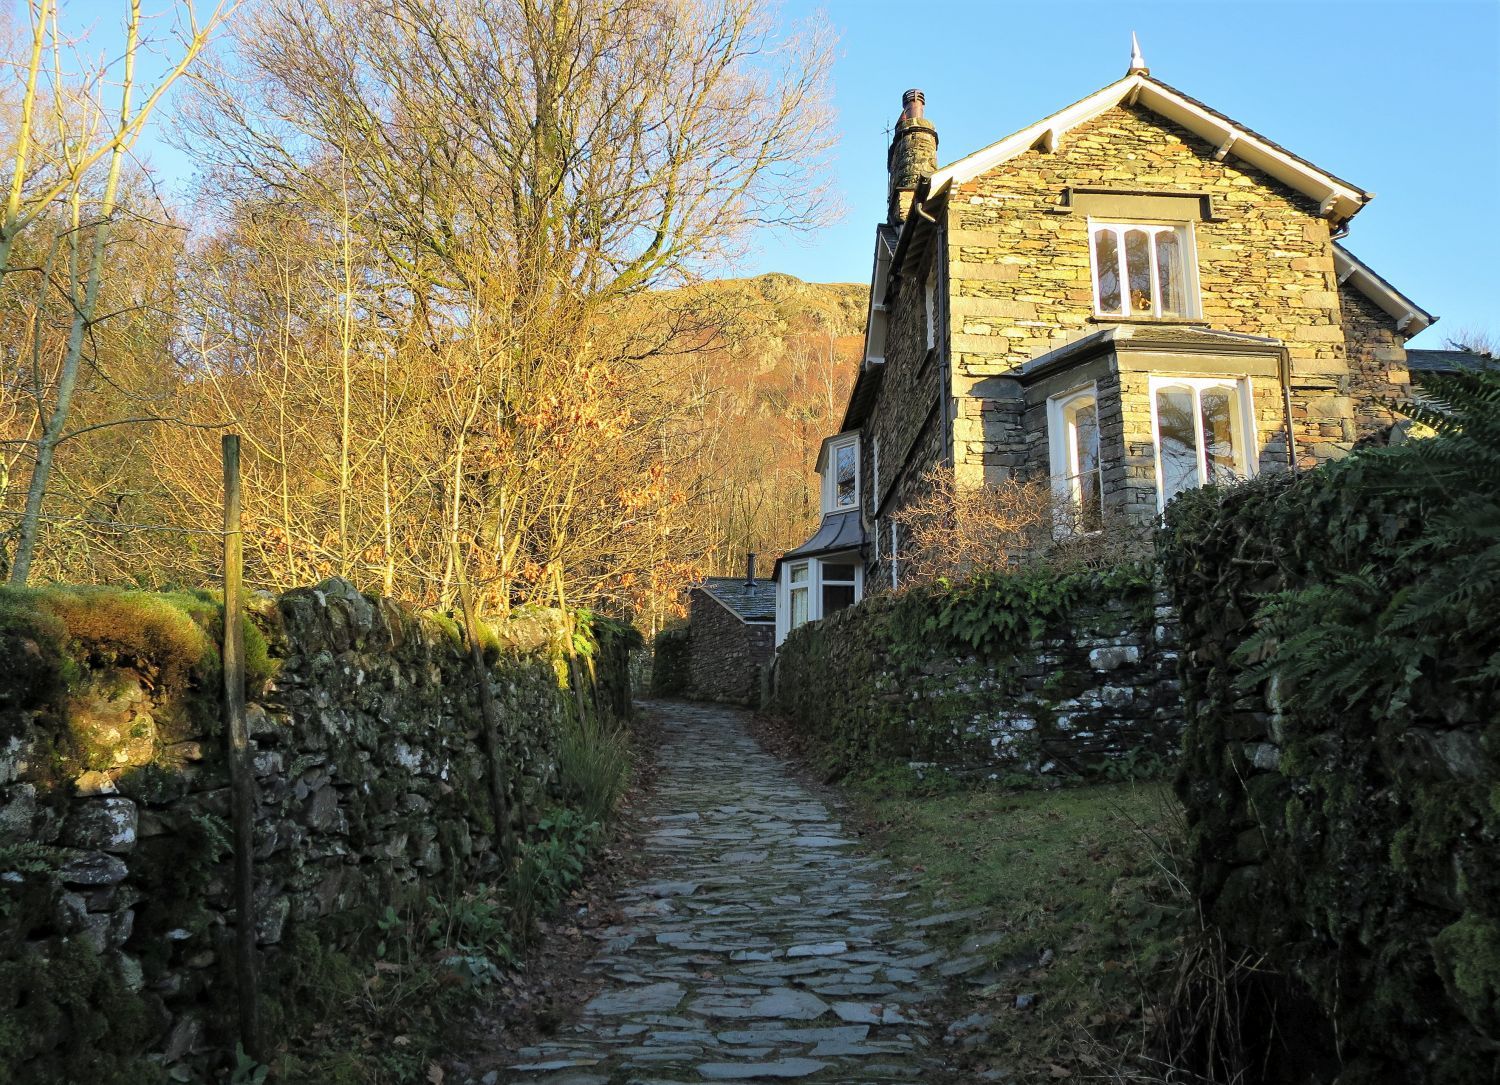
 The valley of Easedale
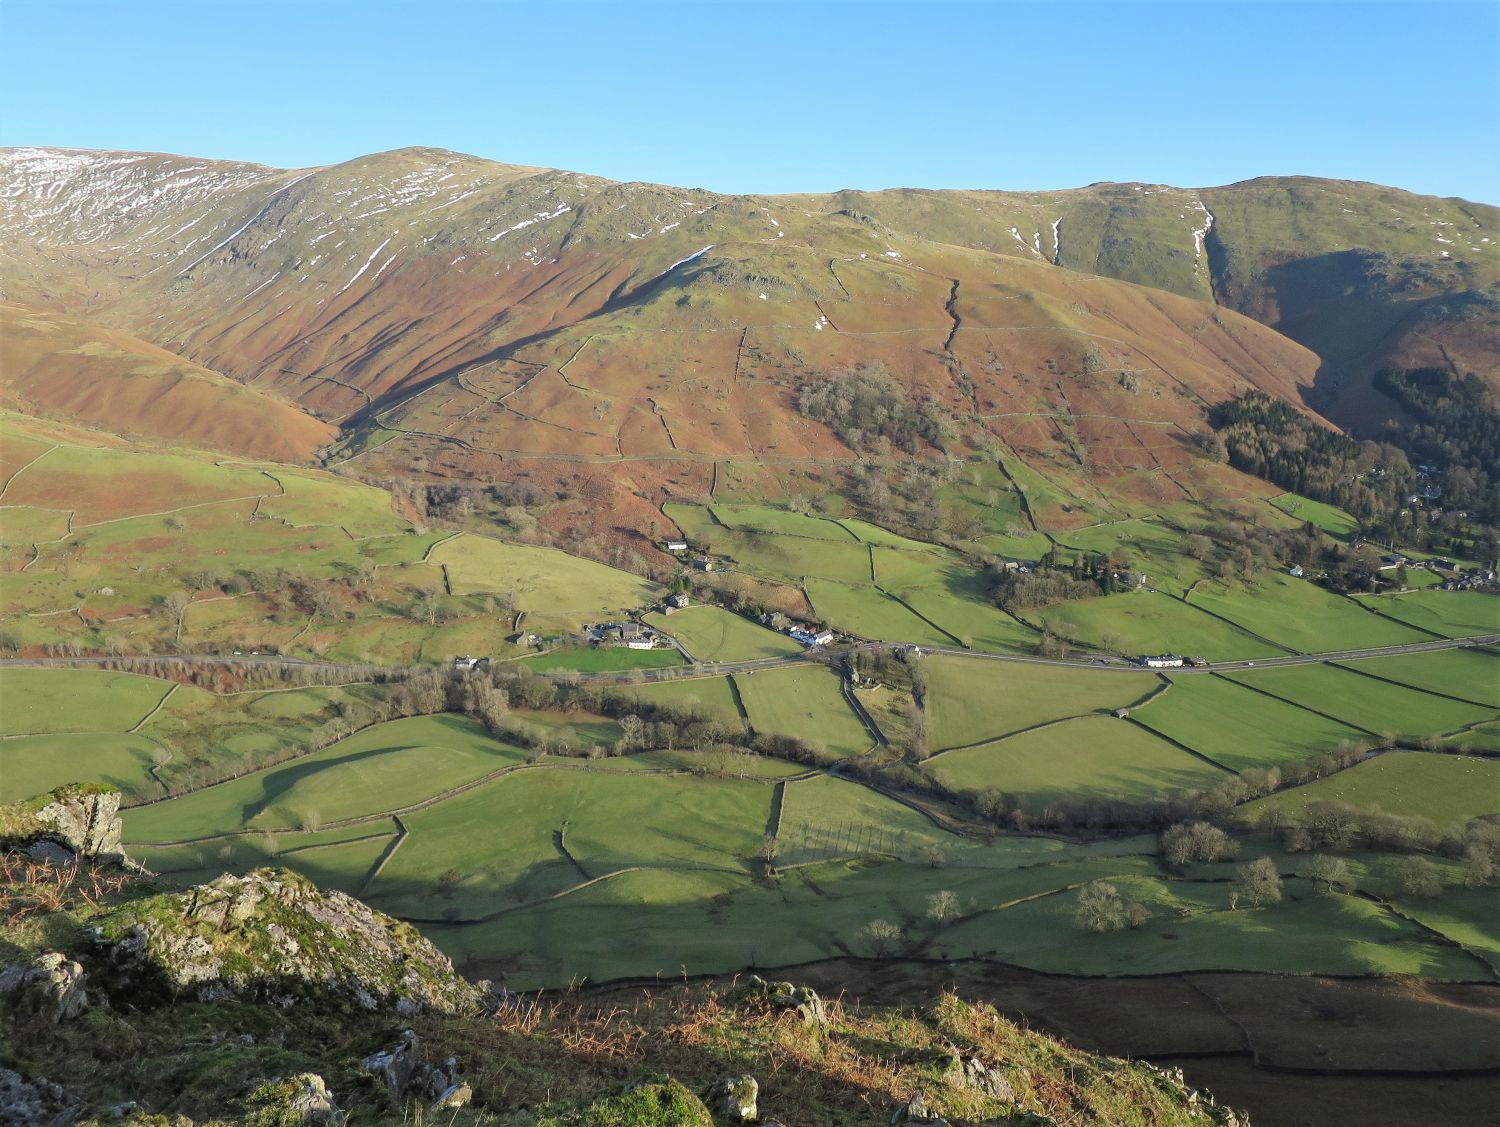
Seen here on the left, rising from the head of Easedale (Brimmer Head), the east ridge of Tarn Crag continues its journey to Coledale Head. Far centre, peering over the concaved edge and the entrance to the narrow sweeping valley of Far Easedale, is Moment Brow. This section of ridge is part of the long curving crest that includes the Wainwright fells of Helm Crag, Gibson Knott and Calf Crag; Helm Crag is seen here on the right towering over the cottages.
“The familiar pyramid of Helm Crag, rising sharply from the green fields of Grasmere, is the terminus of a ridge that curves away westwards to culminate finally in the rocky crest of a lesser known eminence, Calf Crag.” Calf Crag 2
AW
The house just left of centre, previously named Oakleigh, is Little Parrock, a wonderfully located self-catering cottage in the heart of Easedale.
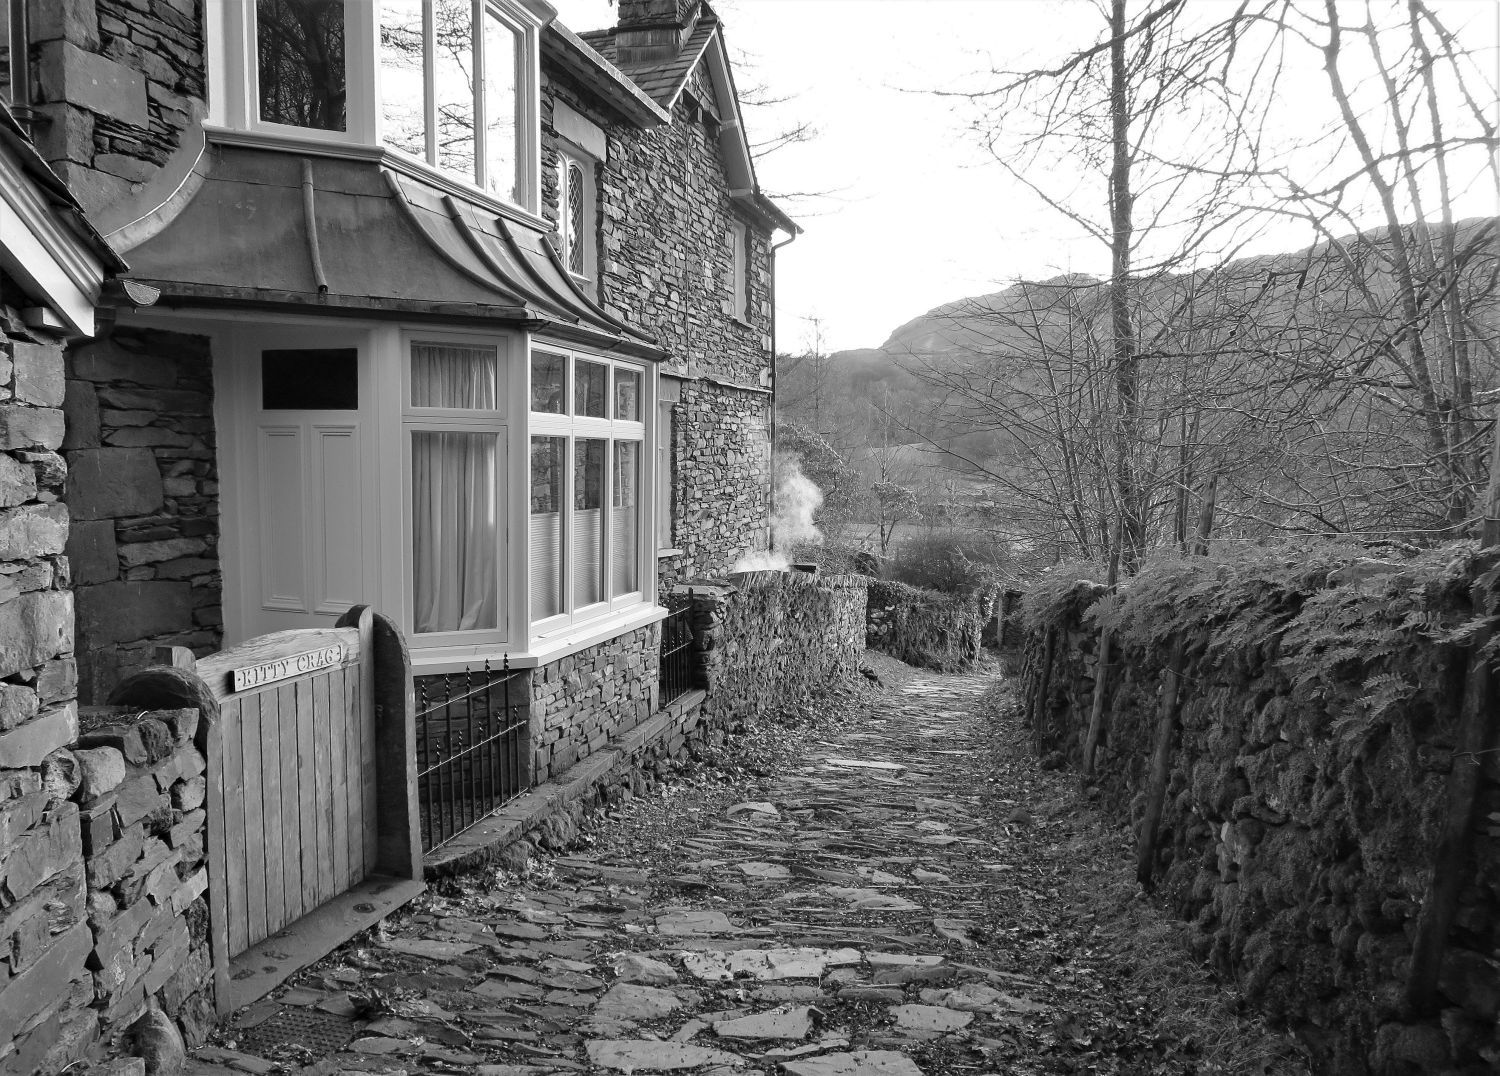
 Kitty Crag Cottage
From where the tarmac road ends (Easedale Road), head right and follow the stone-rippled lane that passes the idyllically located Kitty Crag Cottage.
 Looking across to the Castle How shoulder over Brimmer Head Farm
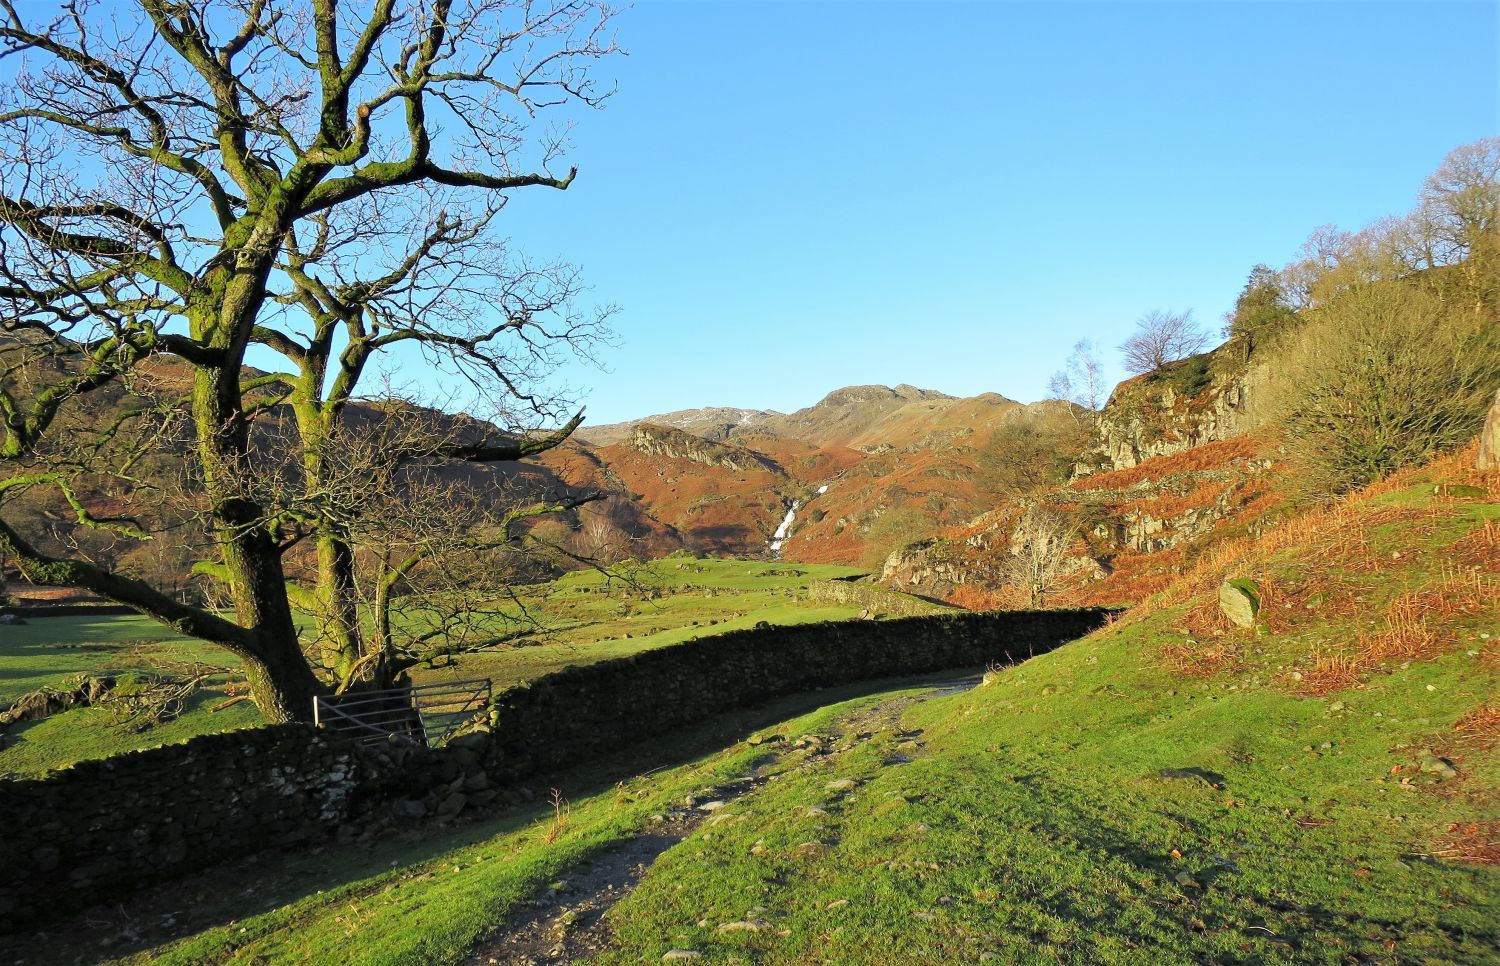 Tarn Crag over the cascades of Sourmilk Beck and the pastures of Brimmer Head
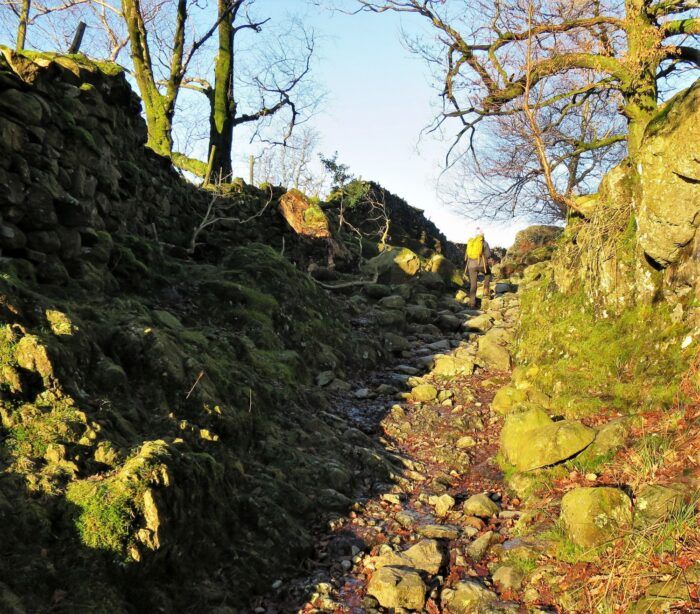 Old packhorse track into Far Easedale
We now follow an old packhorse track that ascends, initially, out of Easedale at Brimmer Head, and then through a small hanging valley previously known as High Easedale. This track then enters the valley of Far Easedale, before continuing its journey over the pass of Greenup Edge and into Borrowdale; we will follow it as far as Moor Moss, below the head of Far Easedale. It was routes like these that connected the valleys and the small hamlets, for medieval producers to exchange goods and form markets. These arteries were vital for the period.
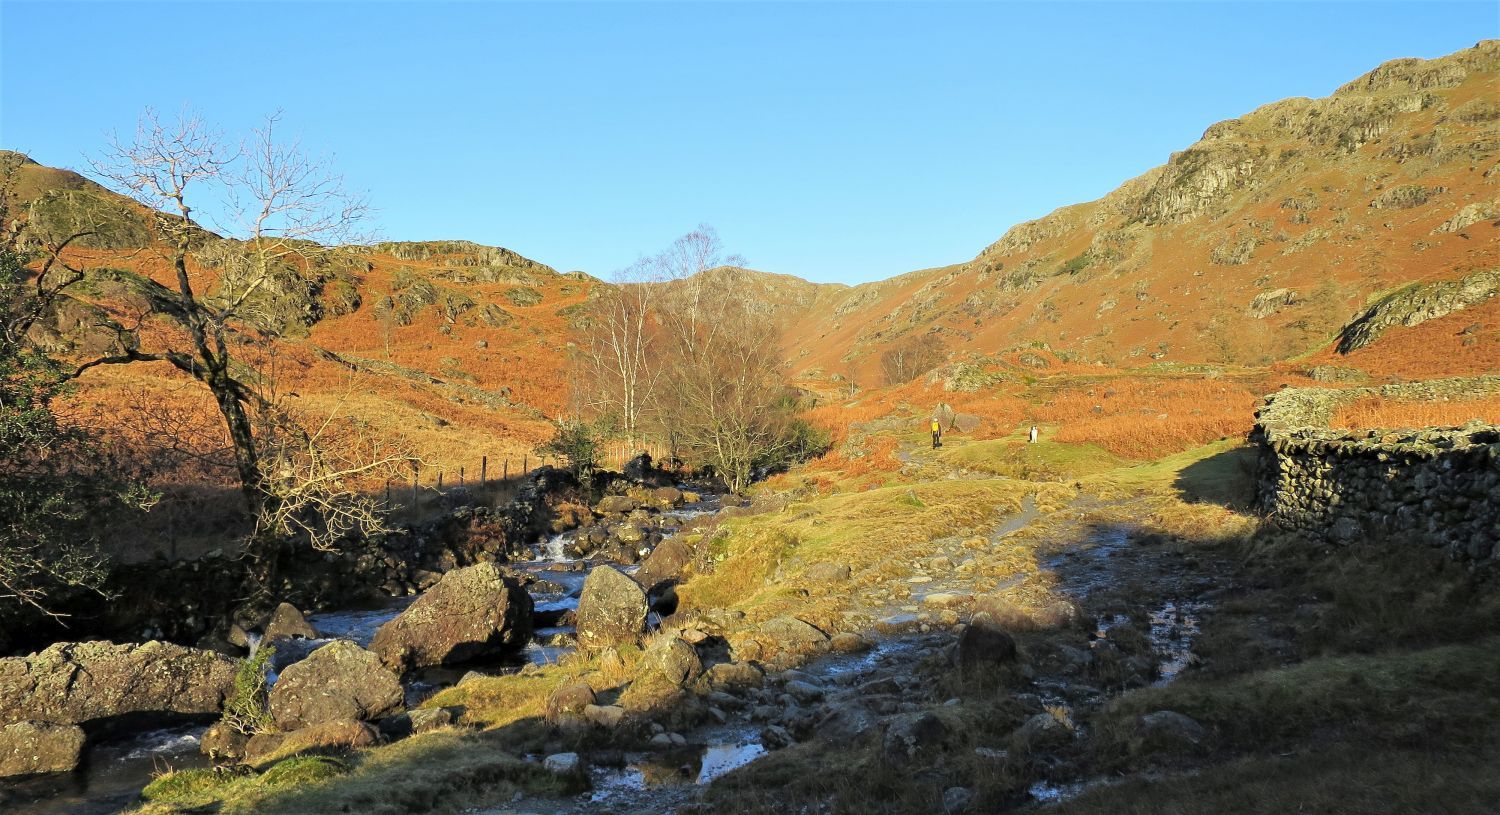 Far Easedale Beck on the approach to Stythwaite Steps
We are now in Far Easedale.
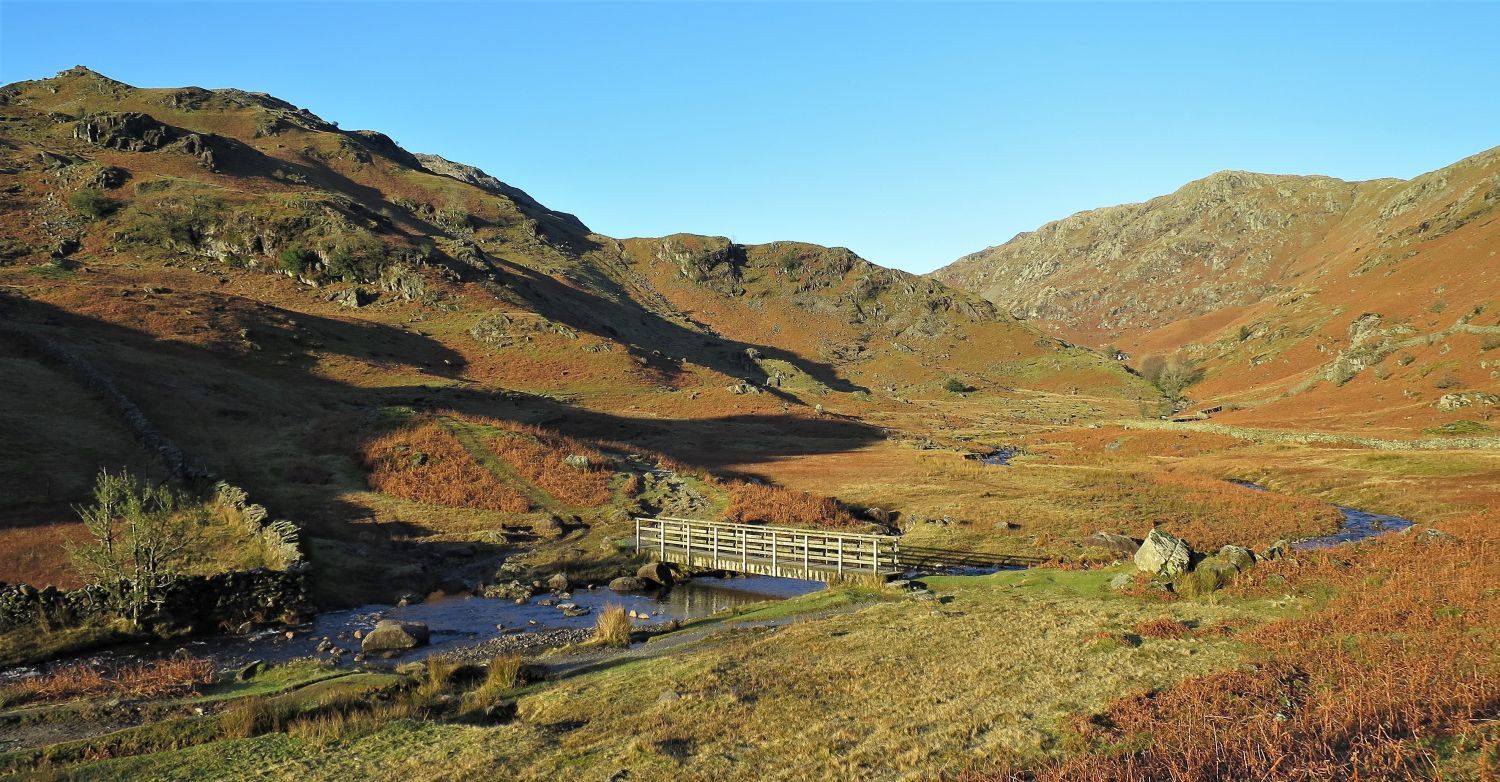 Footbridge over Far Easedale Beck, at Stythwaite Steps
Stythwaite Steps was an old way of crossing over Far Easedale Beck, but little remains of these ‘stepping stones’ which have been replaced by a footbridge. Rising on the left is the eastern ridge of Tarn Crag, and far on the right is Pike of Carrs, which hides our first summit of the day, Calf Crag.
“The shapely peak seen ahead from Stythwaite Steps is not the summit, but Pike of Carrs, part of Calf Crag.” Calf Crag 3
AW
 Horn Crag over Far Easedale Gill
We are now on the left side of the valley following a path that continues to its head. It’s well worth pausing along the way to admire the rock scenery across the gill.
 Pike of Carrs over Far Easedale Gill
 Looking back to Horn Crag, Bracken Hause and Helm Crag
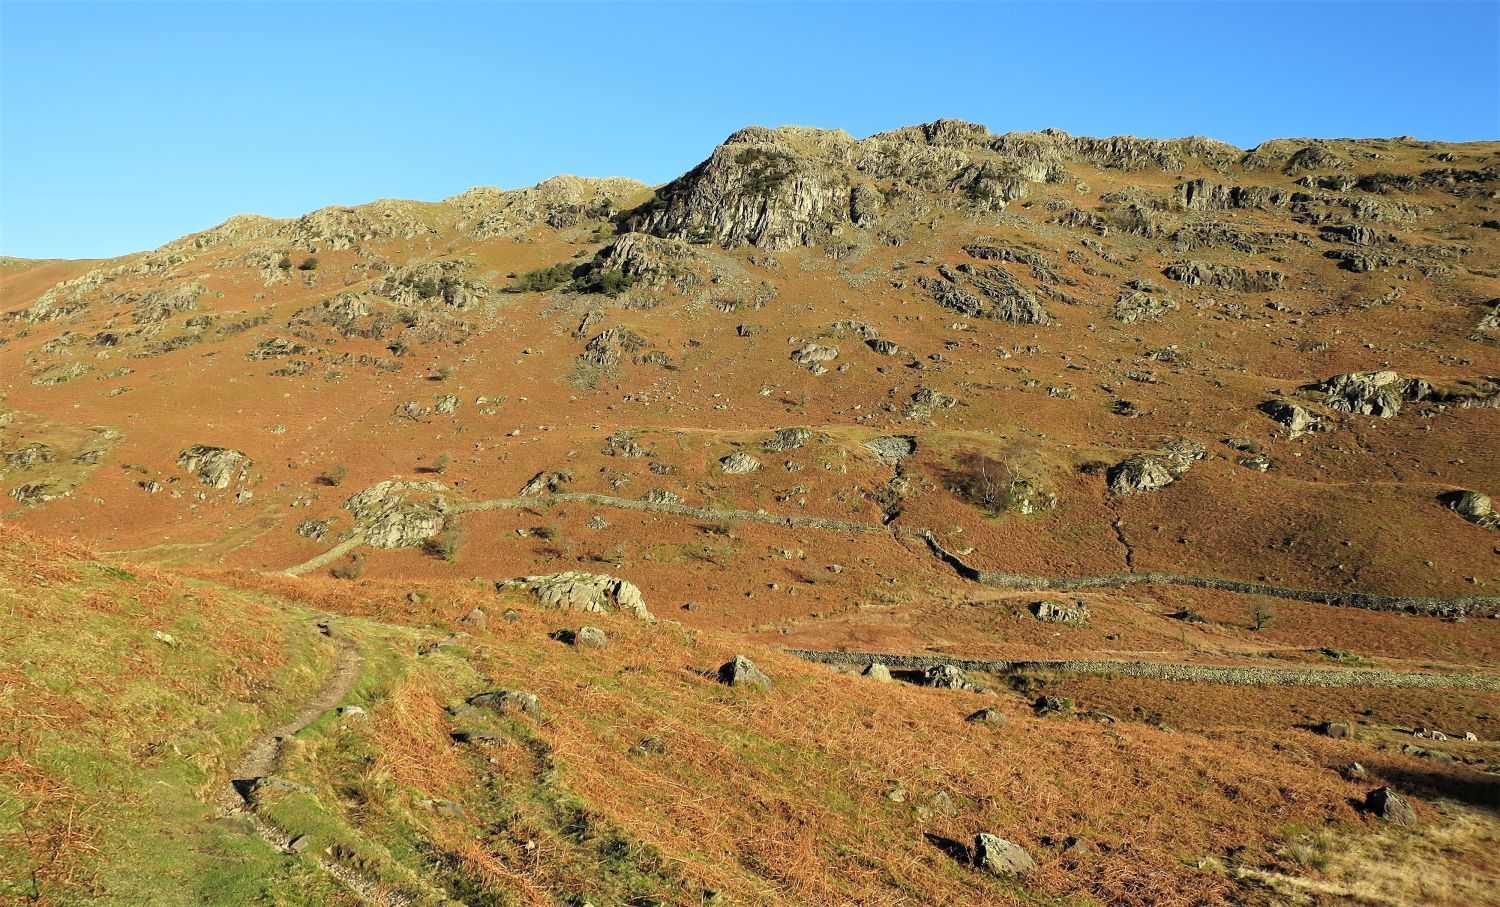
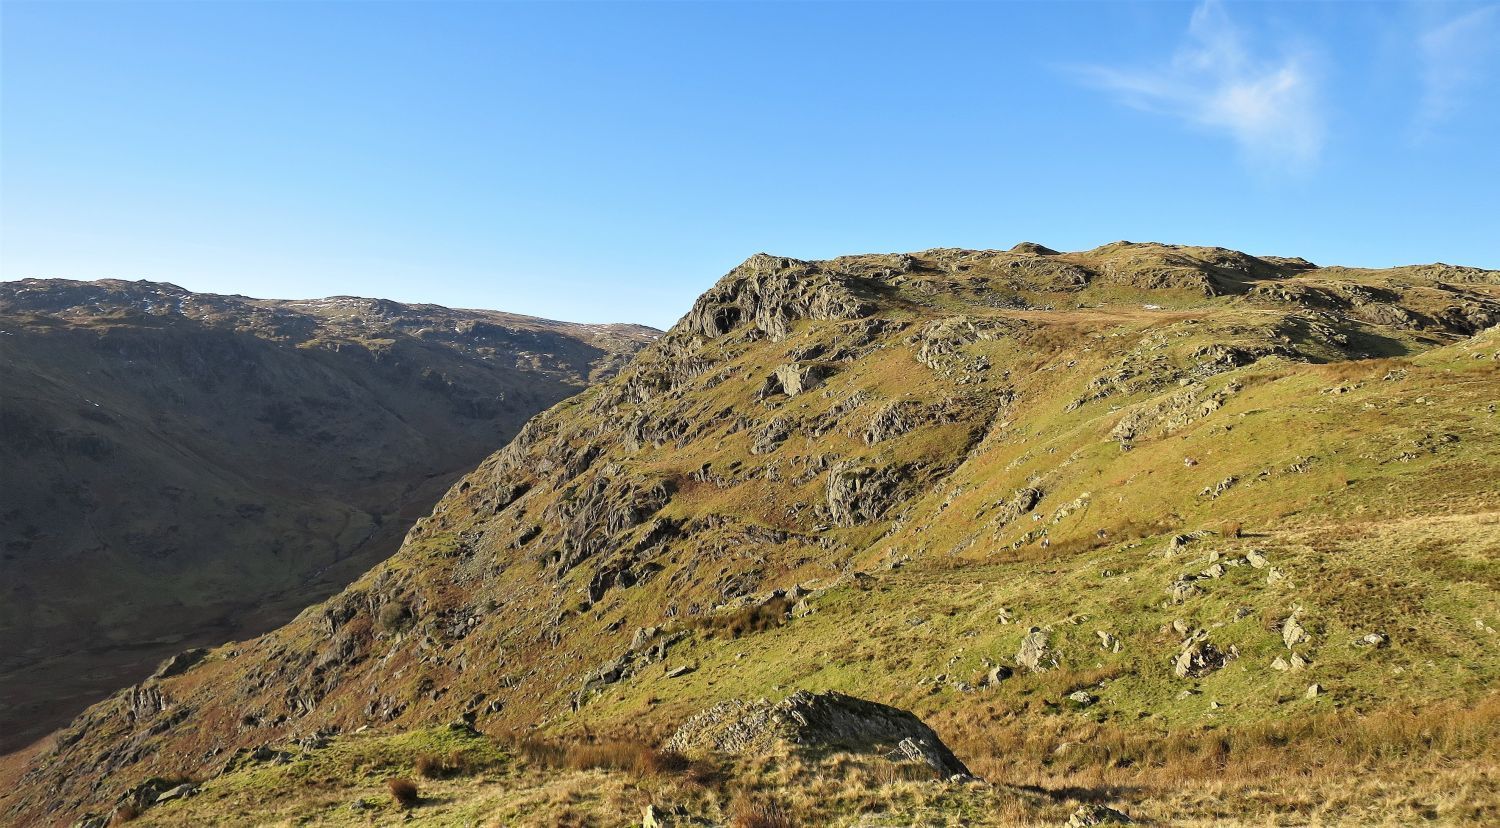
 The escarpment of Deer Bields from Far Easedale
“Far Easedale is a beautiful and interesting valley with impressive rock scenery. The path along it is commonly used as a route to Borrowdale but can be conveniently adapted as a simple way onto Calf Crag.” Calf Crag 3
AW
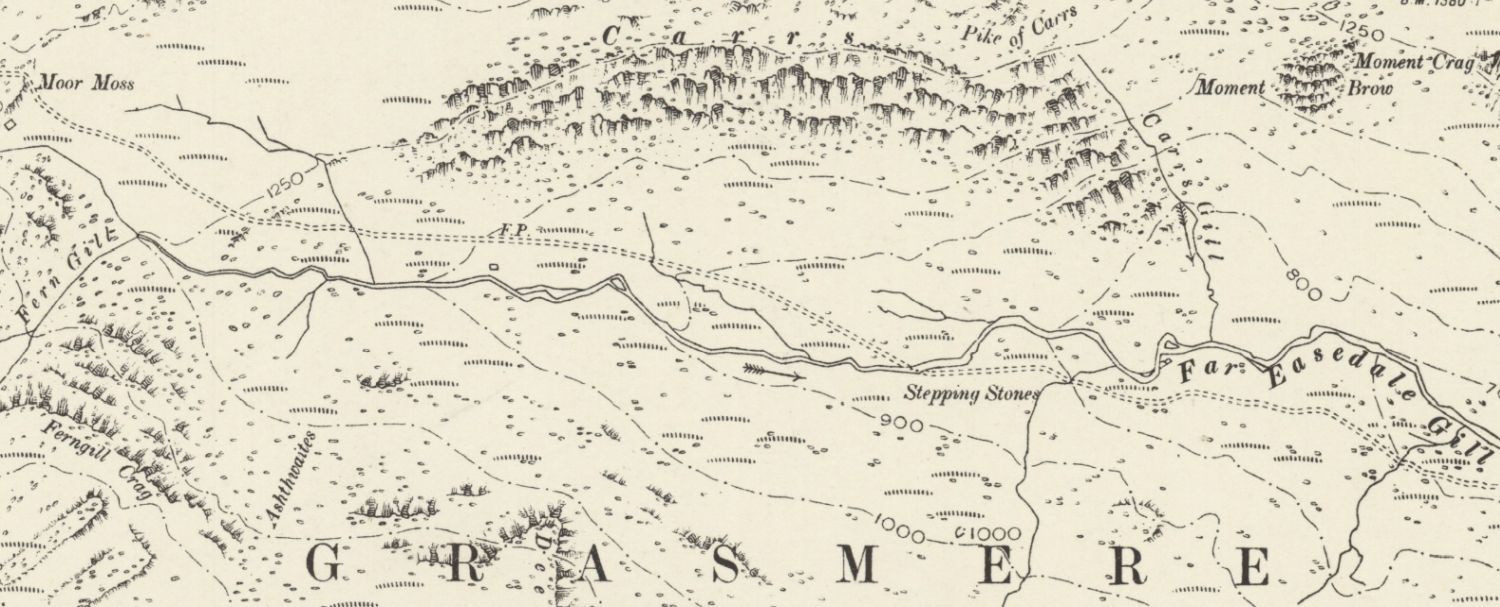 Ordnance Survey map of Far Easedale (rev. 1897, pub. 1900)
“Recent generations of walkers have blazed a new trail to the head of the valley. Formerly, the bridle-path crossed the beck by stepping stones at about 850′, but it can no longer be traced on the ground.” Calf Crag 3
AW (revised by CJ)
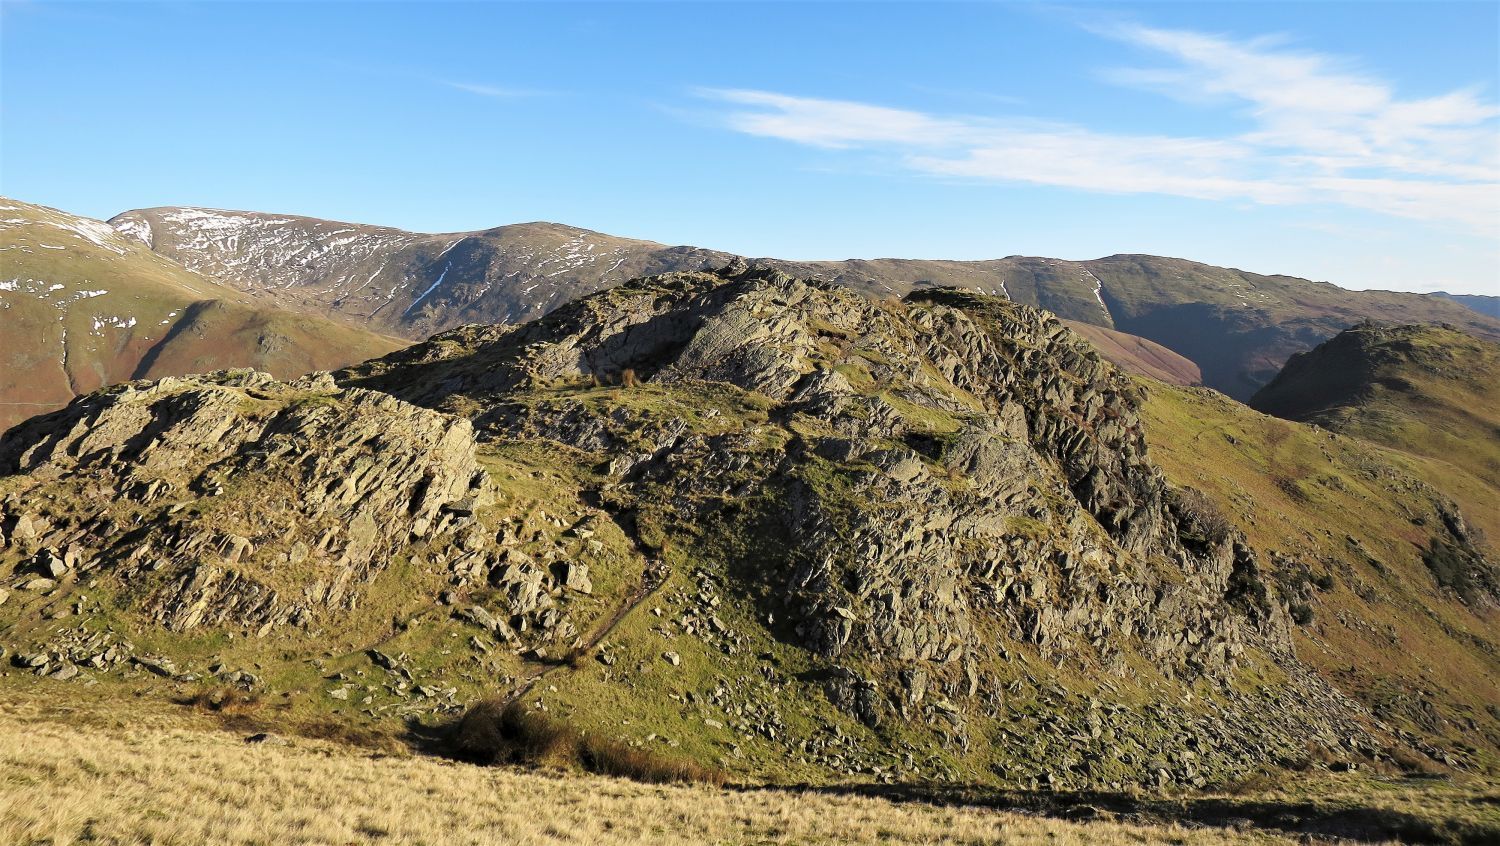
 Deer Bield Crag (left), Deer Bields and Ferngill Crag (centre)
“….facing north into Far Easedale, form a scene of unrelieved gloom, with the black forbidding precipices of Deer Bields and Ferngill Crag seeming to cast a permanent shadow across the valley.” Tarn Crag 2
AW
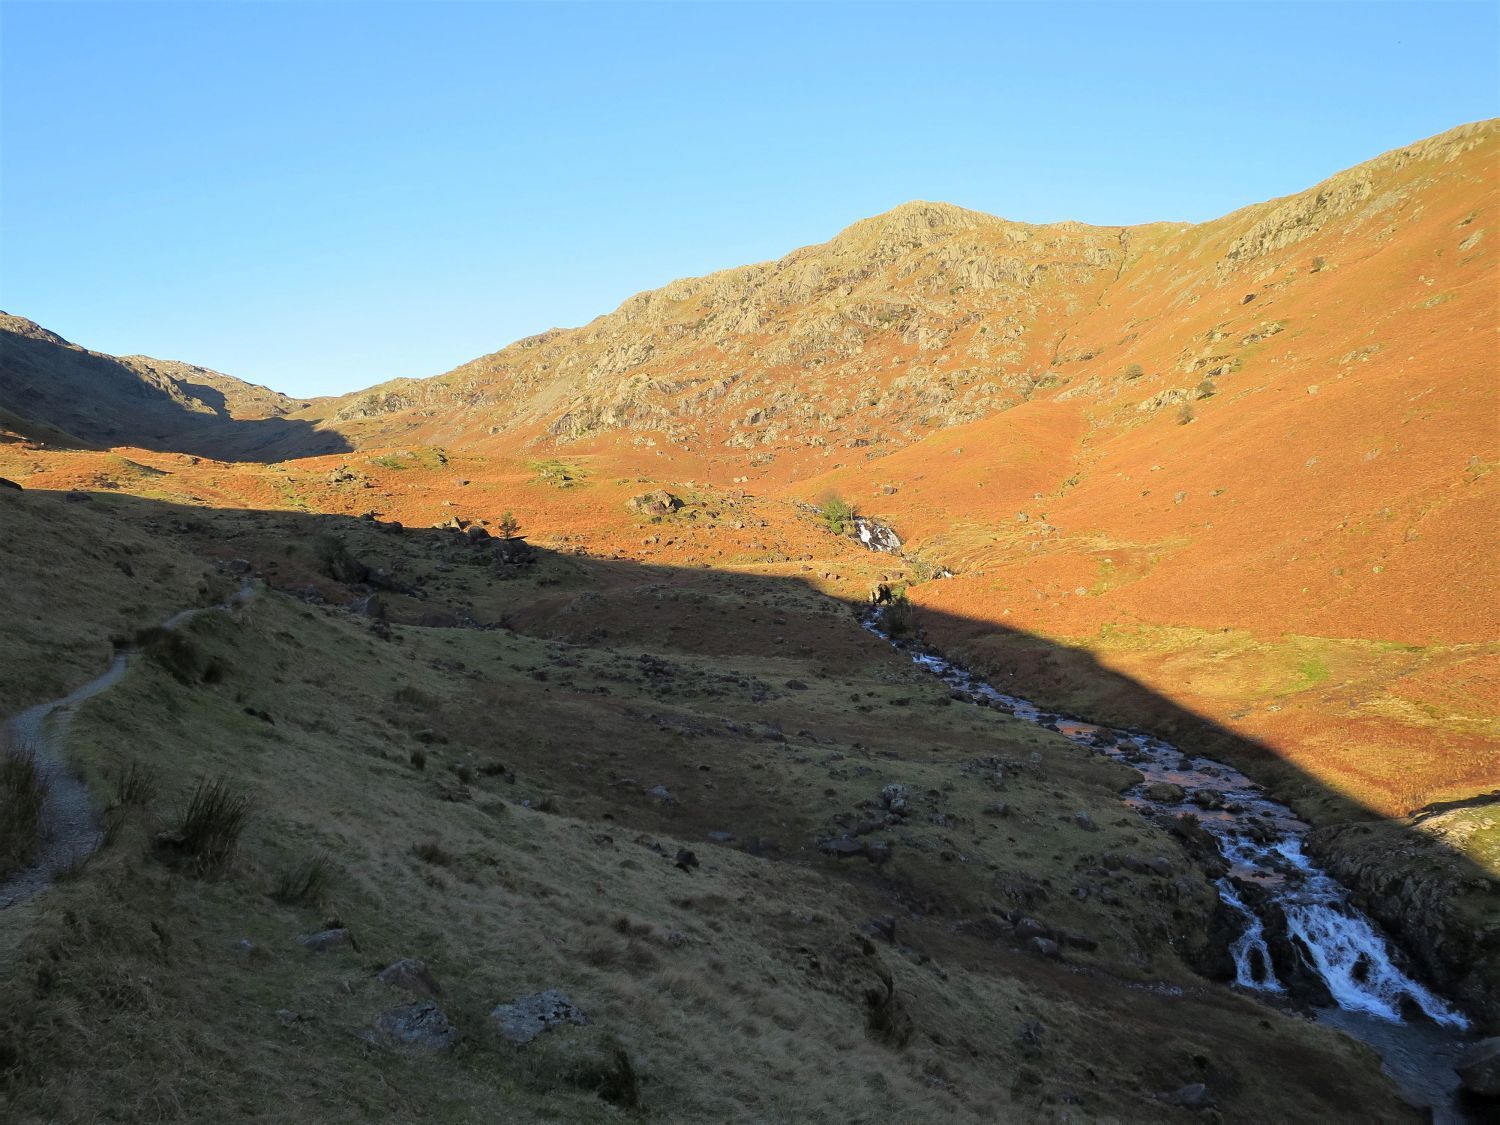
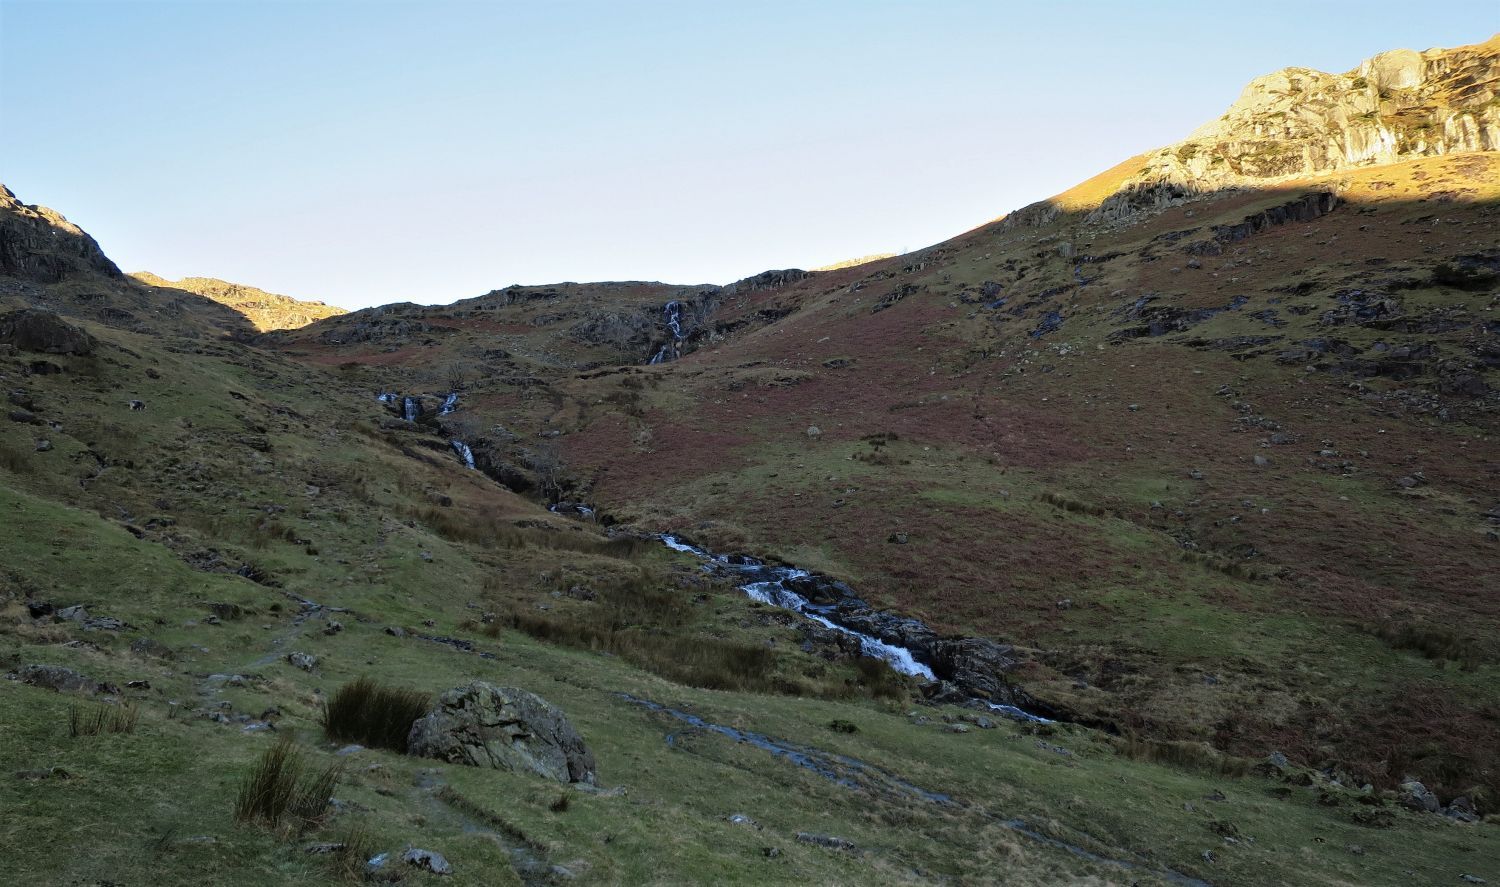 Waterfalls below Moor Moss
What looks to be the head of the valley, isn’t. Just beyond these waterfalls is the depression of Moor Moss, and beyond that is the true head of the valley. From the waterfall on the left, take a direct route to the crag, seen here in sunlight top right. However, if you want to follow Wainwright’s route to Calf Crag then continue to Moor Moss.
 Book Three
The Central Fells
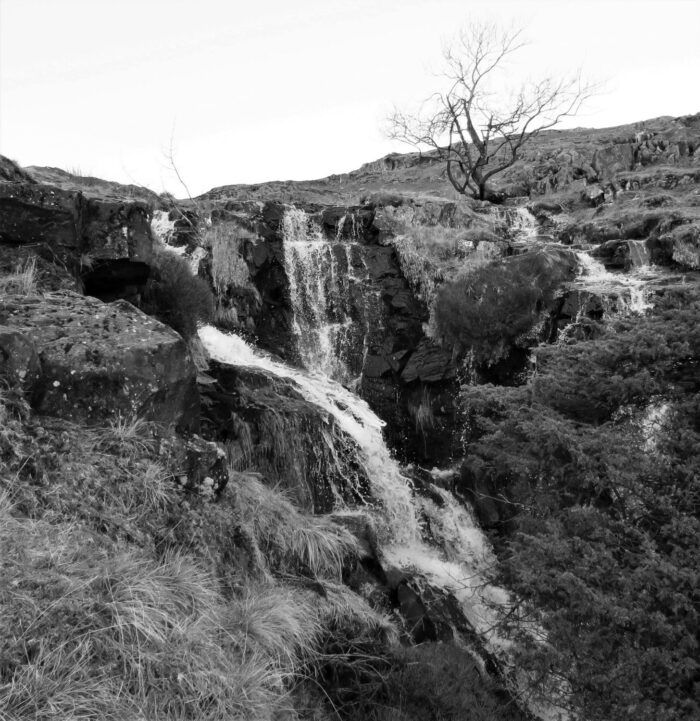
Calf Crag 7
“Waterfalls, Far Easedale Gill”
The tree above this waterfall hasn’t changed in appearance since Alfred Wainwright’s illustration in book three of the Lakeland guides (pub. 1958).
 Looking down Far Easedale from the tree and above the waterfall
 Ascent to Carrs
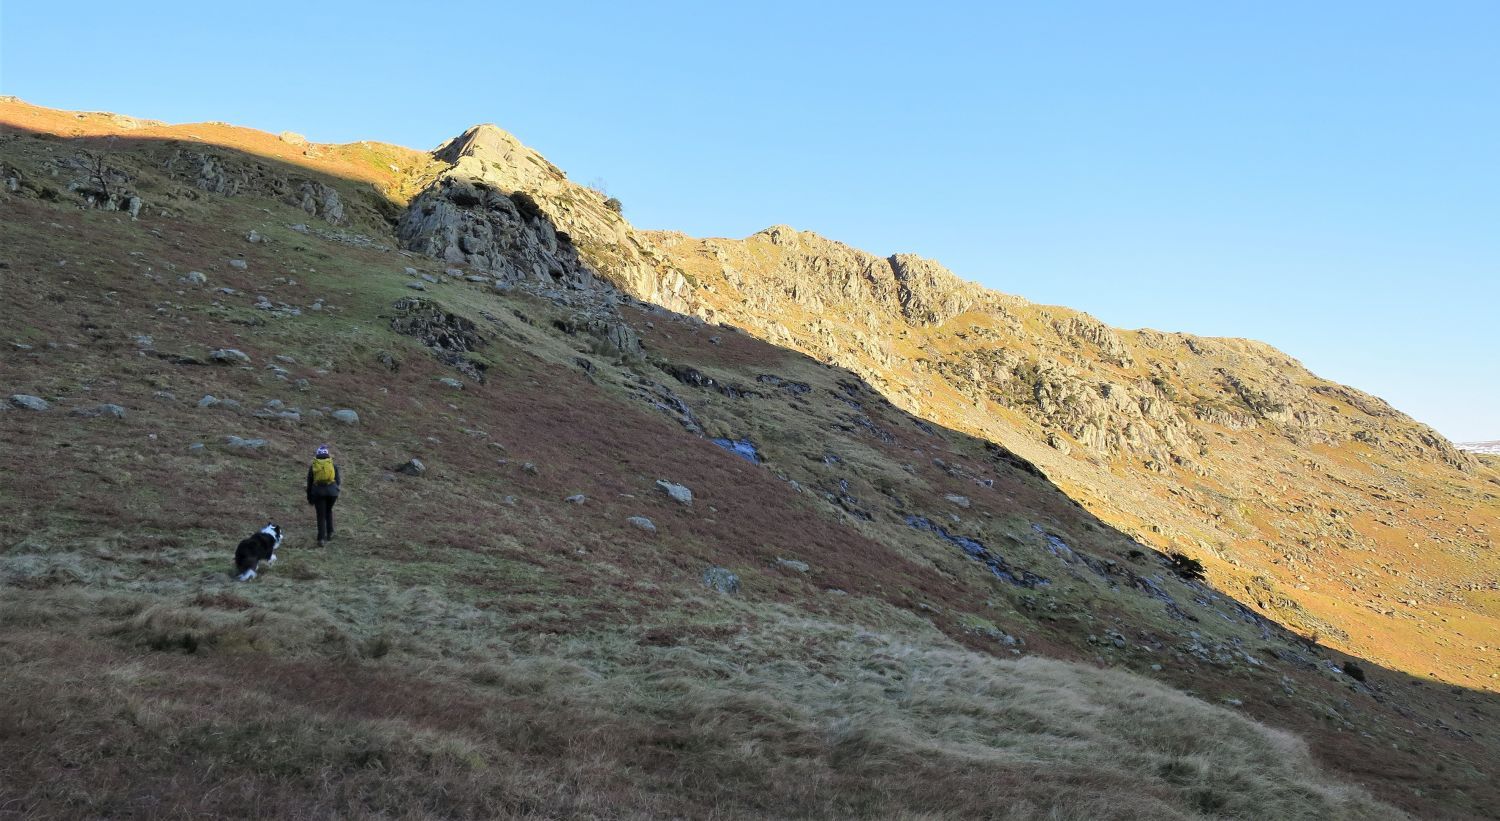
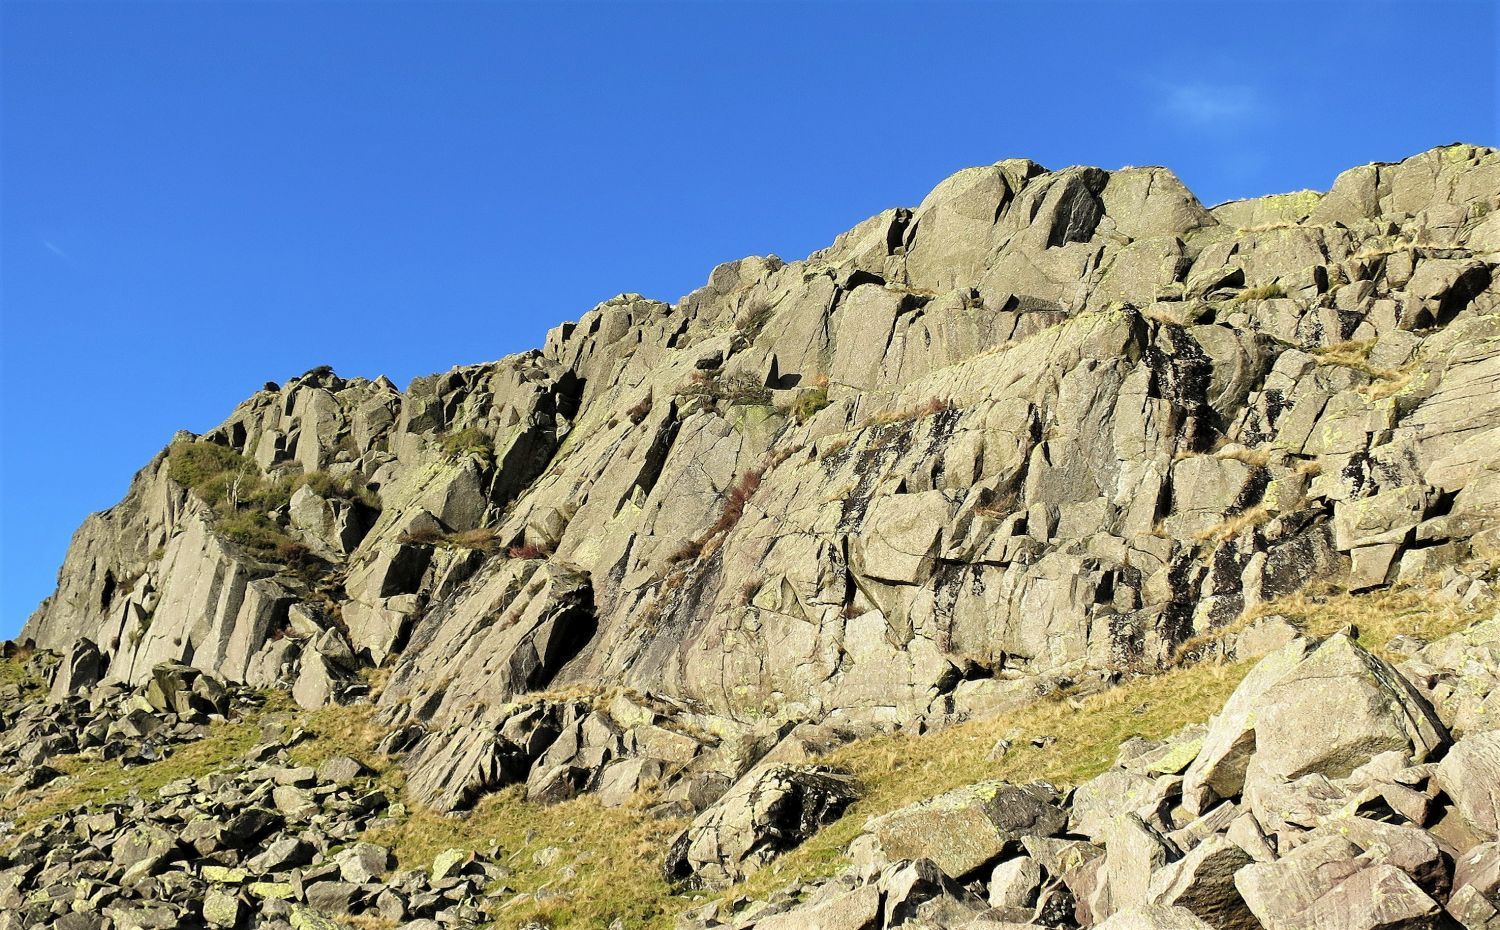
From the tree above the waterfall, take a pathless route to the rock turret ahead. This arete is at the very western edge of the rocky escarpment of Carrs, and will eventually lead you to the summit of Calf Crag. This is a more direct and adventurous route than Wainwright’s route via Moor Moss.
Note the gully to the left of the arete.
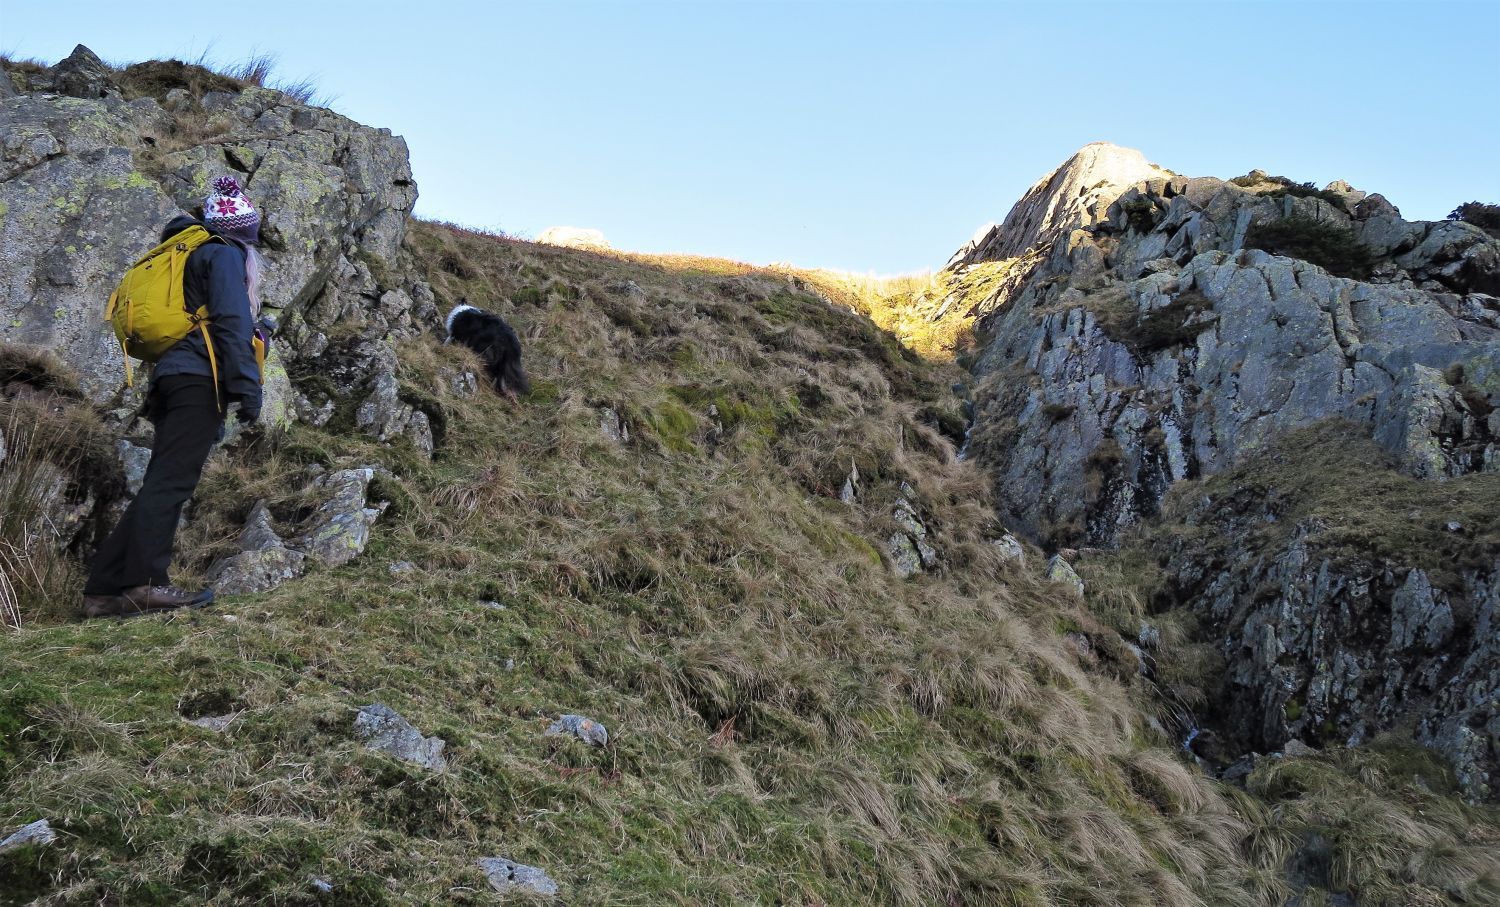 Jaclyn and Frankie in the gully
There are three options of ascent once the base of the gully is reached: to continue up the gully, climb the breast to the left of the gully, or scramble along the arete.
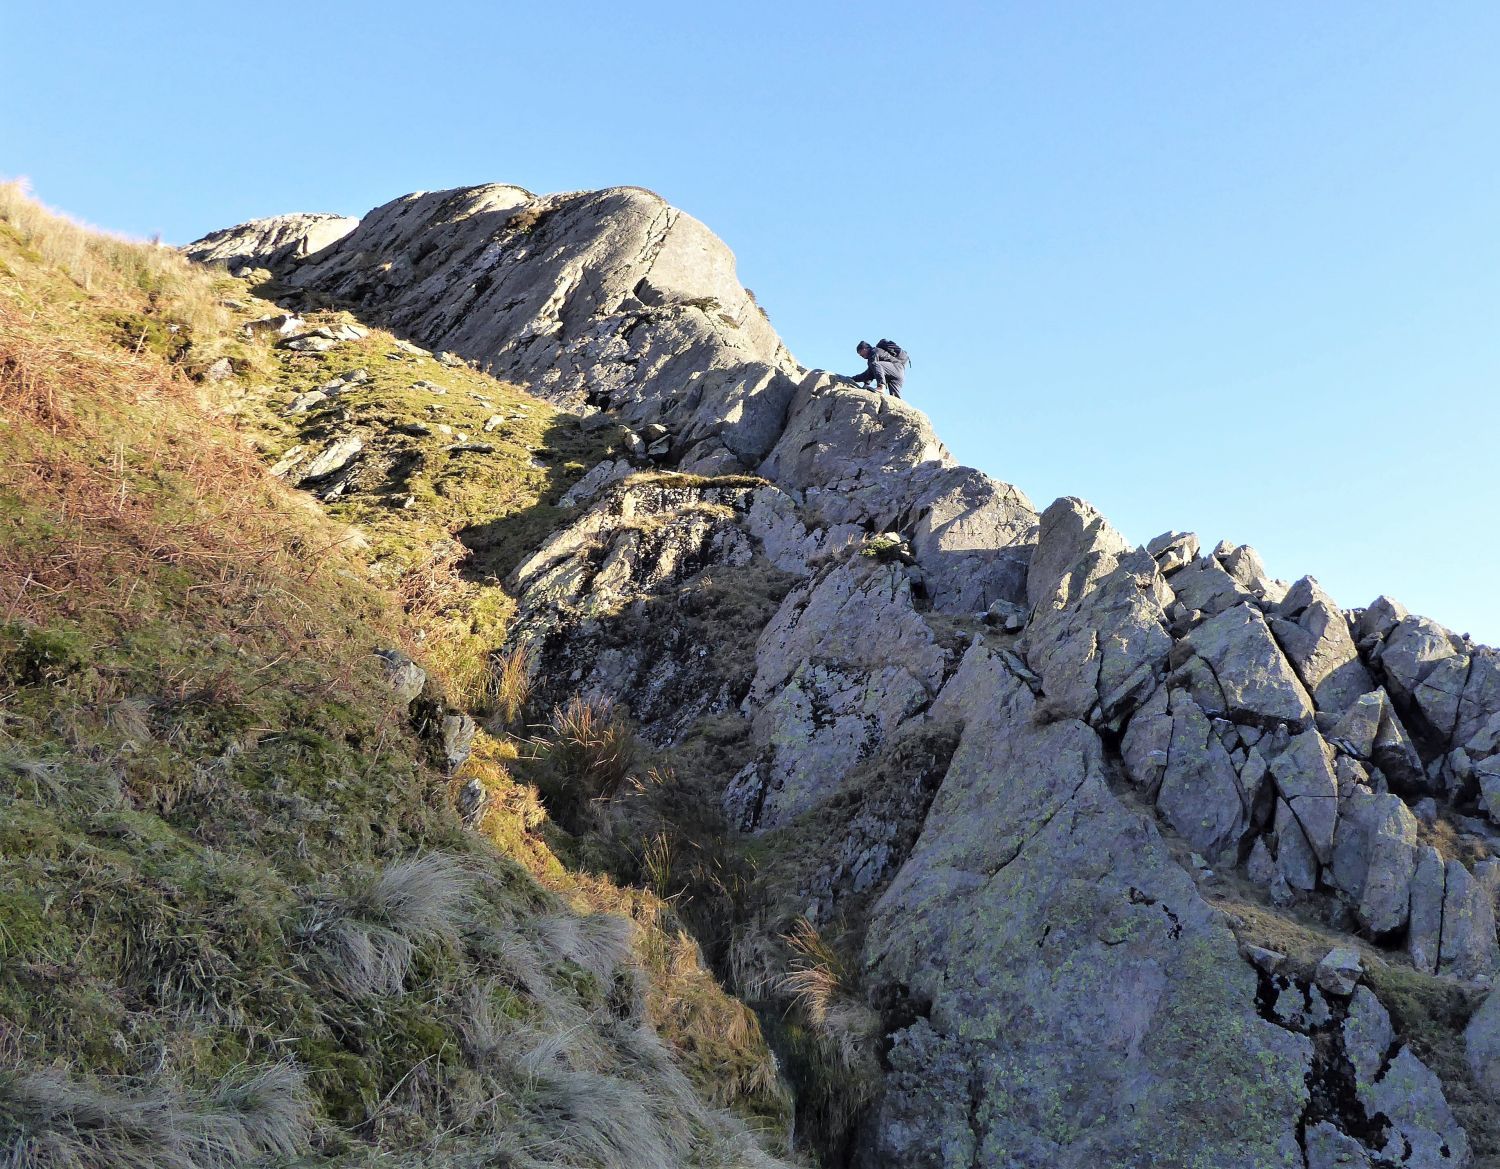 The author on the arete
 Jaclyn ascending via the breast
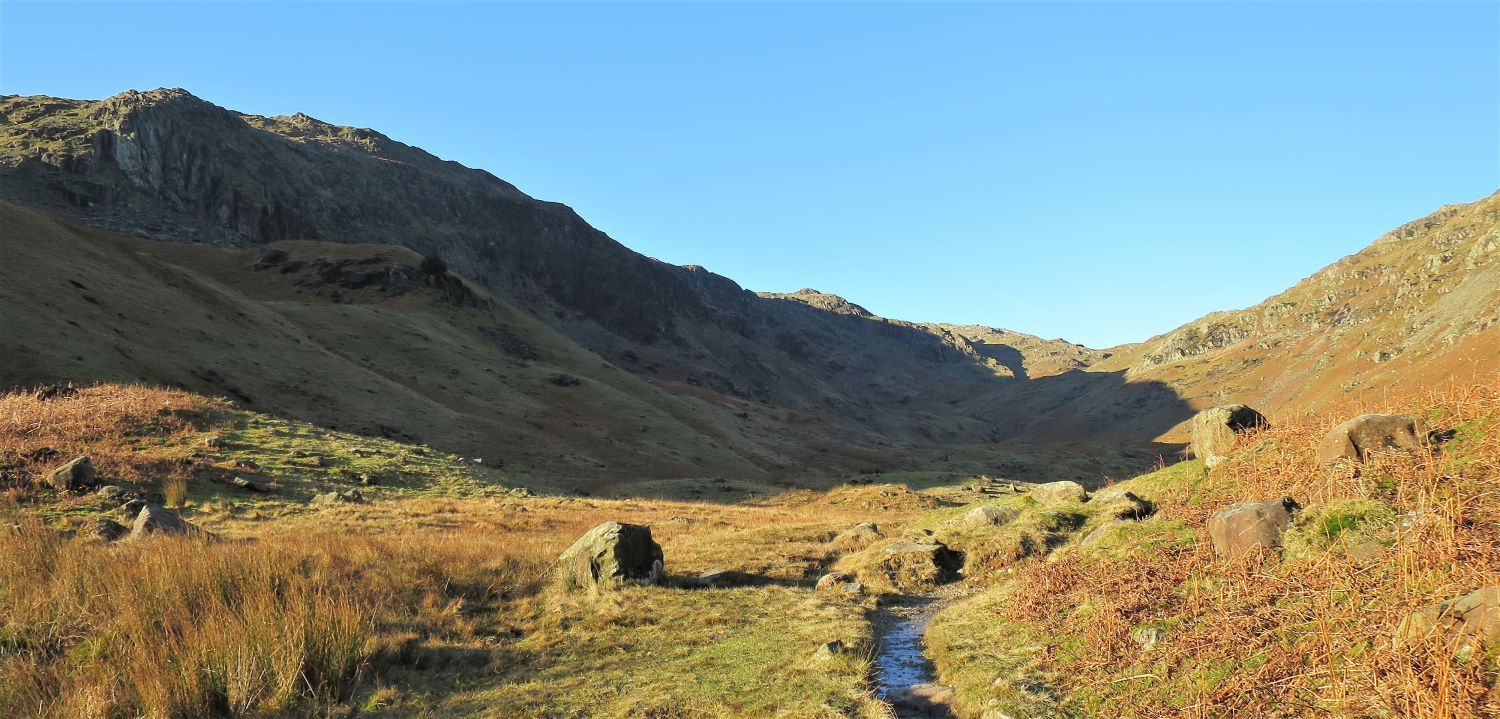
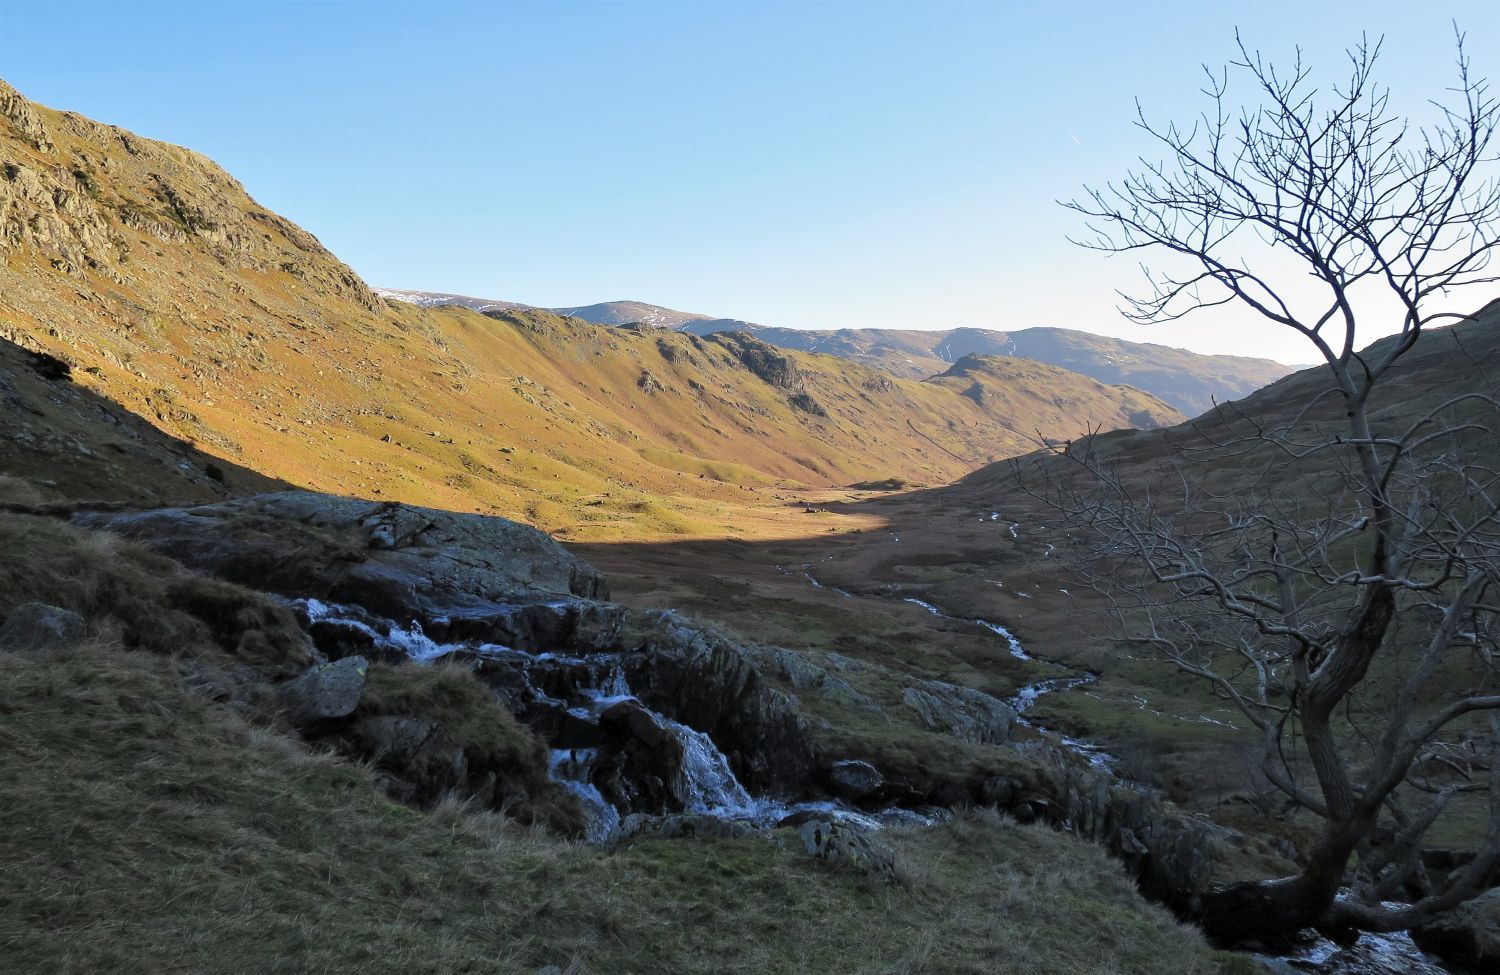
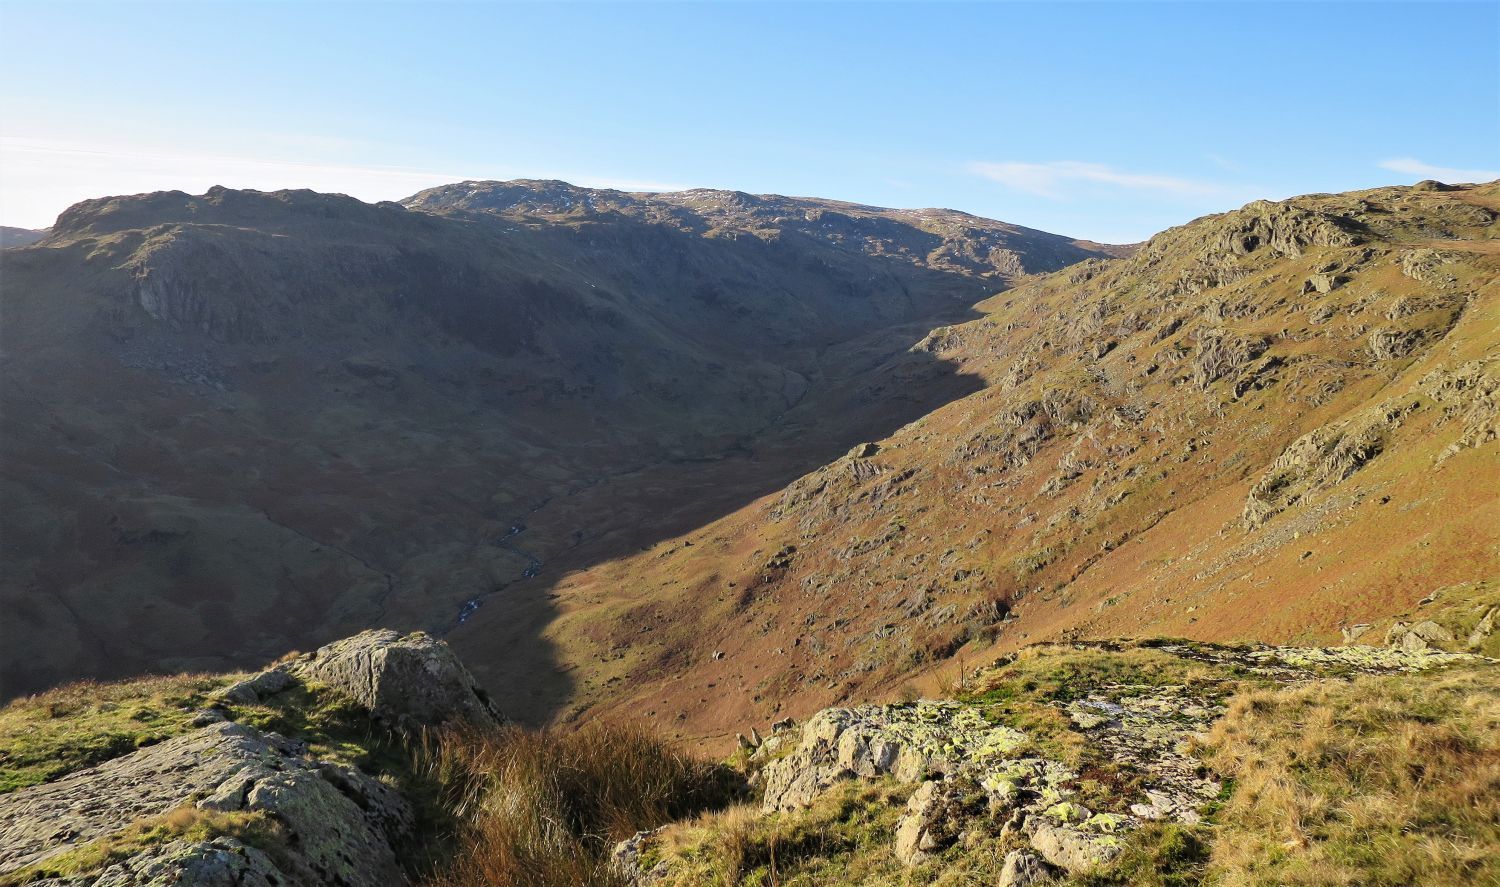
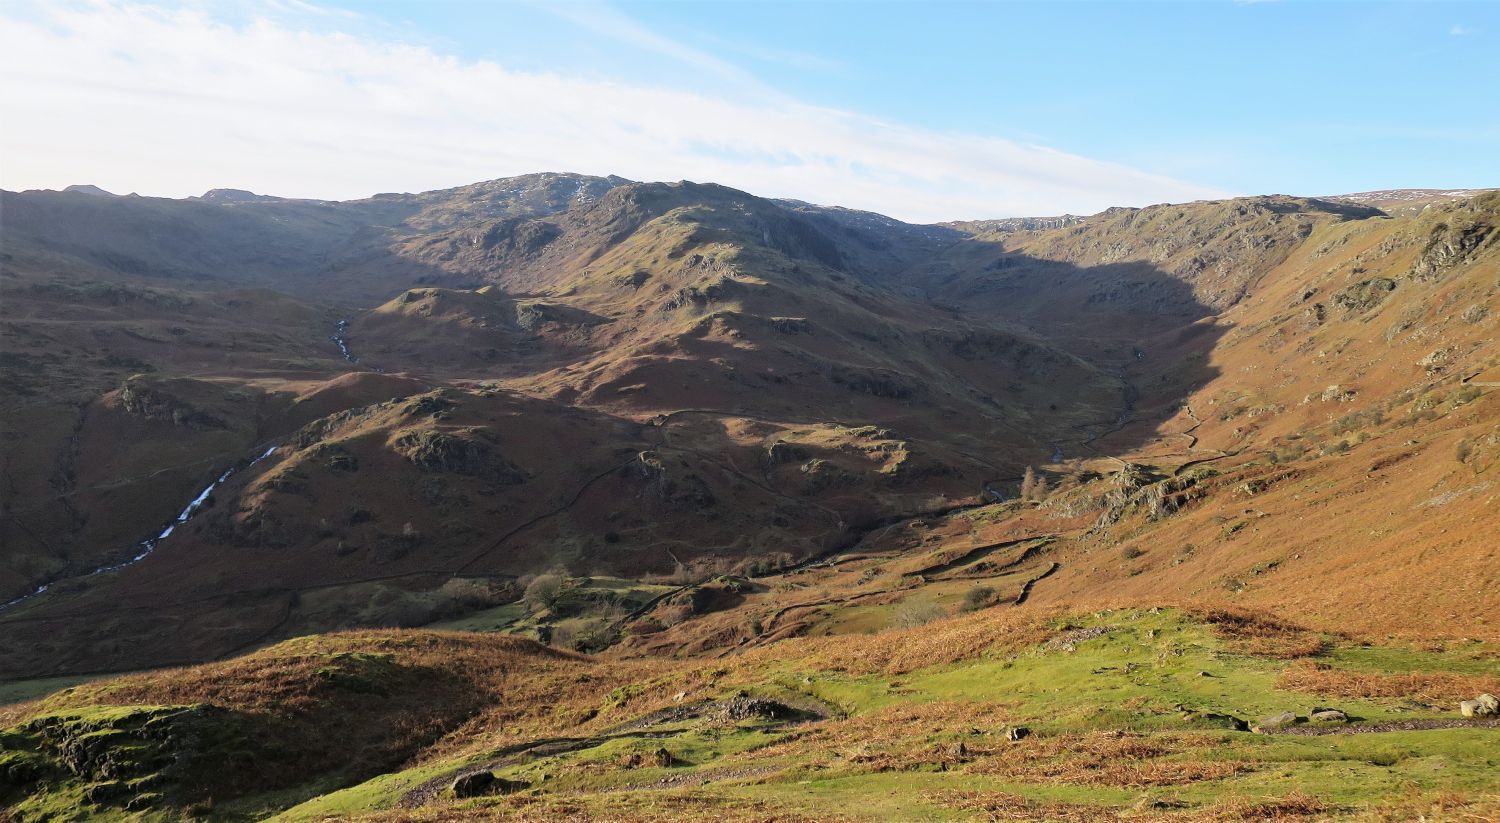
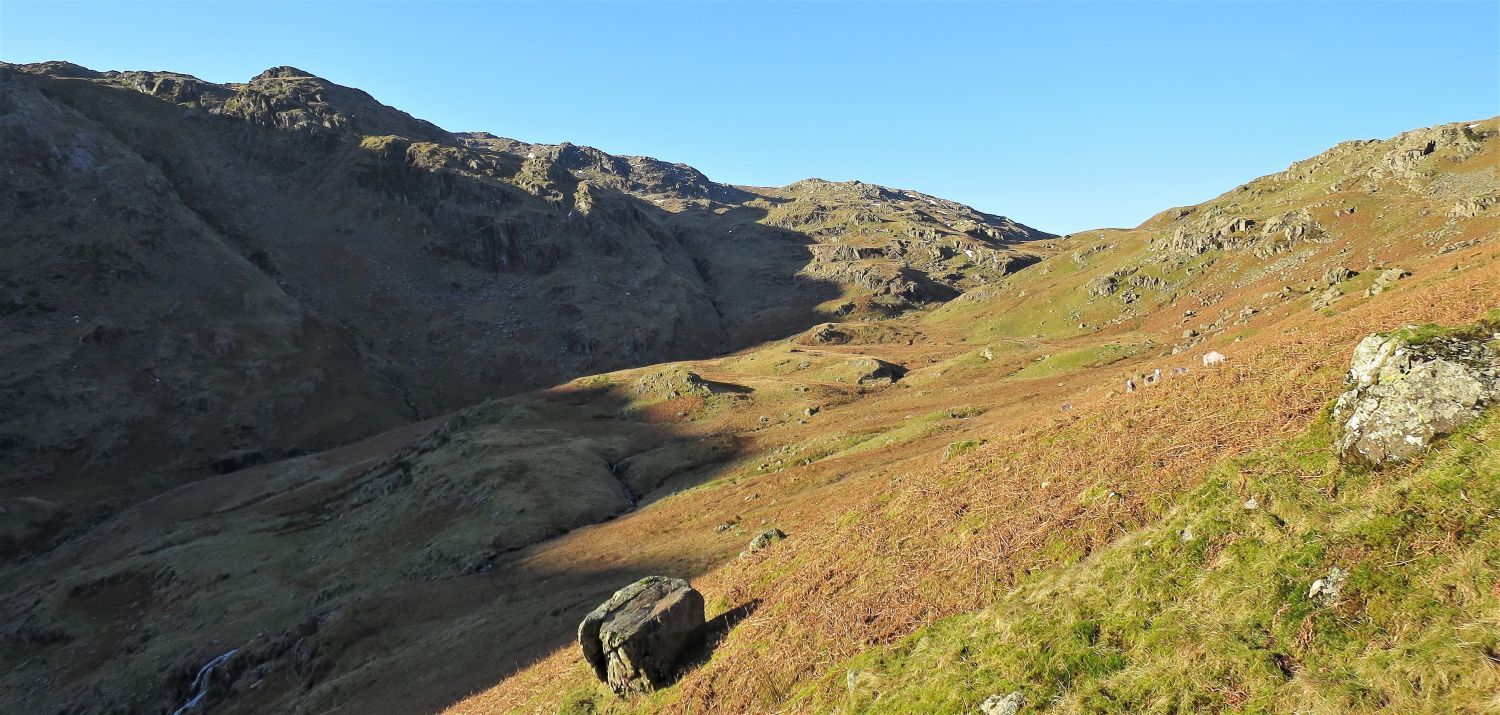 Looking across to Broadstone Head over Moor Moss
This is the true head of the valley. The old packhorse route continues over the col to Greenup Edge, down Greenup Gill and then into Borrowdale. Here, the rough crags of Broadstone Head are flanked by two ravines; the left one being Fern Gill.
The “rough ground” Wainwright mentions on his ‘Moor Moss’ route to Calf Crag, can be seen here on the right. This rise of broken crags is the beginning of Brown Rigg.
“It is unnecessary to continue quite to the head of the valley. At the level of Moor Moss, look for a track leading away to the right below rough ground.” Calf Crag 3
AW
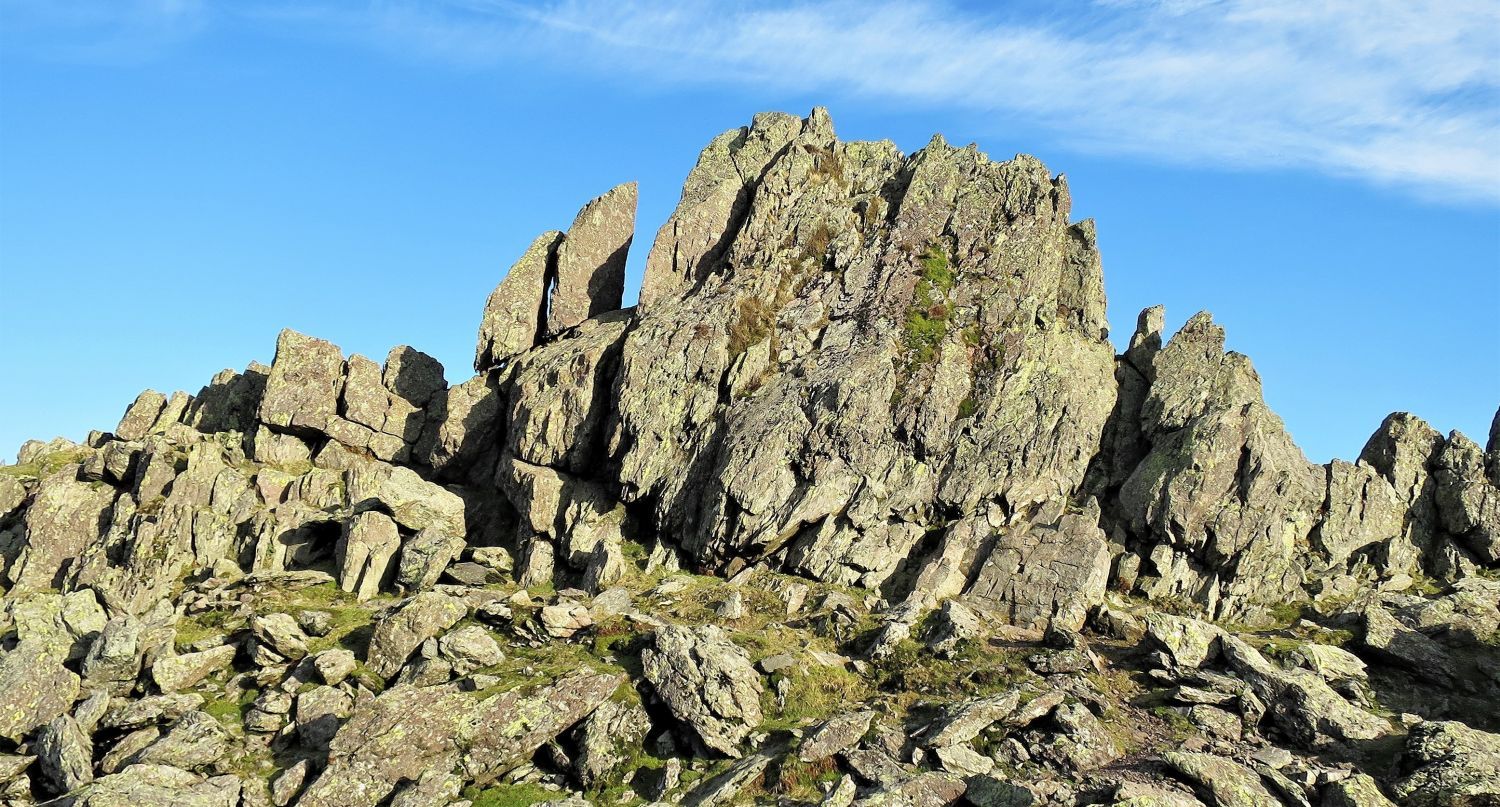
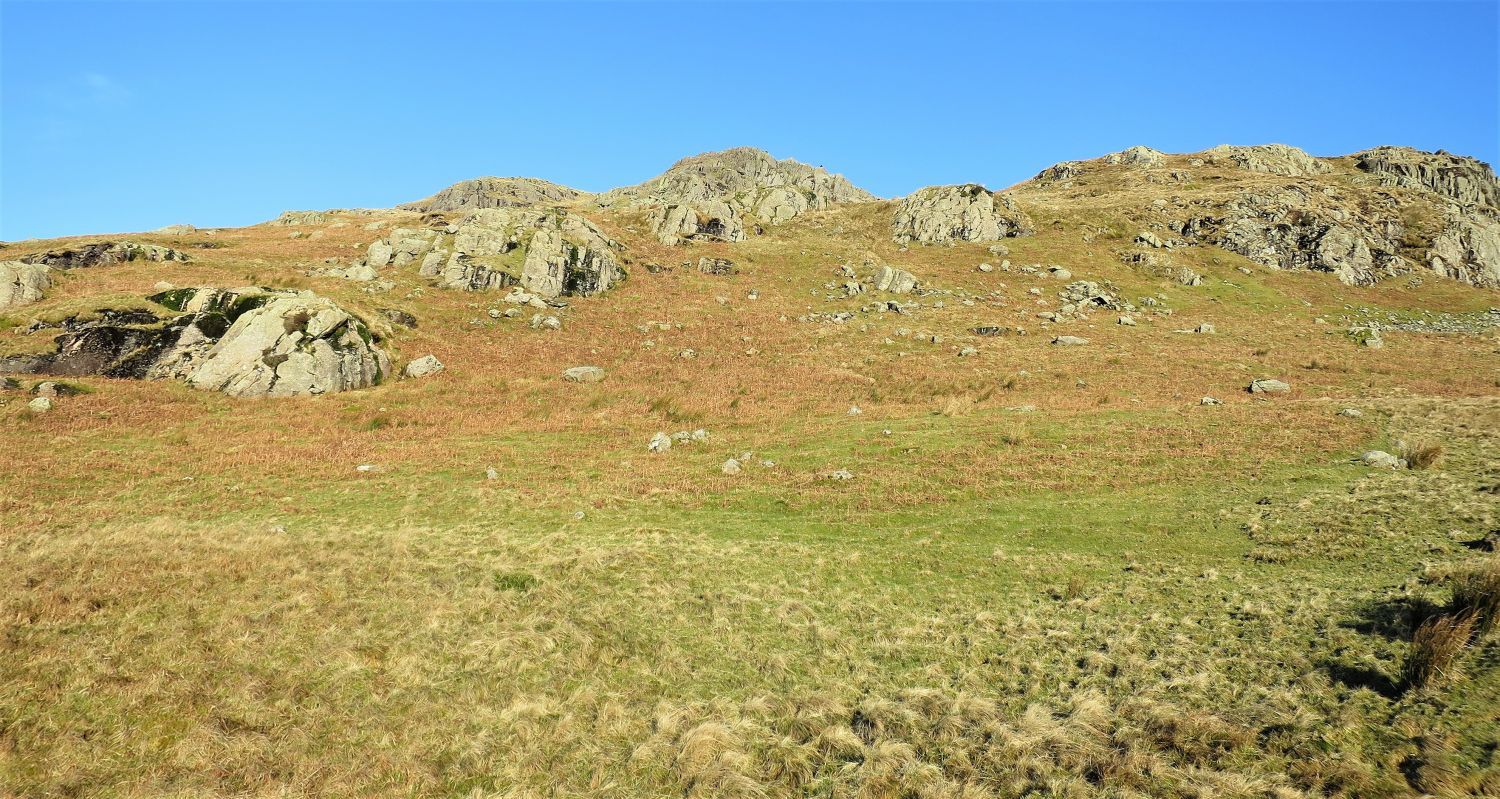 The summit of Calf Crag from the escarpment of Carrs
It’s now a simple trod to the summit crags; the actual summit of Calf Crag can be seen above on the left.
 Looking back down Far Easedale
The long sweeping ridge, that includes the tops of Gibson Knott and Helm crag, embraces the limited warmth of winter, while the northern slopes of Tarn Crag look on in envy.
 Book Three
The Central Fells
Calf Crag 6
“The summit crags (the maximum height is about 35 feet)”
 Book Three
The Central Fells
Calf Crag 6
“The summit”
“The highest point, small and rocky, is a pleasant place for a halt and quiet contemplation of the scenery. Sheep think so, too, and wearers of new clothes should not sink into repose here without first clearing away the profuse evidence of their occupation.” Calf Crag 6
AW
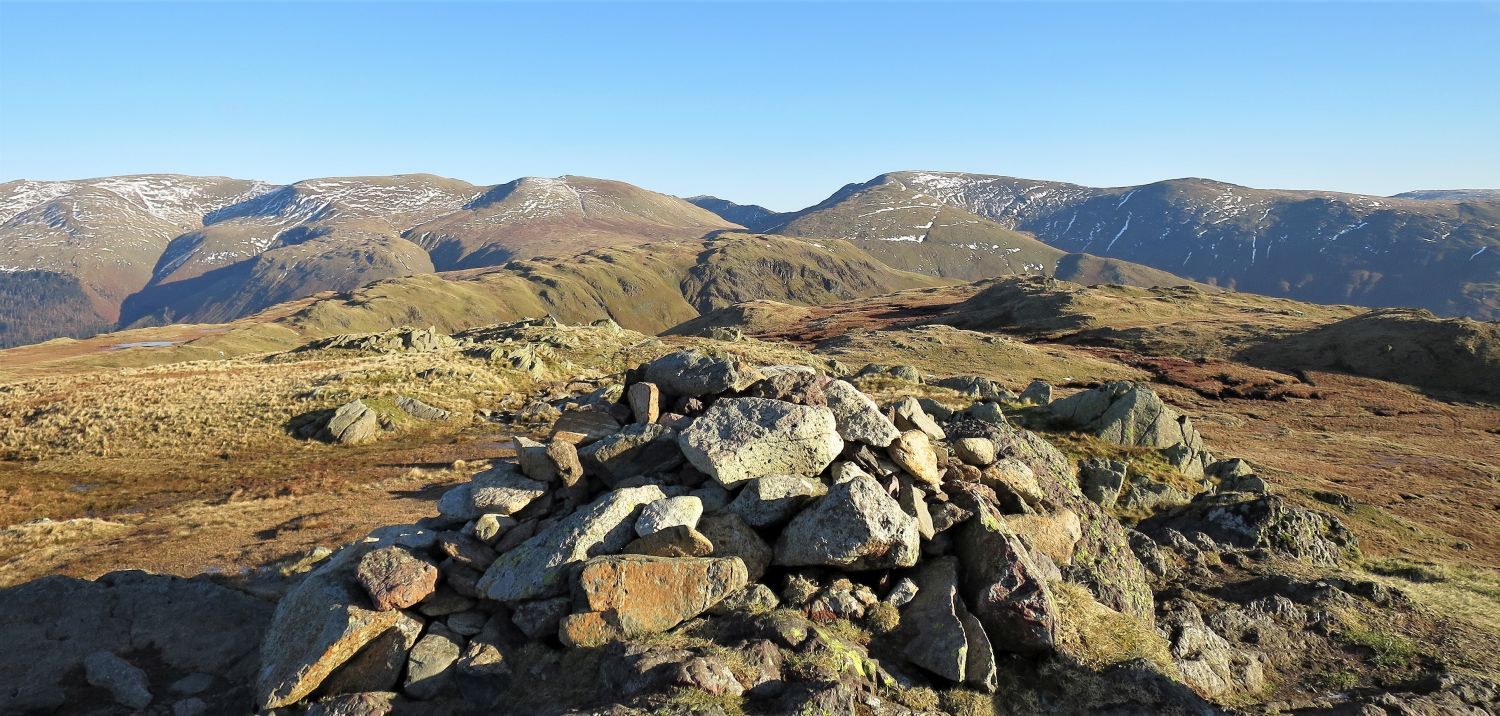
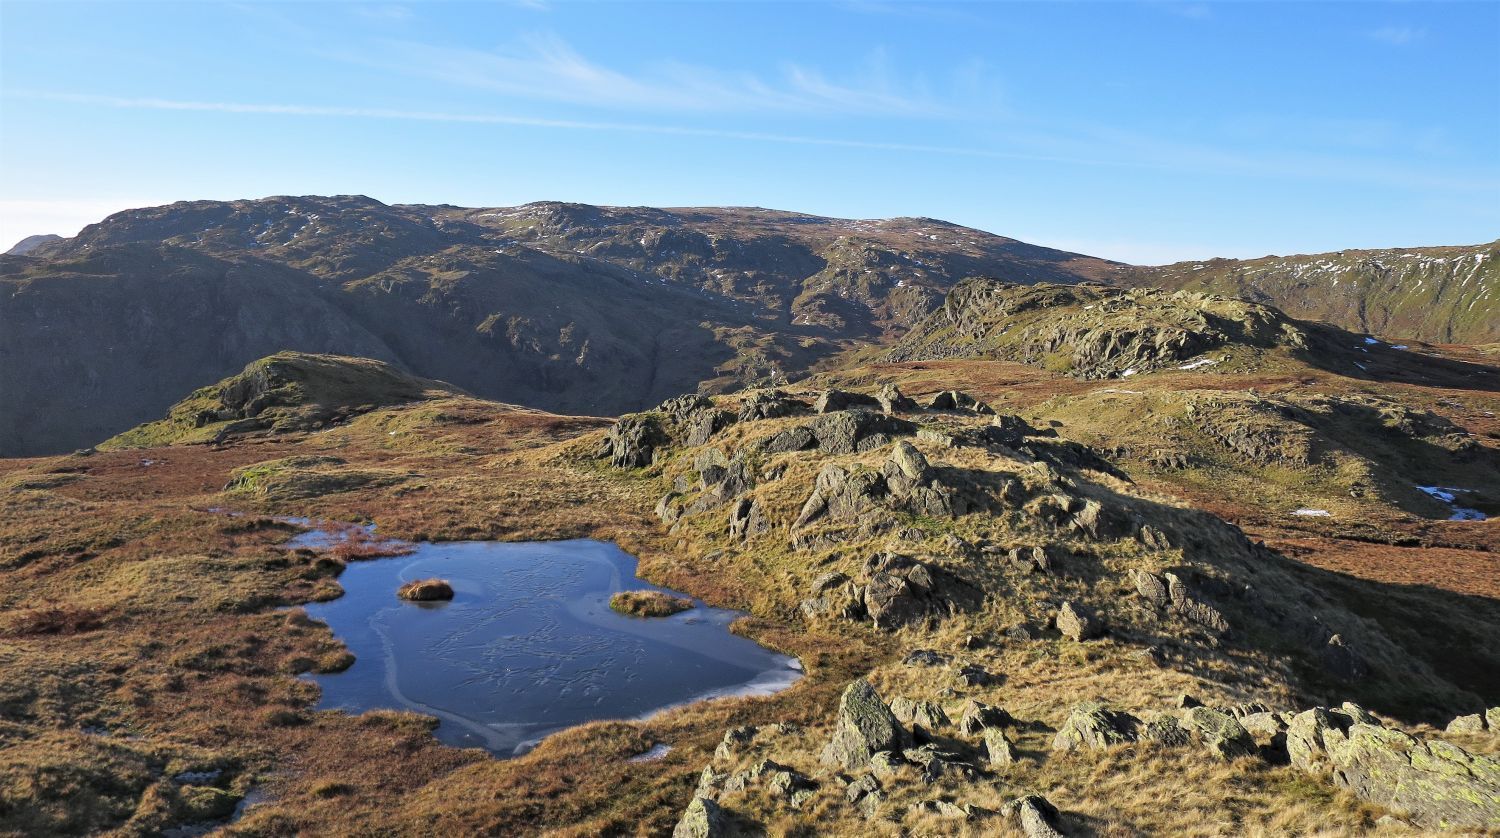
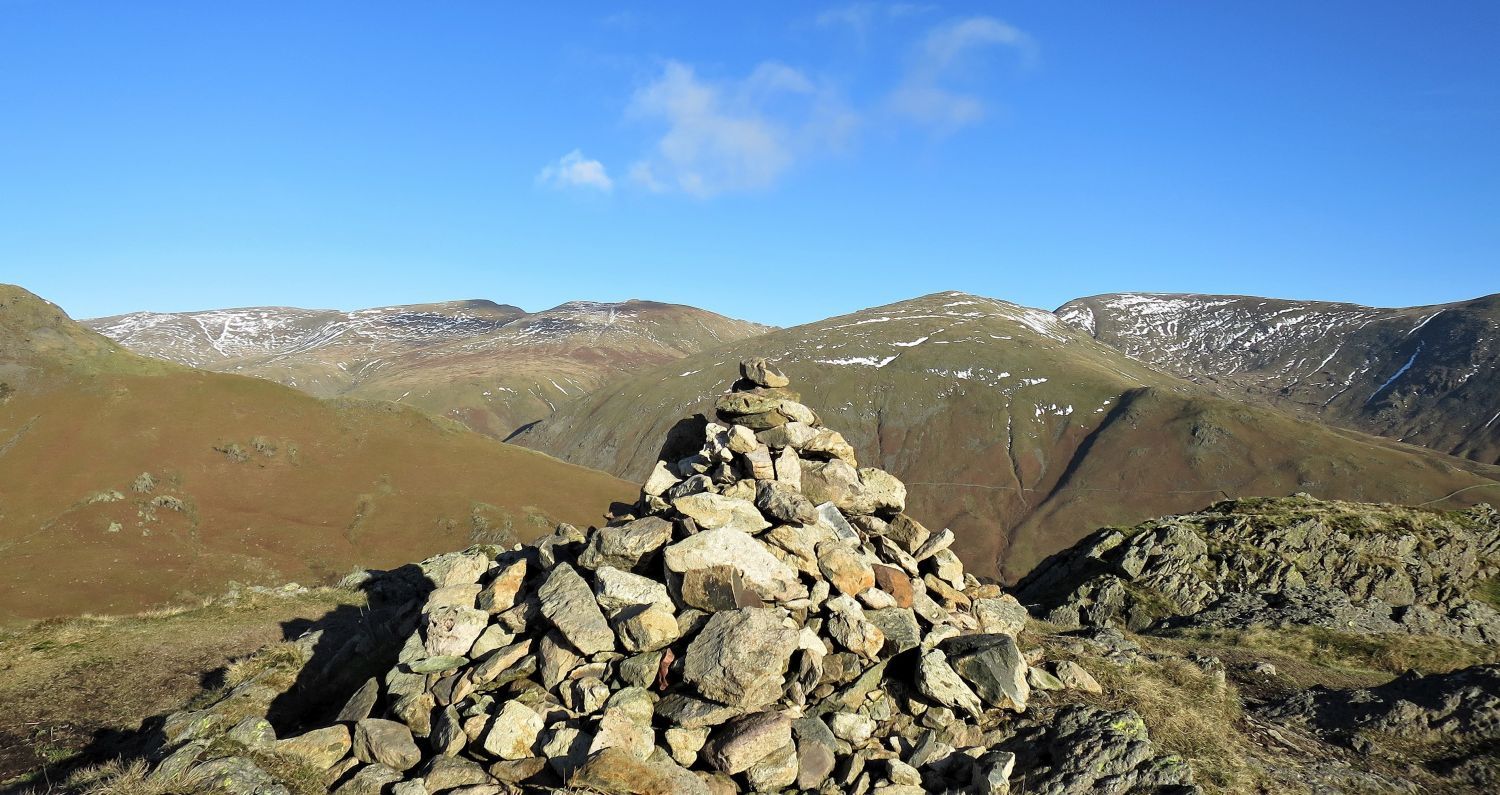
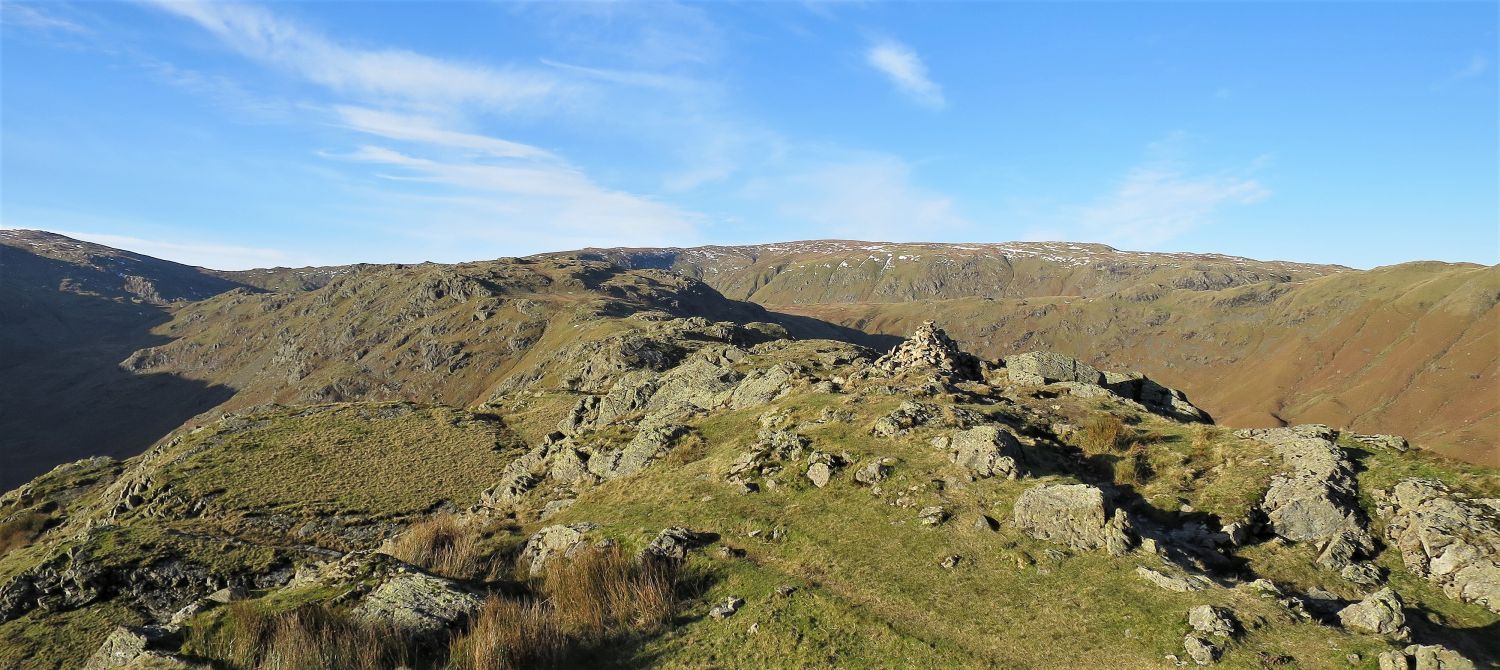
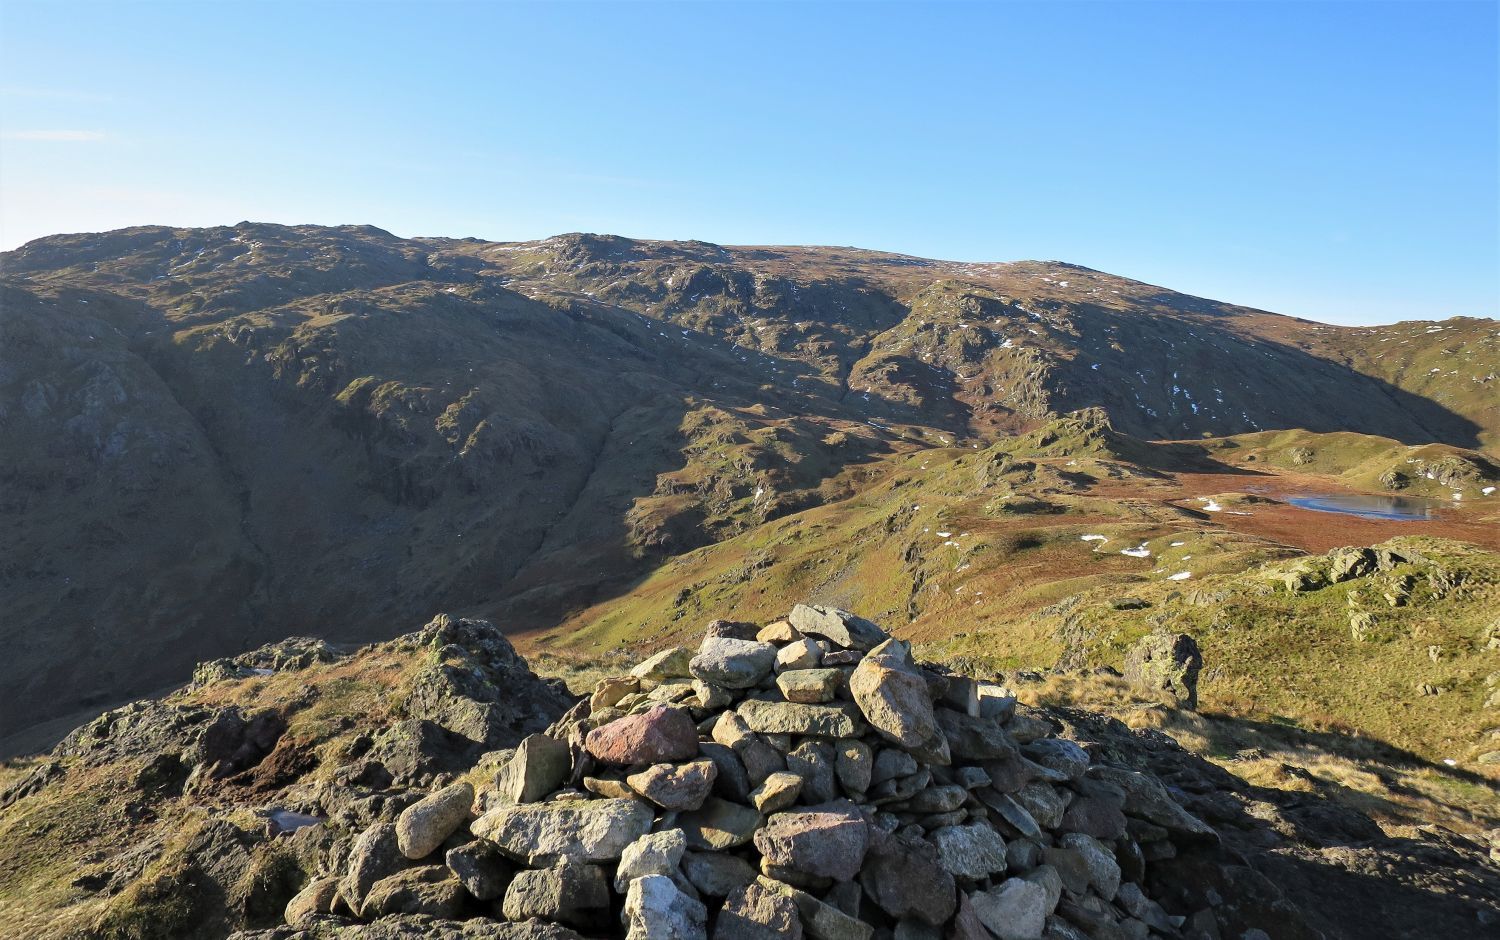 The head of Far Easedale from the summit of Calf Crag
To the left of centre, seen at the head of the valley of Far Easedale, is the aptly named Broadstone Head. Top left is the rocky plateau of Codale Head. Seen directly above the cairn are Ash Crags and Birks, which are backed by the slender peaks of High Raise and Low White Stones. Right of centre is Brown Rigg containing its moss and tarn.
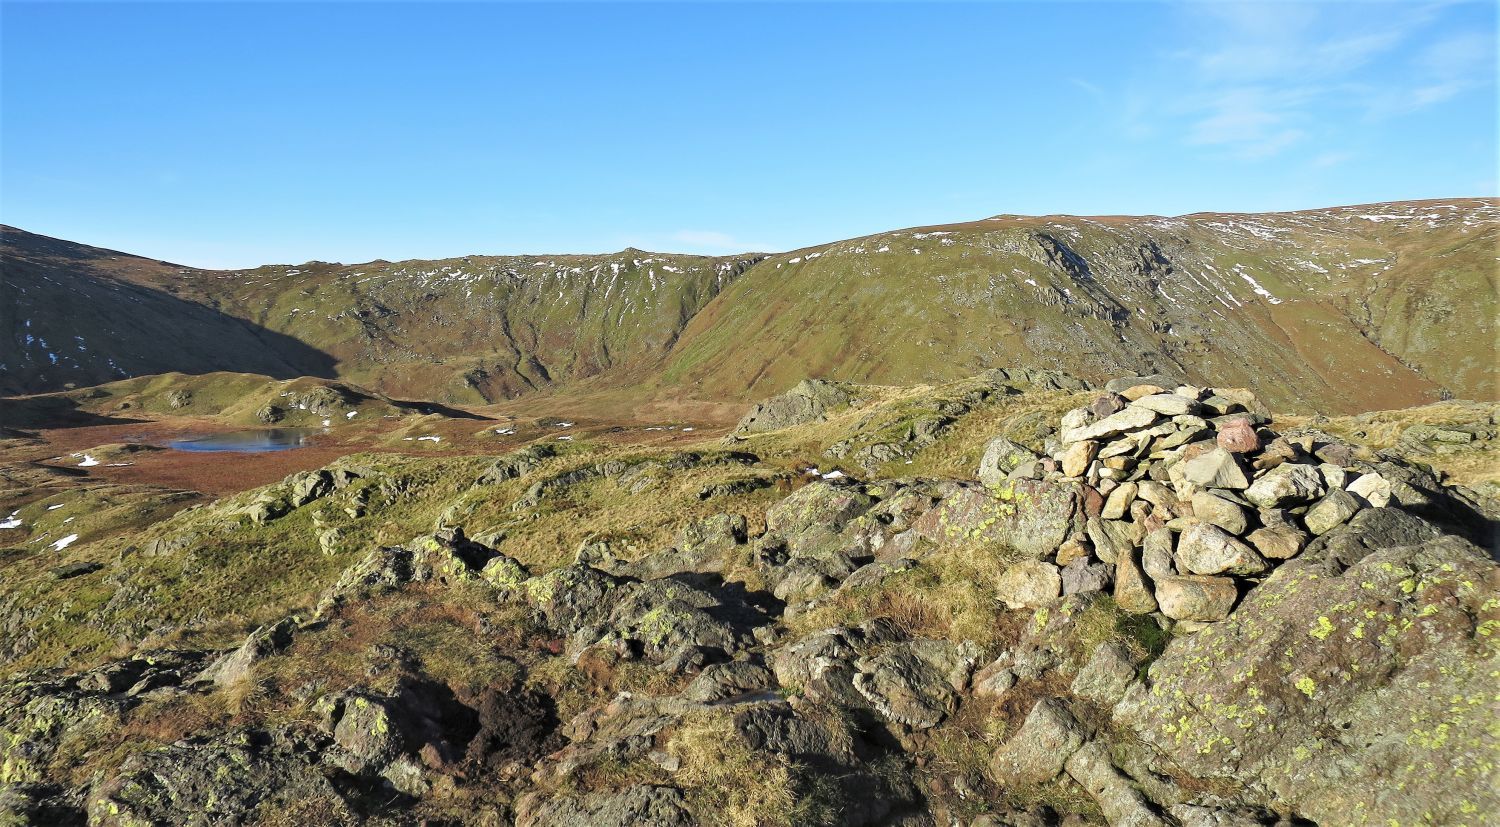 Greenup Edge and Greenhow Crags from the summit of Calf Crag
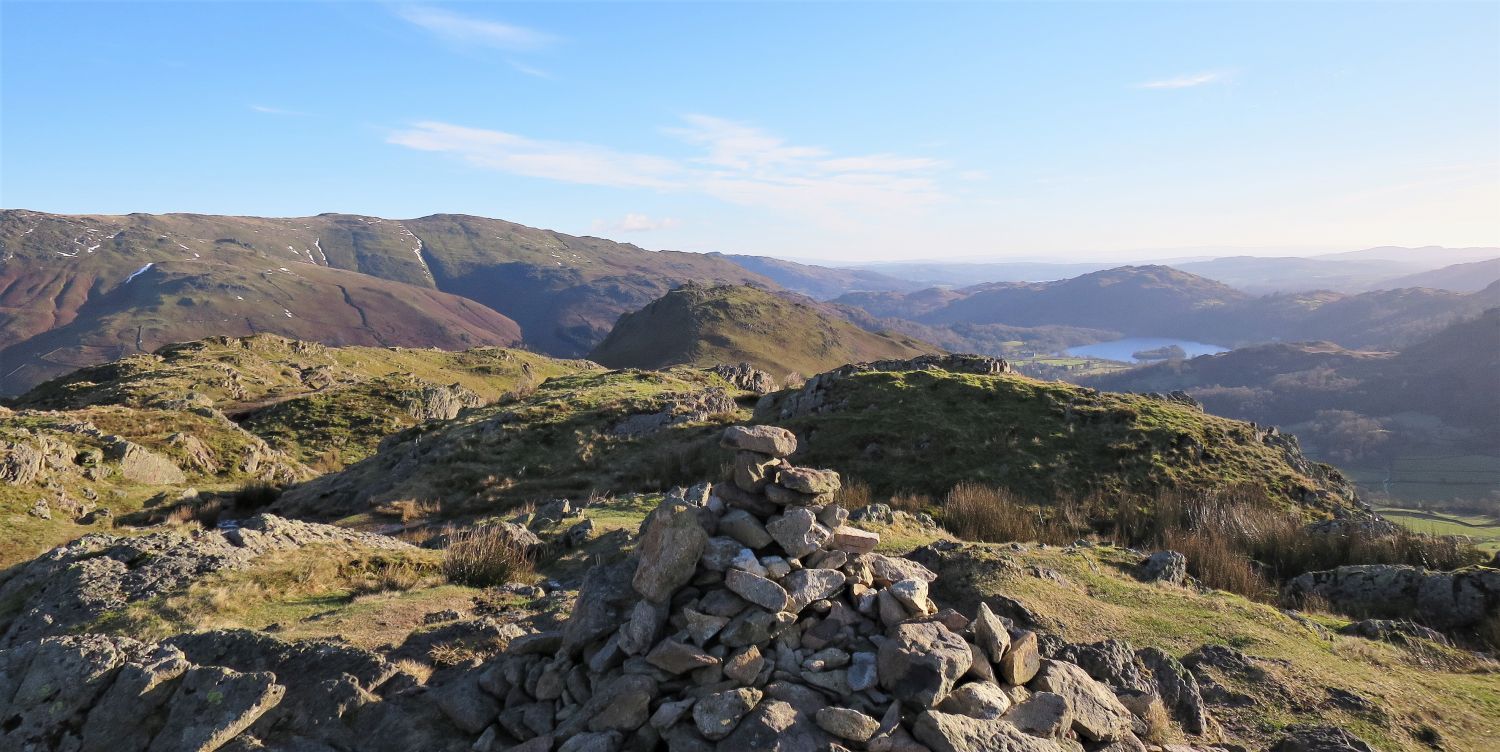
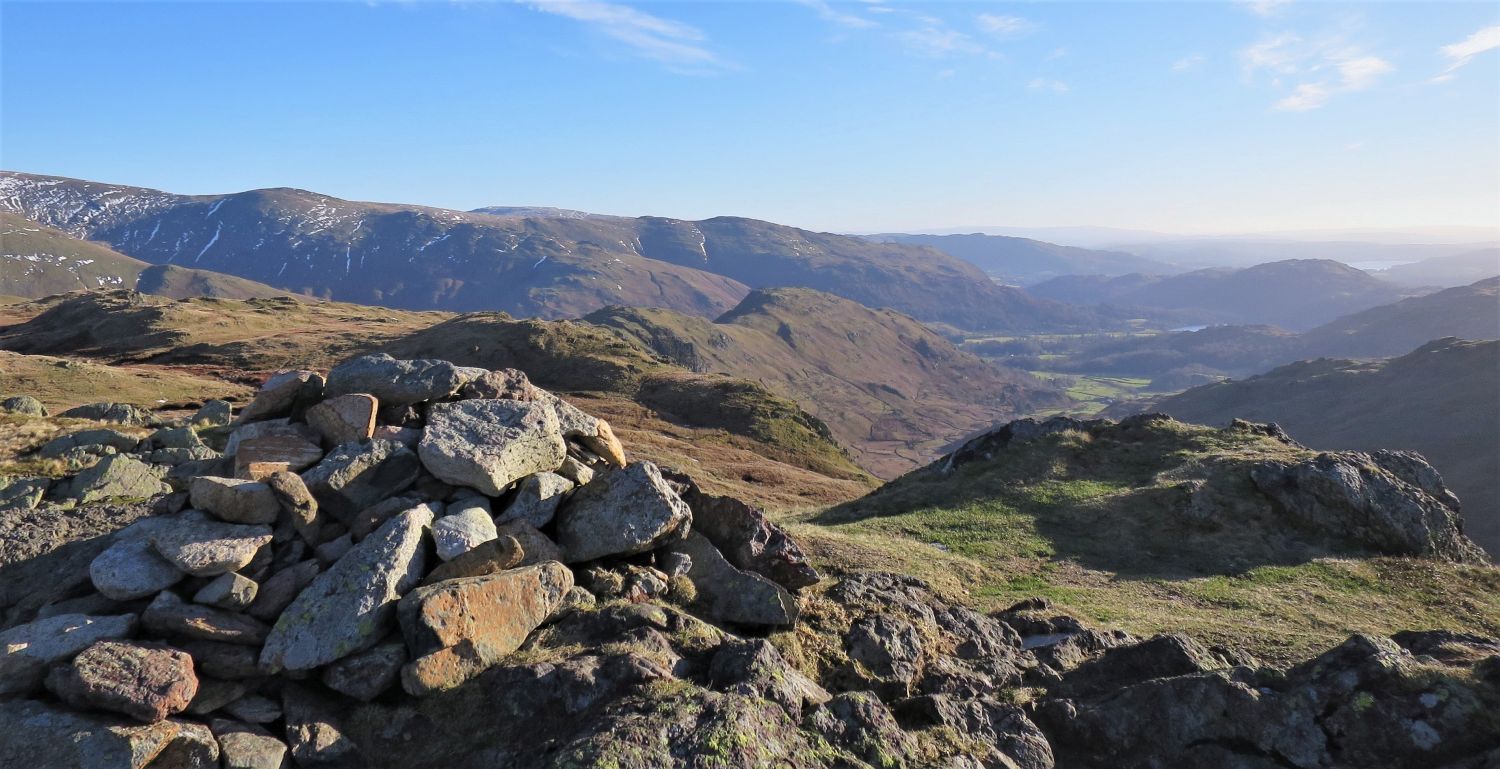 Vale of Grasmere from the summit of Calf Crag
“The best feature in a moderate and restricted view is a beautiful vista of the Vale of Grasmere with Far Easedale curving into it from the inexpressibly wild flanks of Tarn Crag and Sergeant Man nearby; a complete contrast in landscapes in the space of two miles.” Calf Crag 7
AW
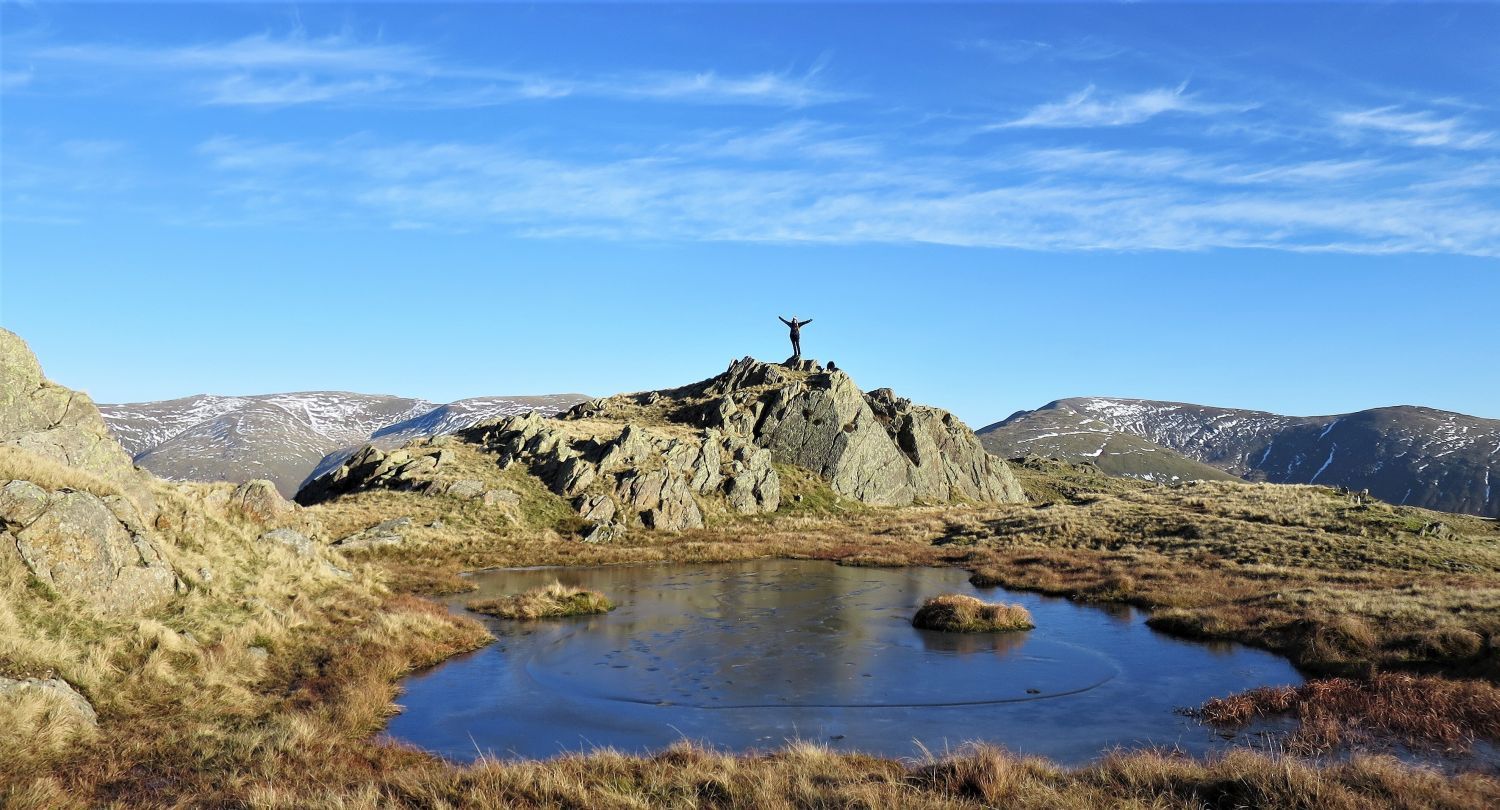 Jaclyn on the summit of Rough Crag
Just a short distance from Calf Crag and the ridge-path, the rocky knoll top of Rough Crag and its tarn are well worth a visit.
 Looking back to Calf Crag (right) from the summit of Rough Crag
We now reunite with the ridge-path and head towards Pike of Carrs.
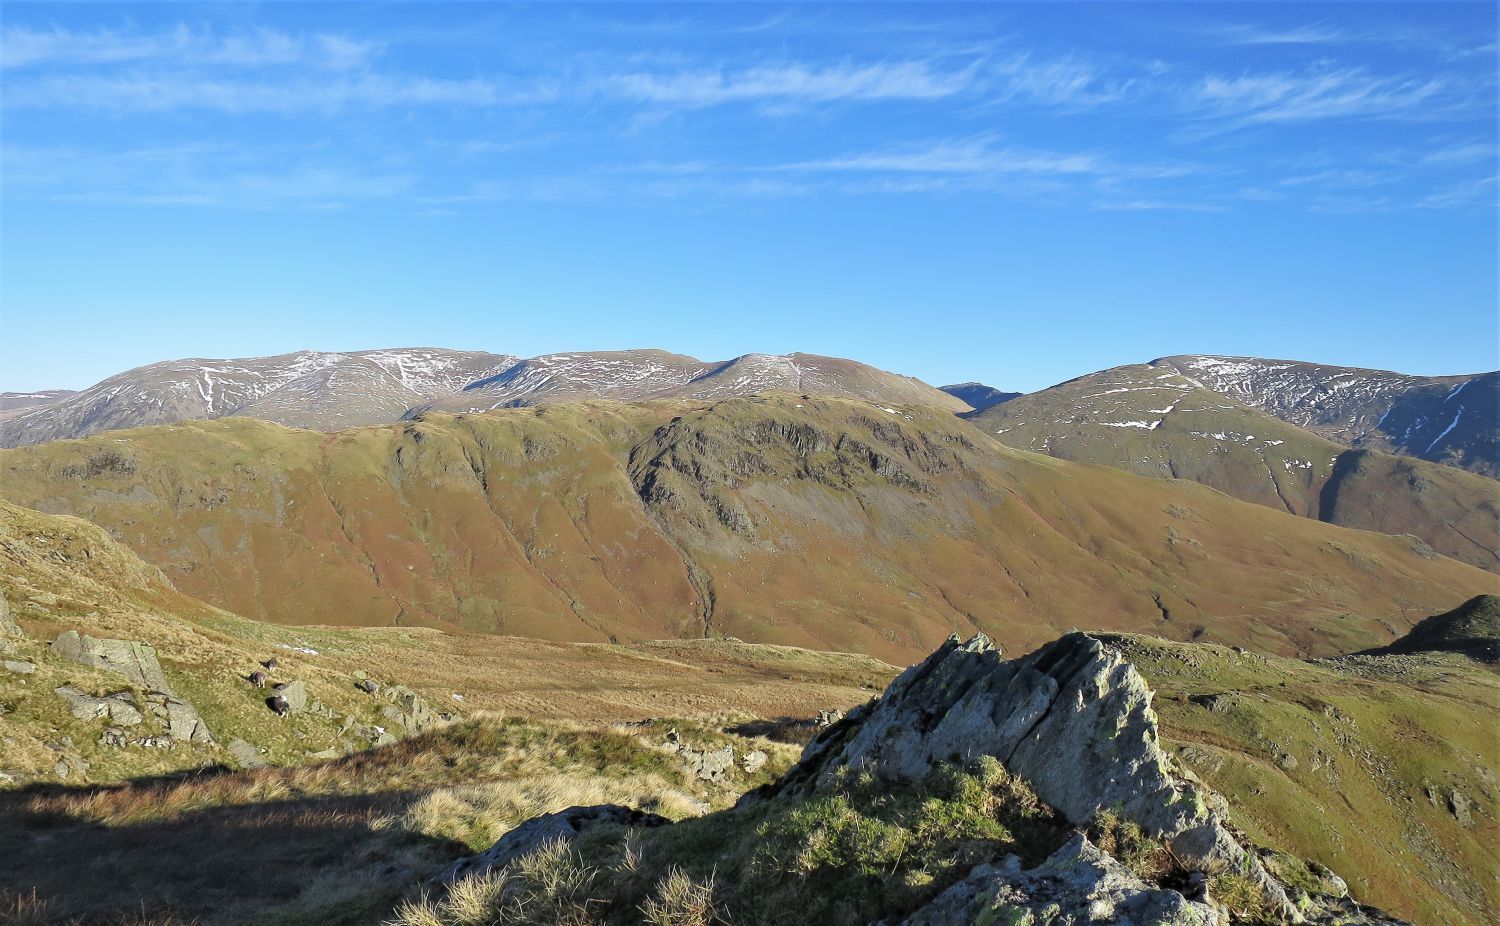 The eastern spine over Steel Fell, from the summit of Pike of Carrs
From left to right: Helvellyn, Nethermost Pike, Dollywaggon Pike, St Sunday Crag (far back), and Fairfield over Seat Sandal.
 Gibson Knott and Helm Crag from the summit of Pike of Carrs
Pike of Carrs provides a grand view of the continuing ridge, the valley of Far Easedale and the Vale of Grasmere. A wonderful scene.
 The ridge leading to Gibson Knott and Helm Crag
 Looking back to Pike of Carrs
 Approaching Gibson Knott
“Gibson Knott is the most elevated of the several sundry knobs and bumps that form the crest of the mile-long ridge linking at its extremities Calf Crag and Helm Crag and dividing the valleys of Far Easedale and Greenburn. There is much rock in evidence along the serrated top and fringing steep flanks.” Gibson Knott 1
AW
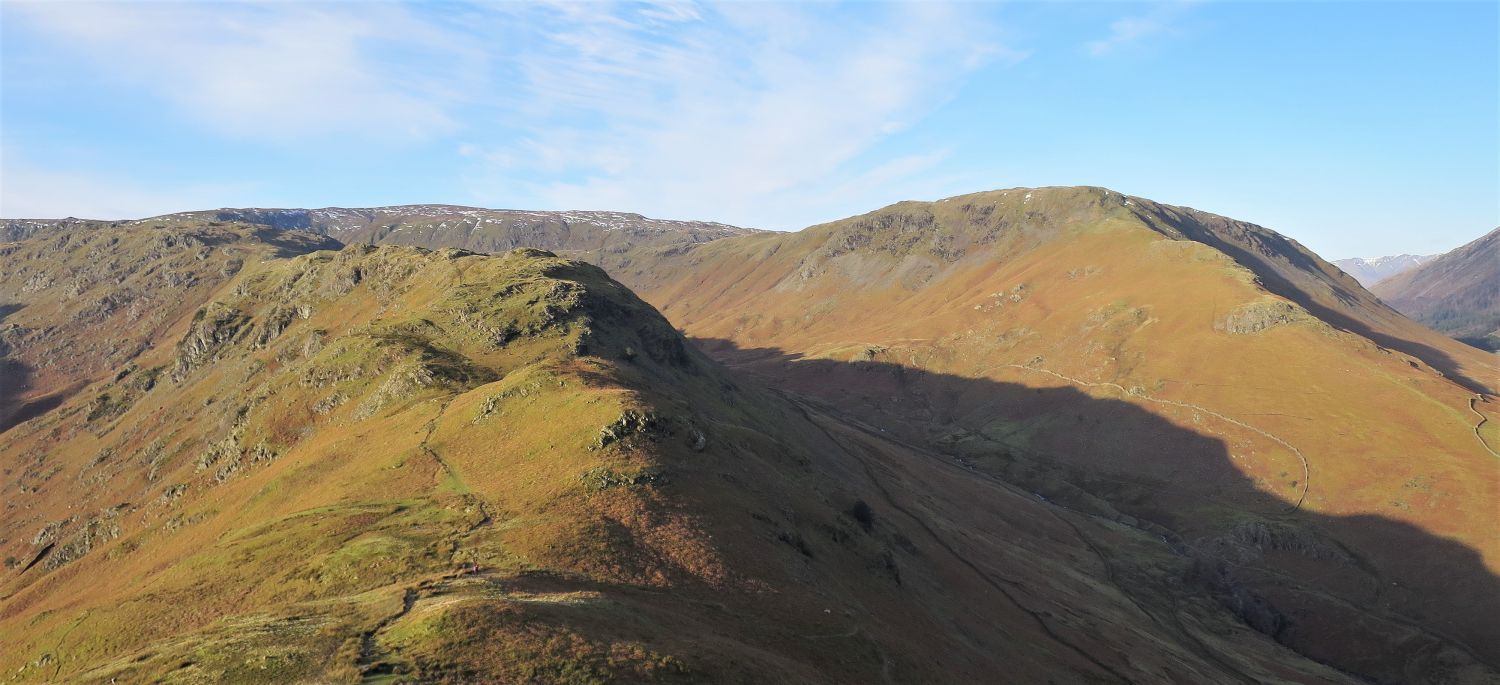
 Looking back to Tarn Crag, Codale Head and Pike of Carrs over Far Easedale
 The eastern spine from the summit of Gibson Knott
Helvellyn, Nethermost Pike, Dollywaggon Pike, Seat Sandal and Fairfield dominate the skyline north-east. Over on the left is Steel Fell’s south-east ridge.
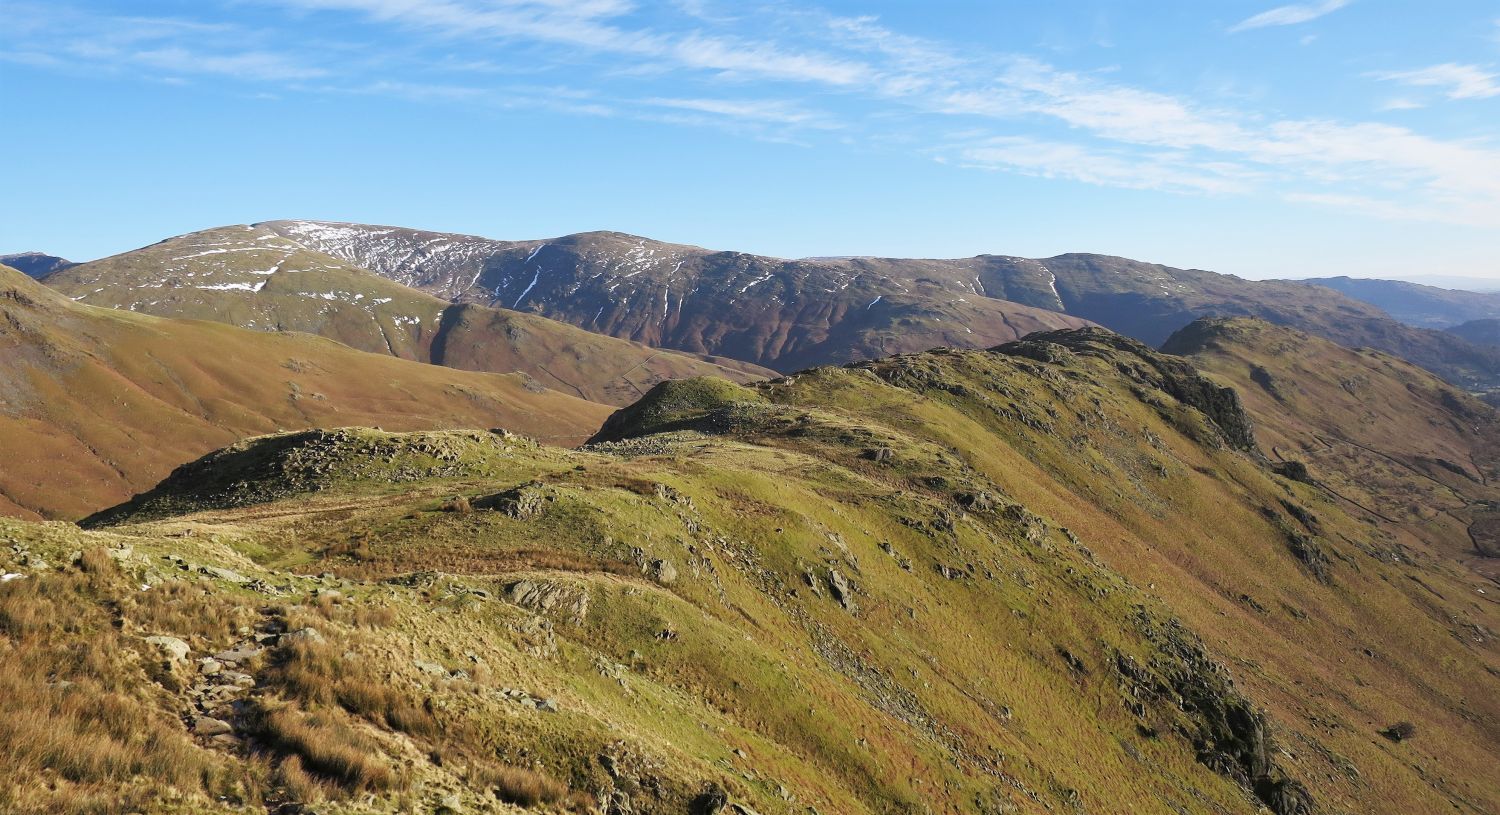
 Looking back to Calf Crag and the plateau of Ullscarf from Gibson Knott
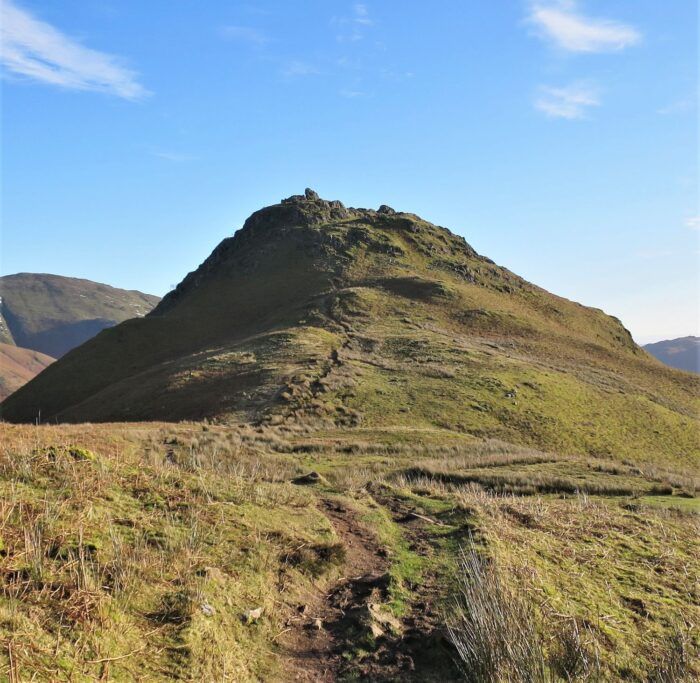
 Helm Crag from the summit of Gibson Knott
Far right Loughrigg Fell is seen over Grasmere (lake).
Ridge route to Helm Crag
“A delightful path. Follow the path to the east from the cairn to the top of the next rise where it winds in and out and up and down in a charming manner….”
 Book Three
The Central Fells
Helm Crag 10
“Helm Crag, from the path to Gibson Knott”
“….before descending to the depression below Helm Crag, the curious top of which is reached by a stiff little climb.” Gibson Knott 3
AW (revised by CJ)
 Looking back to Gibson Knott and Steel Fell from the ascent of Helm Crag
 Book Three
The Central Fells
Helm Crag 7
“The summit”
“Rocks at the north-west end of the summit-ridge known as The Old Women Playing the Organ from their appearance when seen from Tongue Gill and the vicinity of Easedale Tarn.” Helm Crag 7
AW
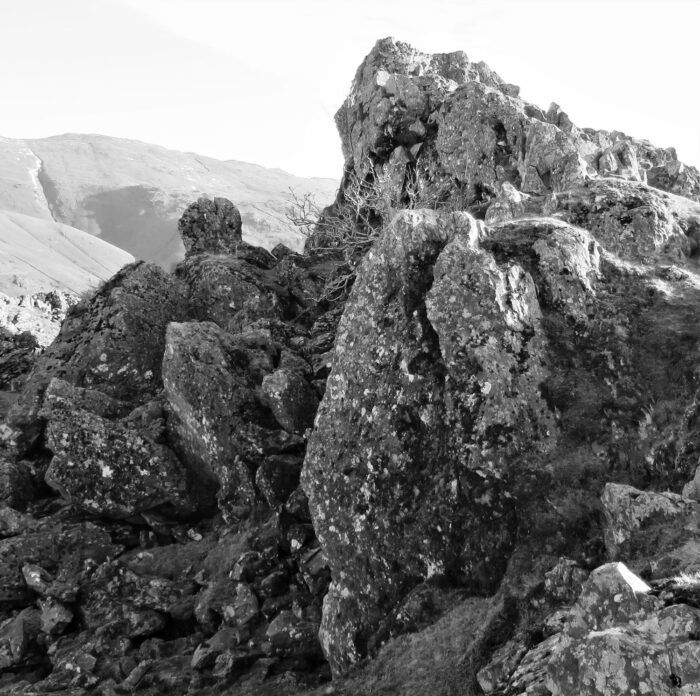
The rocks at the north-west end of the summit-ridge, which include the true summit rock, were known as The Old Woman Cowering (O. S. sur. 1859, pub. 1863) and The Old Women Playing the Organ (O. S. rev. 1897, pub. 1900), however, the adopted name of The Howitzer is now more commonly used.
 Book Three
The Central Fells
Helm Crag 5
“The summit – The highest point of the rocks is the true summit of the fell”
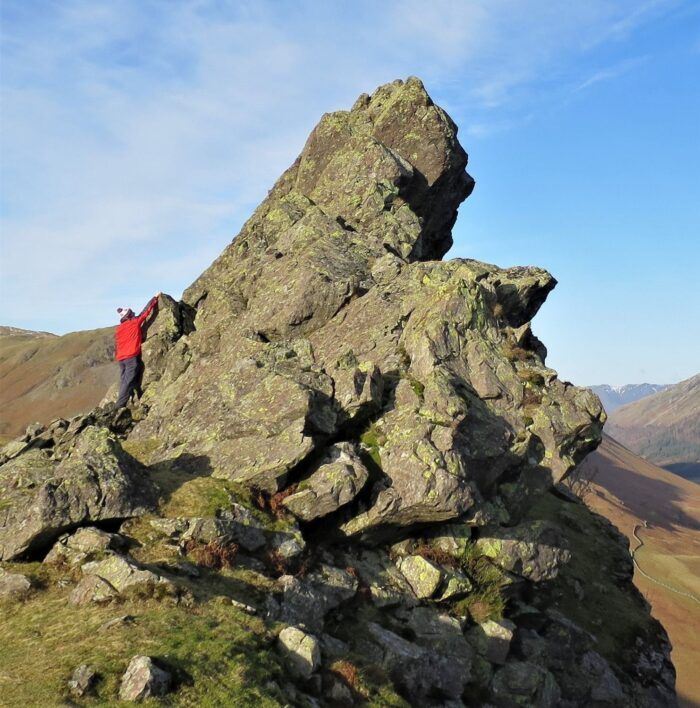
The author climbing The Howitzer.
“In scenic values, the summits of many high mountains are a disappointment after the long toil of ascent, yet here, on the top of little Helm Crag, a midget of a mountain, is a remarkable array of rocks, upstanding and fallen, of singular interest and fascinating appearance, that yield a quality of reward out of all proportion to the short and simple climb. The uppermost inches of Scafell and Helvellyn and Skiddaw can show nothing like Helm Crag’s crown of shattered and petrified stone; indeed, its highest point, a pinnacle of rock airily thrust out above a dark abyss, is not to be attained by walking and is brought underfoot only by precarious manoeuvres of the body. This is one of the very few summits in Lakeland reached only by climbing rocks, and it is certainly (but not for that reason alone) one of the very best.” Helm Crag 5
AW
 Book Three
The Central Fells
Helm Crag 2
“Summit scene”
The Howitzer, with Steel Fell behind.
“The summit ridge is 250 yards in length and is adorned at each end by fangs of rock overtopping the fairly level path. Between these towers there have been others in ages past but all that remains of them now is a chaos of collapsed boulders, choking a strange depression that extends the full length of the summit on the north-east side….Care is necessary when exploring the boulder-strewn depressions on the summit, especially if the rocks are greasy.” Helm Crag 6
AW
 Book Three
The Central Fells
Helm Crag 7
“The summit”
The Lion and the Lamb.
“Rocks at the south-east end of the summit-ridge. These form the official Lion and The Lamb (as seen from the Swan Hotel, Grasmere). The lion’s head is the O. S. ‘station’ (altitude 1306′) but is not quite the highest point of the fell.” Helm Crag 7
AW (revised by CJ)
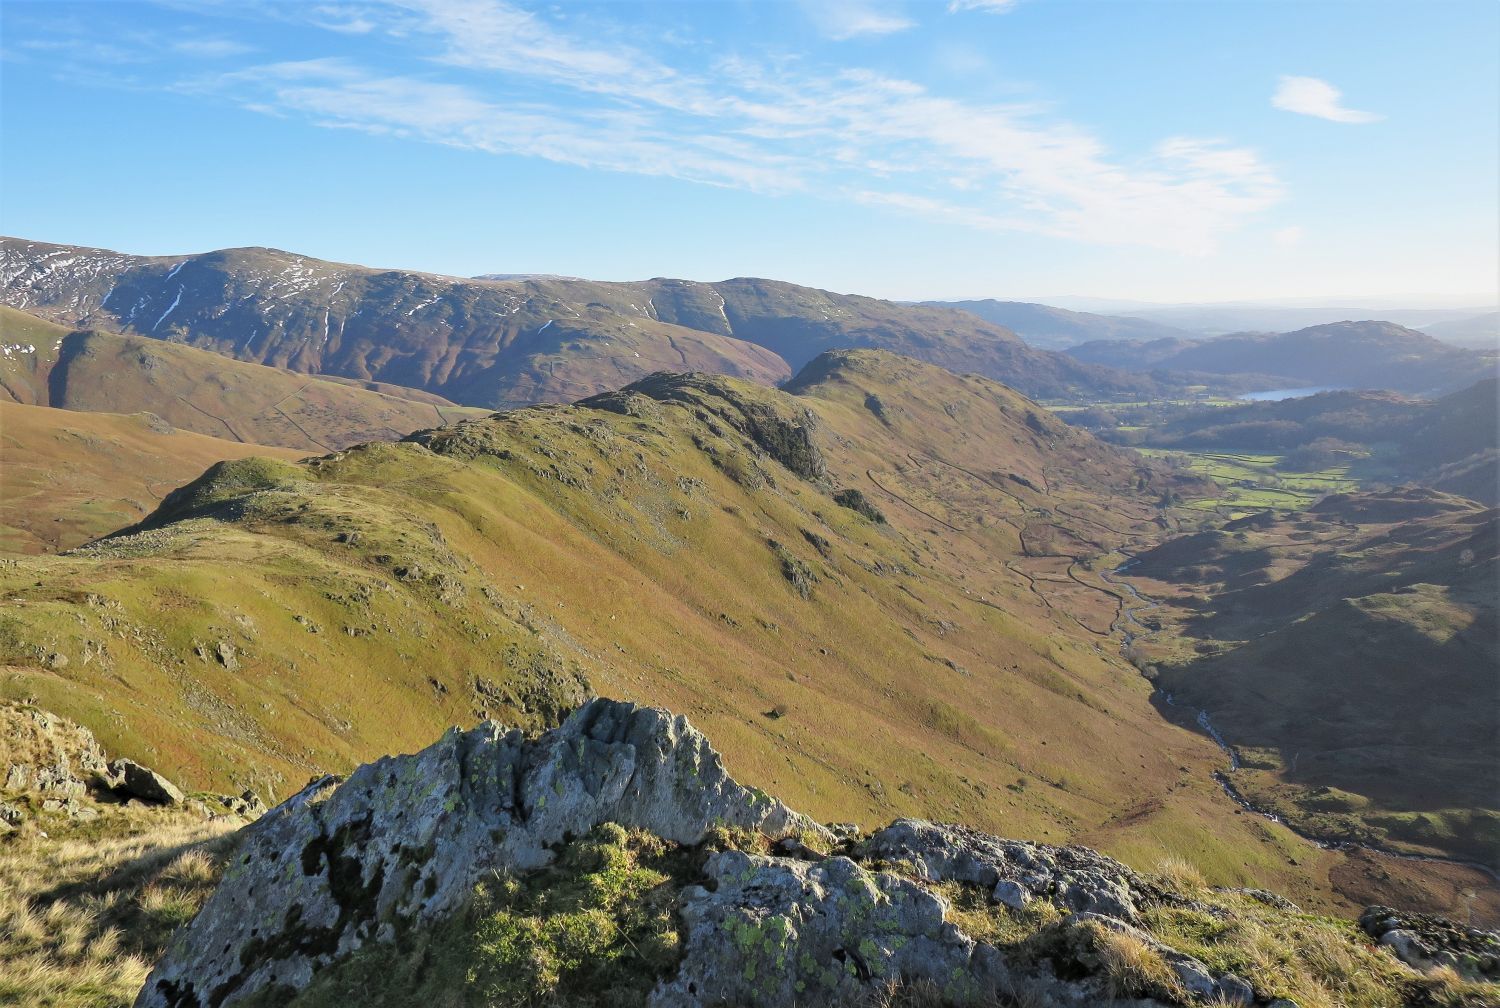
 Great Rigg and Stone Arthur from Helm Crag’s south-east ridge
The cluster of buildings in the centre of the picture are the farms of Broadrayne, and the white building on the right is the Travellers Rest.
 The Vale of Grasmere from Helm Crag’s south-east ridge
A wonderful Lakeland scene.
“….If, however, Helm Crag is to be a part only of the day’s programme (e.g. the circuit of Far Easedale or the Greenburn valley) it is better reserved for descent, for then the Vale of Grasmere will be directly in view ahead; and this fair scene is at its best when the shadows of evening are lengthening….” Helm Crag 4
AW
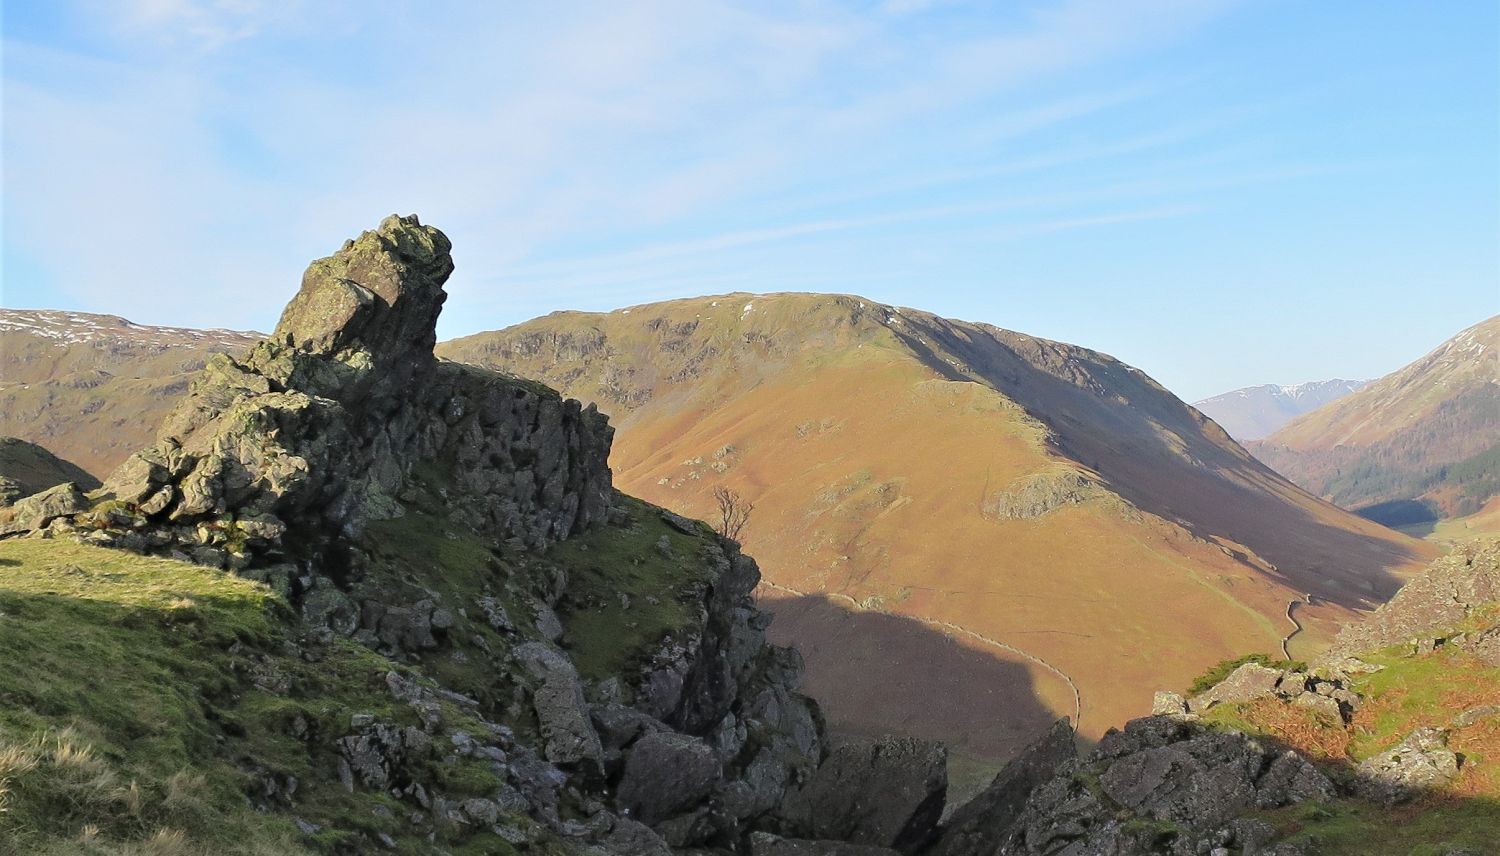
 Upper Easedale, Tarn Crag and Far Easedale from Helm Crag’s south-east ridge
The “permanent shadow” casting over the valley of Far Easedale, that Wainwright describes on page Tarn Crag 2, is very apparent from Helm Crag.
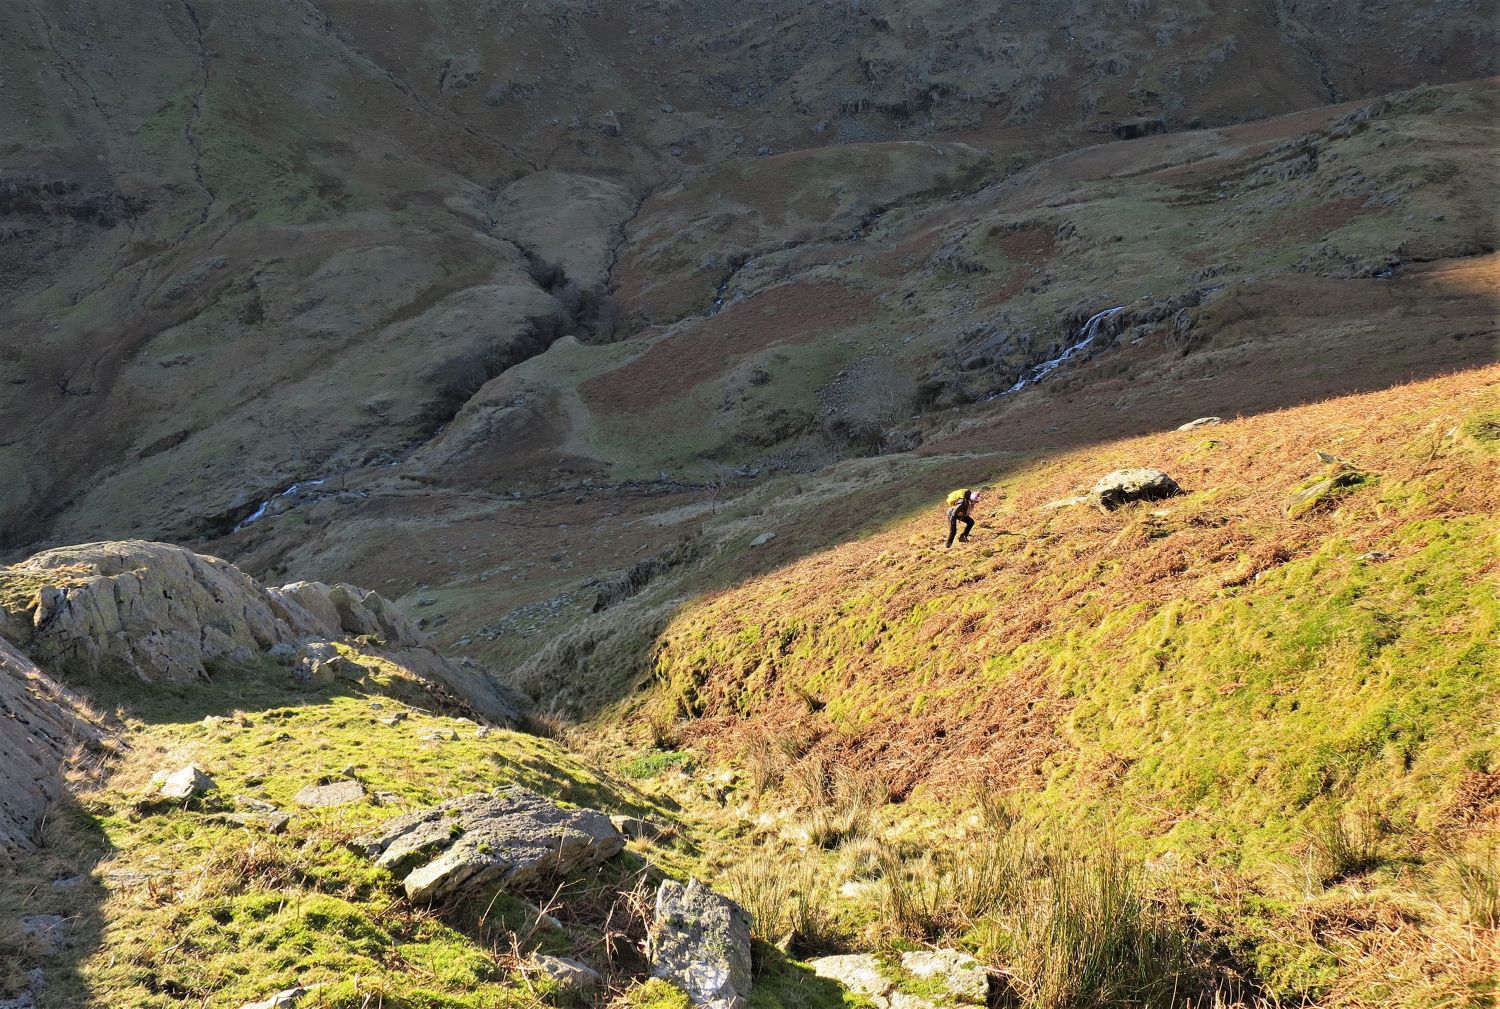
 Brimmer Head Farm in Easedale from the descent of Helm Crag
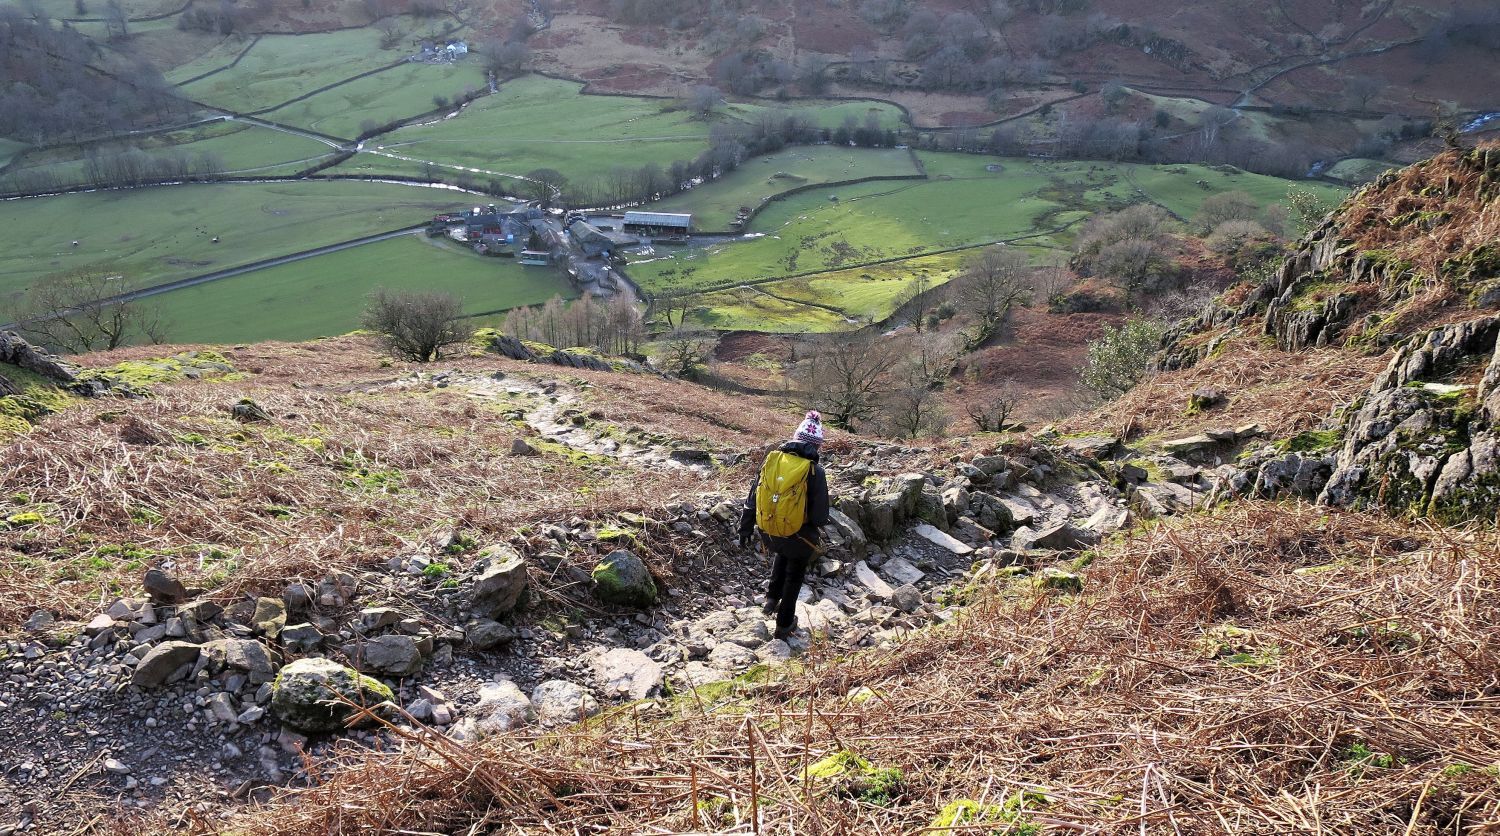
We now follow this new stone-pitched path down into Easedale, where we’ll retrace our steps back to the village of Grasmere.
 Frankie and the author continuing down to Easedale
The stone-pitched path steepens as it nears Kitty Crag and the valley floor.
 Back to the stone-rippled lane passing Kitty Crag Cottage
Thank you for visiting.
Richard
<<>>
Thanks, sources and further reading:
‘Book Three – The Central Fells’ by Alfred Wainwright
National Library of Scotland